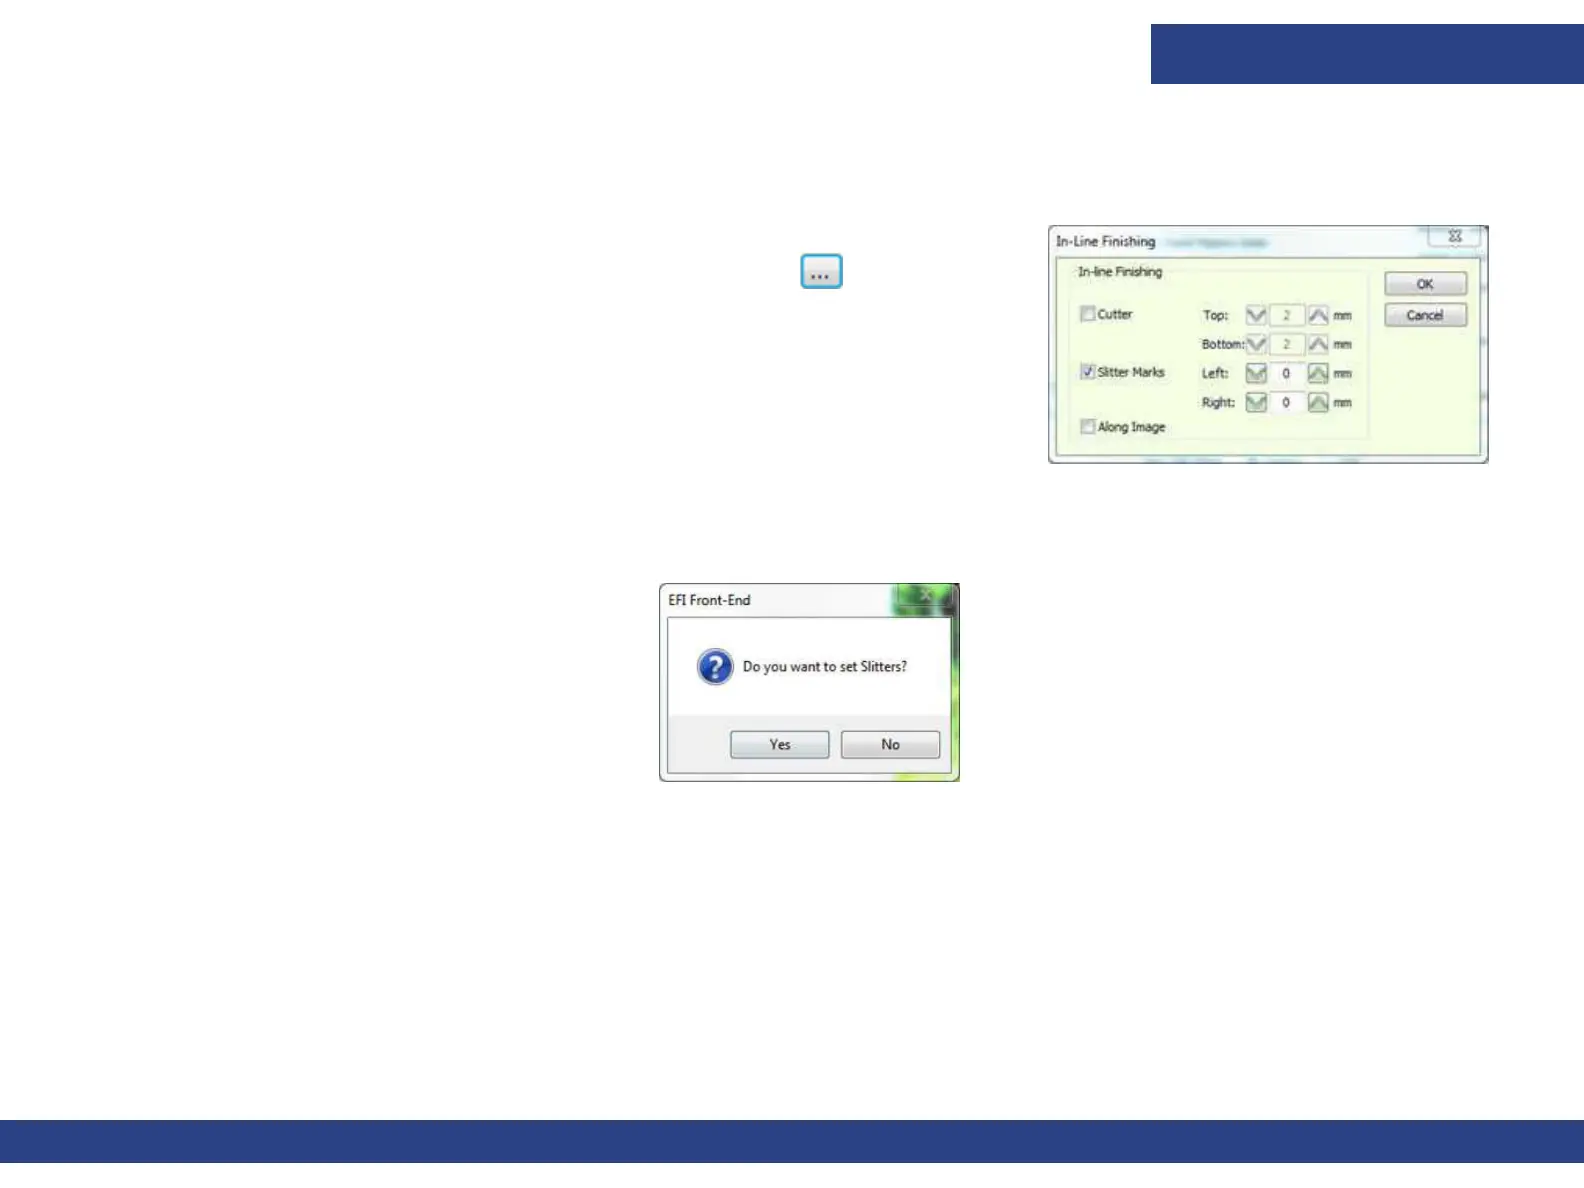
In-line Finishing
Document ID: OMM-00165 Rev. C Pro 32r Operations Guide 167
2. Set the values in one of the following ways:
A. To 260-300 mm
B.
Figure 8-3
Set Location of Slitter Mark Relative to Job. Place a check mark in the
option “Add In-line Finishing by Default” and click
. Slit Job to
edge (0), Bleeding into the image (negative value), or Leaving
Margins (positiv
e value).
C. For each job in the Job Settings dialog box, import the job to slit and
enable the Slitter Mark feature in Job Settings.
3. Start printing the job.
4. After printing the slit marks, the printer pauses and the following message displays:
5. a. Yes: The Carriage moves to the Home Position. Place the Slitters.
b. No: Continue printing.
Figure 8-4