Printer Setup
Document ID: OMM-00165 Rev. C Pro 32r Operations Guide 92
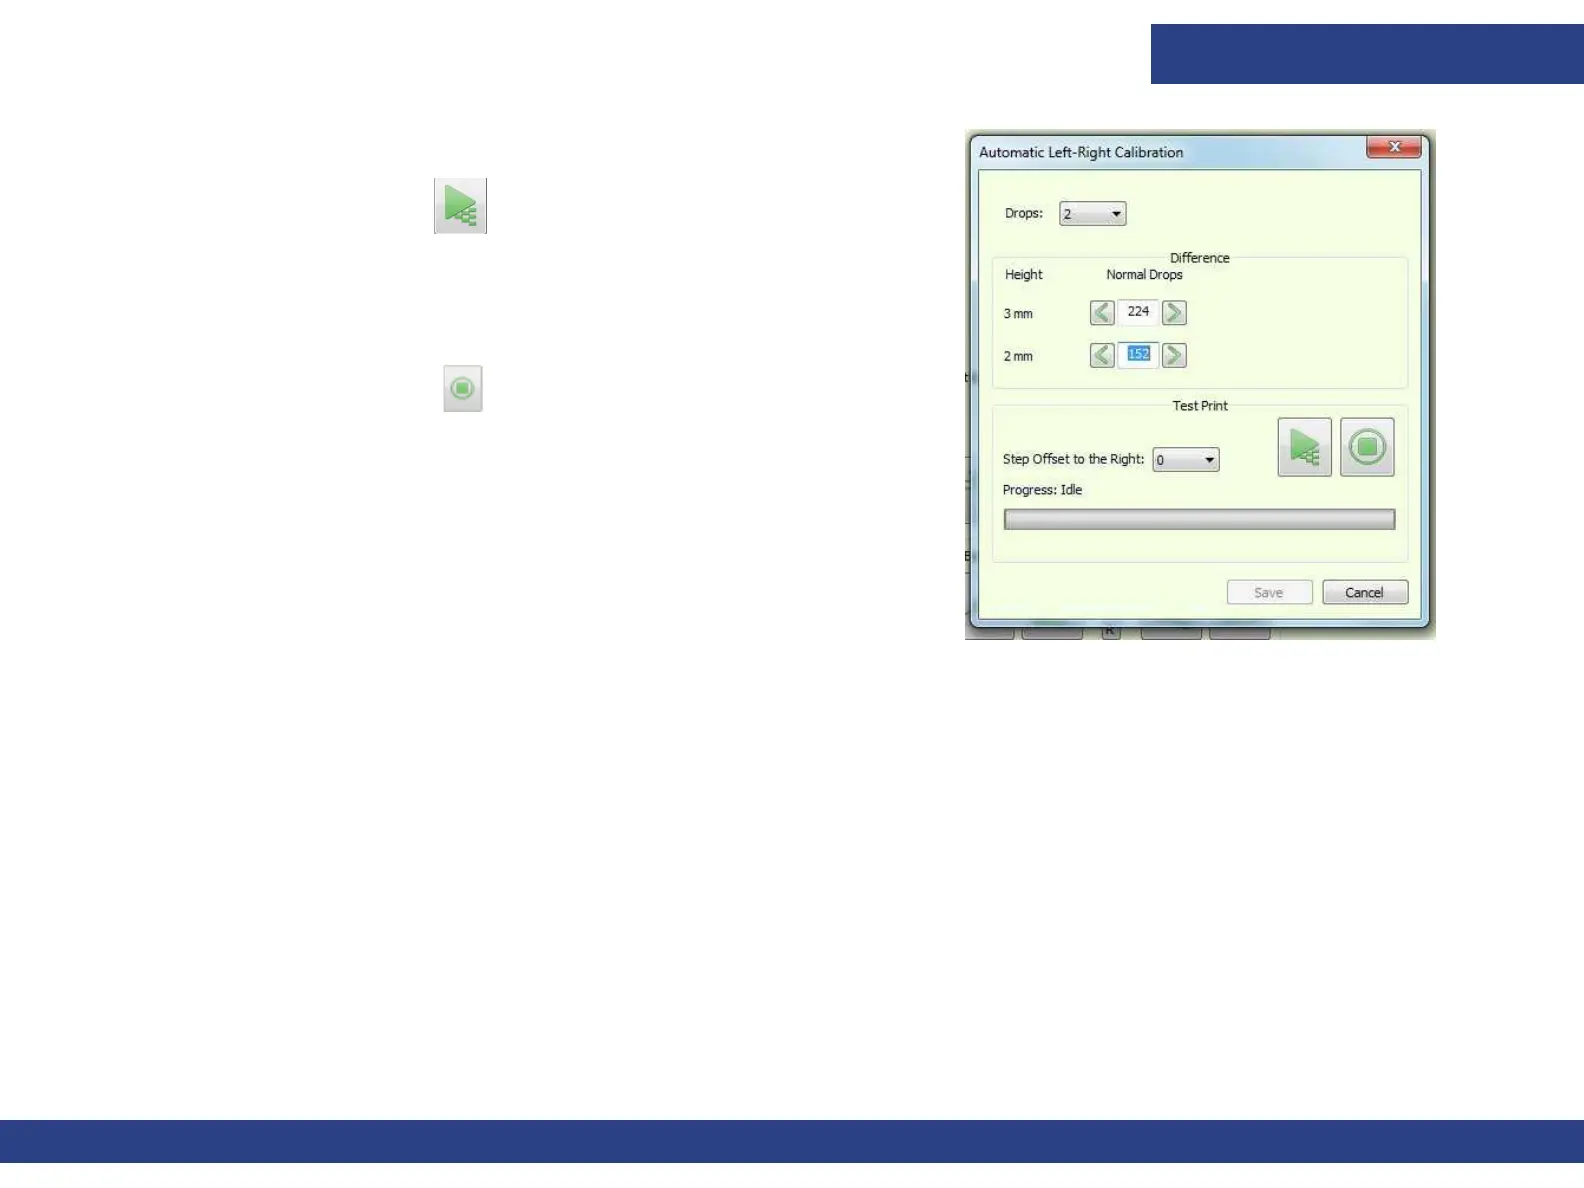
2. Choose from Tools > Calibrations > Drop Velocity to open the
Automatic Left-Right Calibration dialog box.
Figure 5-20 : Automatic Left-Right Calibration Dialog Box
3. Choose the Test Print button. The carriage automatically
goes to 2mm height. The Left – Right calibration pattern is printed.
The carriage raises to 3 mm and the pattern is printed again. The carriage
returns to the height it was at, before you opened the Automatic Left-Right
Calibration dialog box. The process is displayed in the progress bar.
4. Choose the Stop button to stop the print process.
5. Adjust the Left–Right values according to the printed patterns.
6. When you choose Save, the drop velocity is calculated and stored for
each of the four drop
settings.
7. From the Control Panel, open the Left-Right Calibration dialog
box and set the current LR value for fast speed.
8. Choose Update to automatically set the LR values for other speeds.
9. To enable this feature, from the Preferences dialog box, check the
Auto Left-right check box, then choose OK.
From this point on, the system is able to automatically calculate the LR for a
change in
carriage height.
• The Left–Right values are automatically adjusted according to any change in the
carriage height that is less than 3 mm.
• For any change above 3 mm, manually calibrate the LR for Fast speed and choose Update
again.