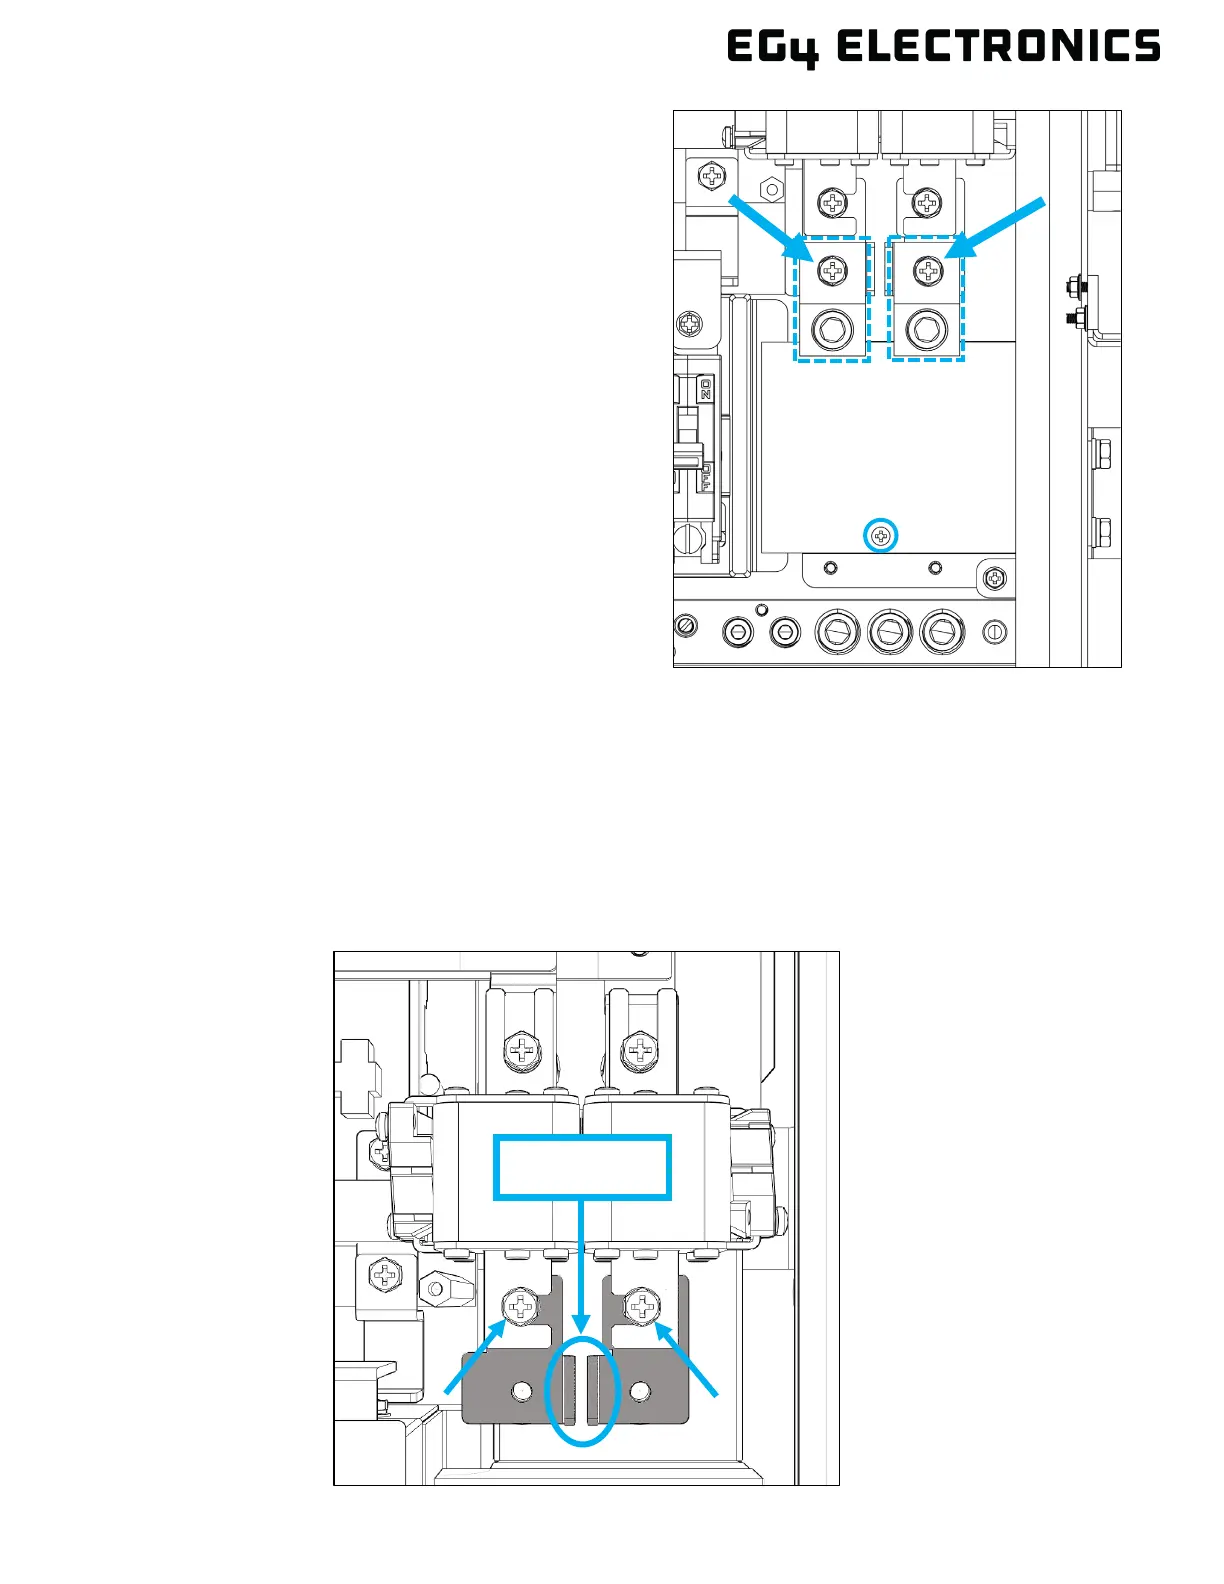
2. With the inside cover removed, locate the lugs
for both line 1 and line 2 (outlined with a
dashed line). Unscrew the fastener holding
each lug in place, then remove each lug.
Remove the small Phillips head screw (circled)
and set it aside. This screw is reinstalled in a
later step with the main breaker.
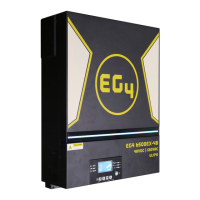
3. Ensure the anti-twist plates are positioned correctly to facilitate the installation of the Eaton main
breaker. The supported orientations of the plates (in gray) are displayed below. If the anti-twist
plates require adjustment, first remove the two screws securing the fuses and plates. Then
adjust the orientation to a supported orientation and re-torque the screws to 80 in-lbs (9 Nm).
Supported Configurations:
a. Anti-twist plates with edges pointing downward and inward.