35
4-2 USING IMAGE MATE 4
Run Image Mate 4 [ ], installed to your computer in the step “4-1 INSTALLING IMAGE
MATE 4”.
Select the desired camera to display by the following procedure
※The camera will not be recognized when it is not turned on. Turn on the camera.
※The layout (camera type) of the camera selection window is different between when the
TX-1 is connected to a computer via the USB cable and when it is connected to a computer
via WiFi.
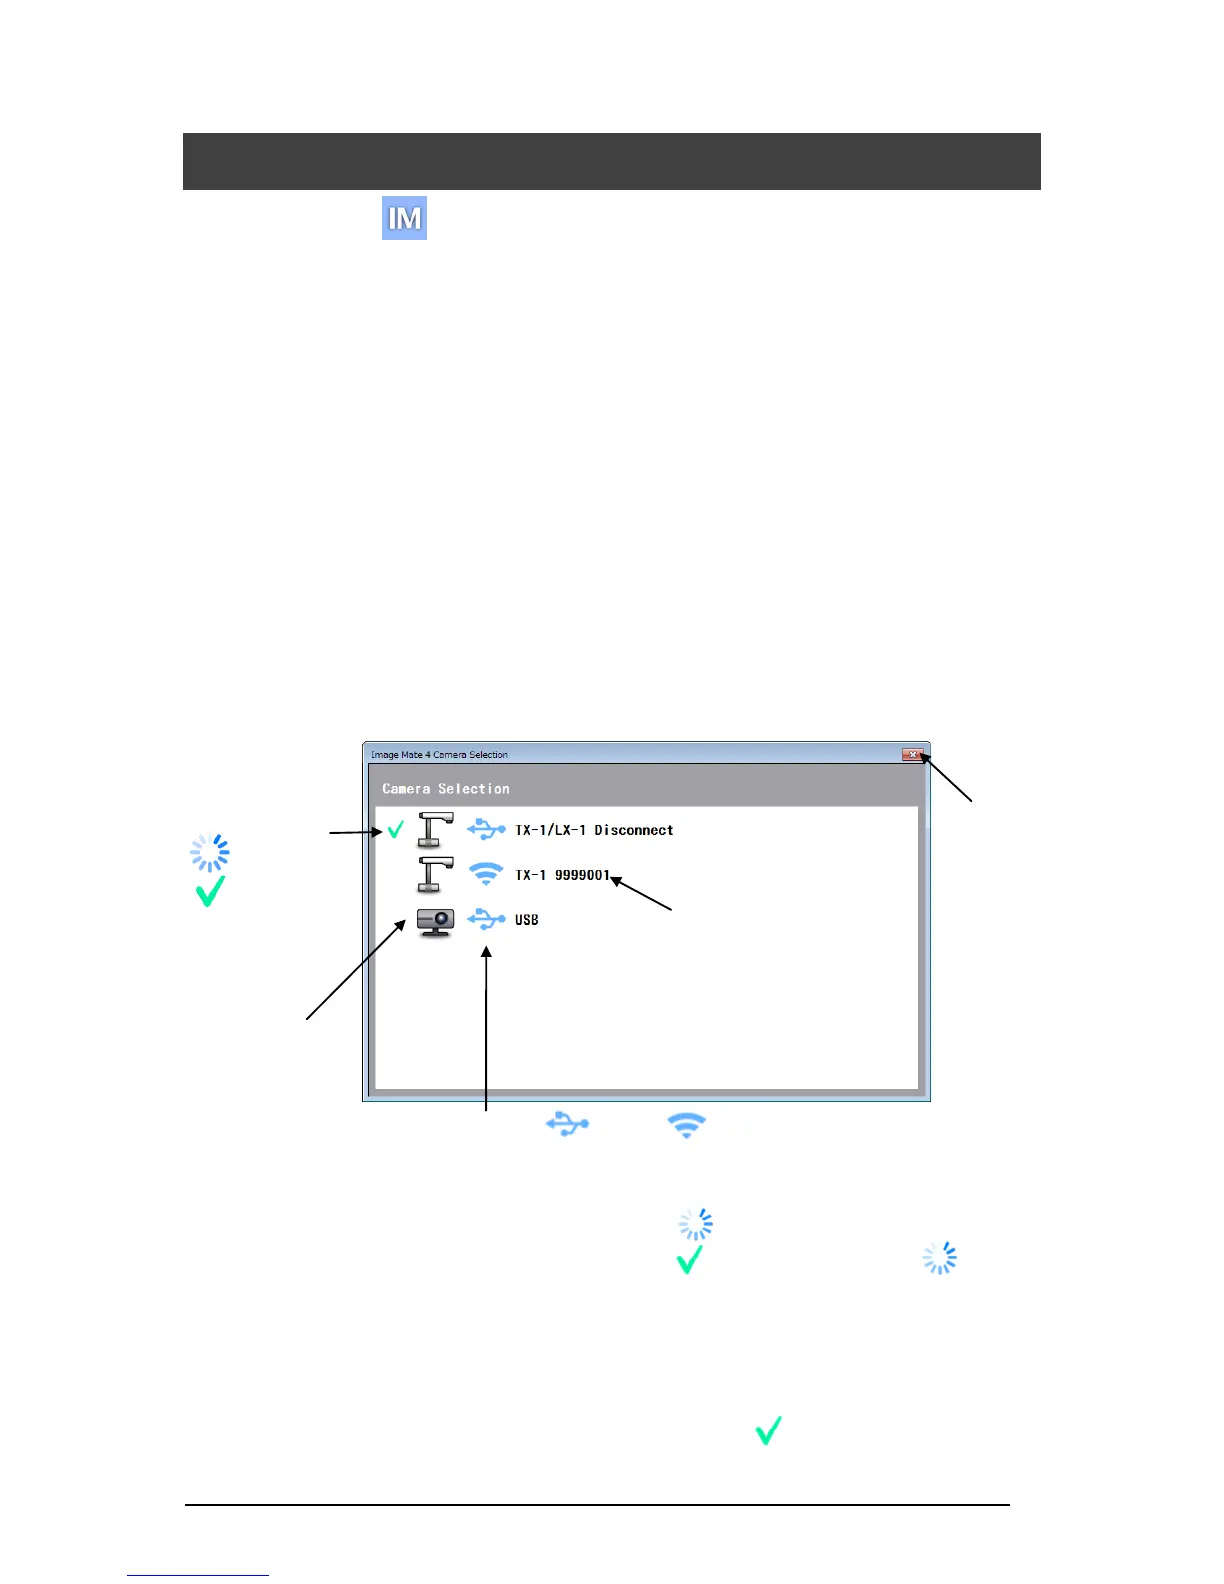
■HOW TO SELECT THE CAMERA
・When the TX-1 is connected to a computer via the USB cable (the camera selection window
does not appear on the screen), the live image of the camera appears after Image Mate 4 is
started.
・When several cameras are connected to a computer, the camera selection window appears
on the screen.
<Connection procedure>
① Click the selected camera name.
② The connection status changes to “Connecting” [ ].
③ The connection status changes to “Connected” [ ] from “Connecting” [ ] after
the connection is established.
※ The software will cancel the selection and start to connect to the other selected
camera if the camera name of the other camera is selected before the connection is
established.
※ The connection will be disconnected if “Connected” [ ] is pressed.
④ The camera selection window disappears and the live image of the camera appears.