2. Grasp one SPS enclosure with the blue latch on the right and slide the SPS into one
side of the tray.
3. Grasp the other SPS enclosure with the blue latch on the right and slide it into the
other side of the tray as shown in Figure 8 on page 27.
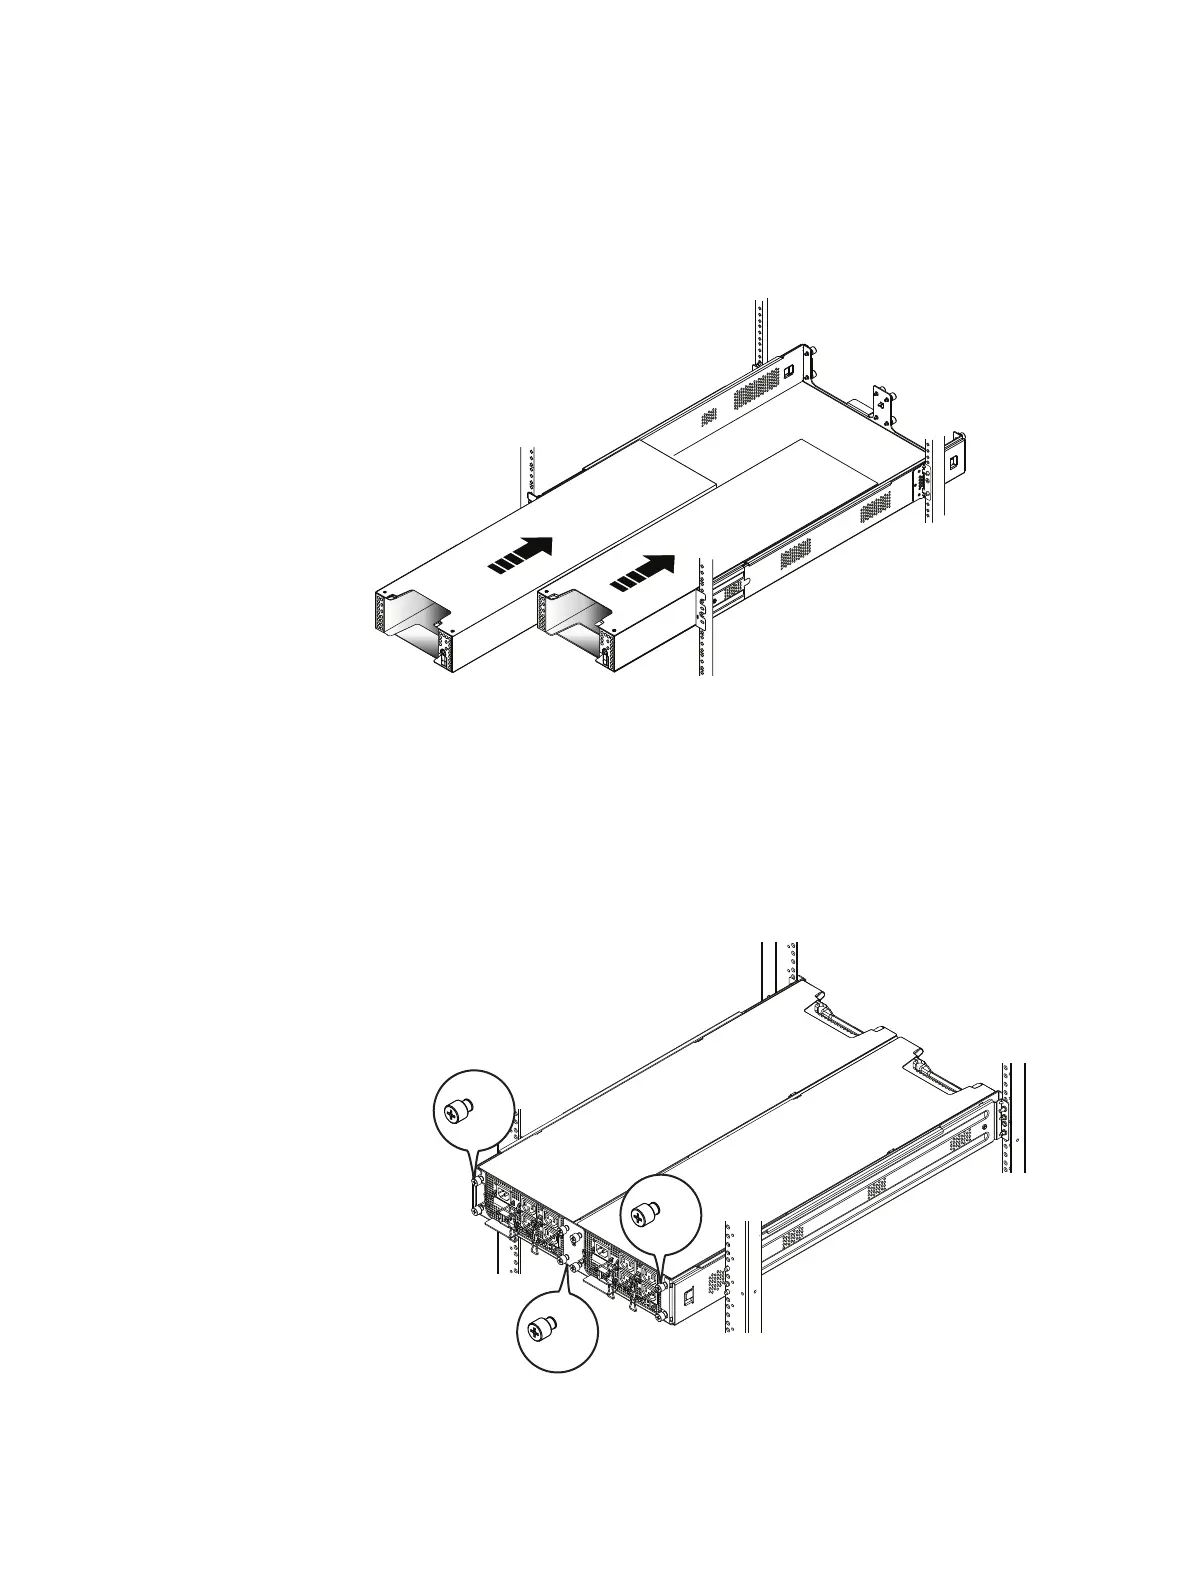
Figure 8 Installing the SPS enclosure
4. Secure each SPS enclosure to the rear of the SPS tray as shown in Figure 9 on page
27.
a. Tighten the captive thumbscrews that attach the SPS to the rear side of the SPS
tray.
b. Tighten the captive thumbscrews that attach the SPS to the rear middle of the SPS
tray.
Figure 9 Location of the rear thumbscrews
Assemble components in your cabinet
Installing components of the SPE standby power supply 27

 Loading...