ControlWave Instruction Manual (CI-ControlWave)
IND-2 Index Revised: Nov-2010
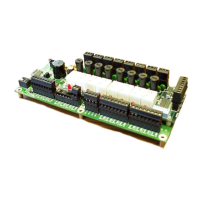
1-1. ControlWave with 8 I/O modules
....................................................1-2
1-2. ControlWave Housing Options 1-
5
1-3. I/O Modules............................1-8
1-4. ControlWave Programming
Environment...............................1-9
2-1. 8 I/O module ControlWave -
mounting diagram......................2-5
2-2. 4 I/O module ControlWave -
mounting diagram......................2-6
2-3. Power Supply/Sequencer Module
(PSSM).......................................2-8
2-4. PSSM Wire Routing Diagram..2-
13
2-5. PSSM TB2 Typical wiring
schemes ..................................2-14
2-6. Watchdog MOSFET Switch
Wiring......................................2-16
2-7. ControlWave to ControlWave
RED I/O Redundancy Field Wiring
..................................................2-17
2-8. ControlWave CPU module
without SCB.............................2-18
2-9. ControlWave CPU module with
SCB..........................................2-19
2-10. Male DB9 9-Pin Connector 2-24
2-11. RJ-45 Connector associated
with COM3 (SCB)...................2-24
2-12. Full-duplex and Half-duplex
Cable........................................2-25
2-13. Full-duplex and Half-duplex
Cable........................................2-26
2-14. Connecting to a Modem or
Radio........................................2-26
2-15. COM3 (on SCB) RS-232 Cable
Diagram (RJ-45 connector)......2-26
2-16. RJ-45 Ethernet Connector ..2-29
2-17. Standard 10/100Base-T Ethernet
Cable (CPU Module to Hub) ...2-30
2-18. Point-to-Point 10/100Base T
Ethernet Cable..........................2-30
2-19 Bezel Assembly...................2-31
3-1. Terminal housing assembly
removal ......................................3-2
3-2. ControlWave Chassis Slot
Assignments...............................3-4
3-3. I/O Module (local termination)
wire routing................................3-5
3-4. I/O Module Remote Termination
Wiring........................................3-7
3-5. DI Module – right side view –
jumper locations.........................3-9
3-6. DI Module – Local Terminal
block assembly assignments....3-10
3-7. Internally sourced DI Module –
wiring diagram.........................3-10
3-8. Externally powered DI module
wiring diagram.........................3-10
3-9. Remote DIN rail mountable
terminal block assembly
assignments..............................3-11
3-10. Remote DIN-rail mountable
terminal block assembly
assignments for relay isolated
120Vac DI operation................3-12
3-11. Local terminal block assembly
assignments for open source
isolated DO ..............................3-14
3-12. Open source isolated DO
module wiring diagram............3-14
3-13. Remote DIN-rail mountable
terminal block assembly
assignments for open source
isolated DO ..............................3-15
3-14. Remote DIN-rail mountable
terminal block assembly
assignments for relay isolated DO3-
16
3-15. Internally sourced 4-20mA
current loop AI wiring diagram3-20
3-16. Externally powered 4-20mA
current loop AI – wiring diagram 3-
20
3-17. Externally powered isolated 1-
5V AI wiring diagram..............3-21
3-18. Local AI module terminal block
assembly...................................3-21
3-19. Remote DIN-rail mountable
terminal block assembly
assignments for 4-20mA AI.....3-22