17
Manual: Transport, Installation and Start-Up: DC CompactCharger ECC 320 ©EnerCharge GmbH
INSTALLATION
The lifting device is the responsibility of the operator or the com-
pany that carries out the installation on behalf of the operator.
EnerCharge does not provide any warranty in case of damage or
injury caused by an unsuitable lifting device.
• Dimension the lifting device according to the maximum weight
of the ECC 320.
• Use a suitable sling with 4 strands.
• No persons are allowed to be below the lifted load.
• Make sure that the extension bolts are mounted correctly.
Unsuitable lifting device
WARNING
> Lift and lower the ECC 320 by the eyelets of the eyebolts
using a suitable lifting device.
> Remove eyebolts and extension bolts.
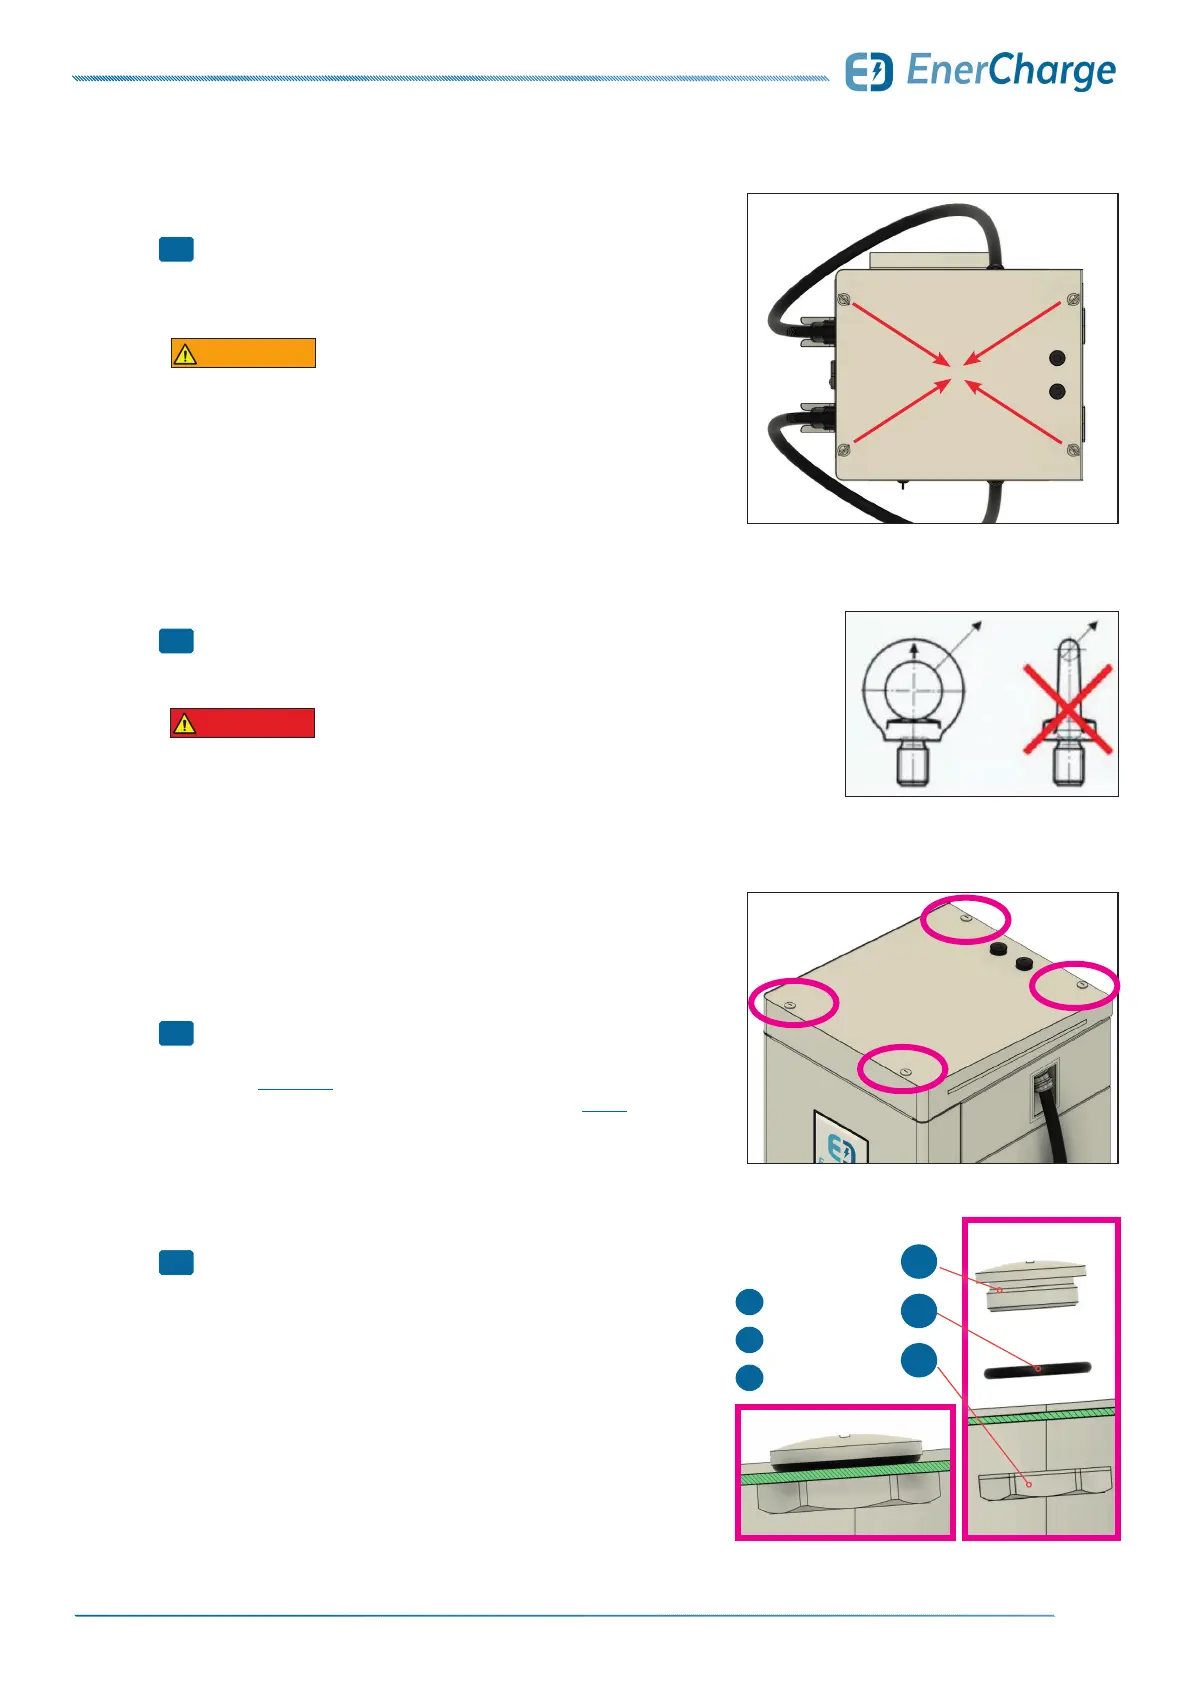
> Mount all four screw ttings in the head area.
• Attach sealing plug with gasket and mount with nut:
see FigAbb. 14.
• Observe the correct position of the gasket: see Fig. 15
• Tighten the nut hand-tight: Make sure not to damage the
gasket.
• Replace a damaged gasket immediately - do not reuse!
• Repeat the process for all 4 screw fittings.
> ECC 320 successfully lifted and lowered.
Fig. 12: alignment of eyebolts
Fig. 13: side-pull of eyebolts
Fig. 14: Screws in head area
The screw ttings in the head area prevent water and liquids from ente-
ring. Penetrating liquids can trigger a short circuit. The consequences
can be fatal electric shocks.
• Install the screw connections properly.
• Take care not to damage the gasket when tightening the nut.
• Replace a damaged gasket immediately.
• If water has penetrated: Do not operate the ECC 320 charging station
under any circumstances. Contact your local sales partner from
whom you purchased the charging station. This partner will ensure
that the interior of the ECC 320 is cleaned and that it is put into
operation.
Sealing in Head Area
DANGER
3
4
5
>
3
2
1
3
2
1
Sealing Plug
Gasket
Nut
Fig. 15: Structure of screw fitting