Replacing ASR-I
O/88
Modules
Replacing the Keypad/Display Board
Removing
1.
Remove all cables connected to the ASR-10, including the power cord.
2.
Remove the volume and data entry knobs.
3.
Turn the unit upside-down and remove all the screws from the base and rear panel.
4.
Remove the digital board (see Section A).
5.
Remove the digital jack board (see Section F).
6.
If installed, remove the SCSI board (see Section K).
7.
Remove the analog board (see Section B).
8.
Remove the analog jack board (see Section G).
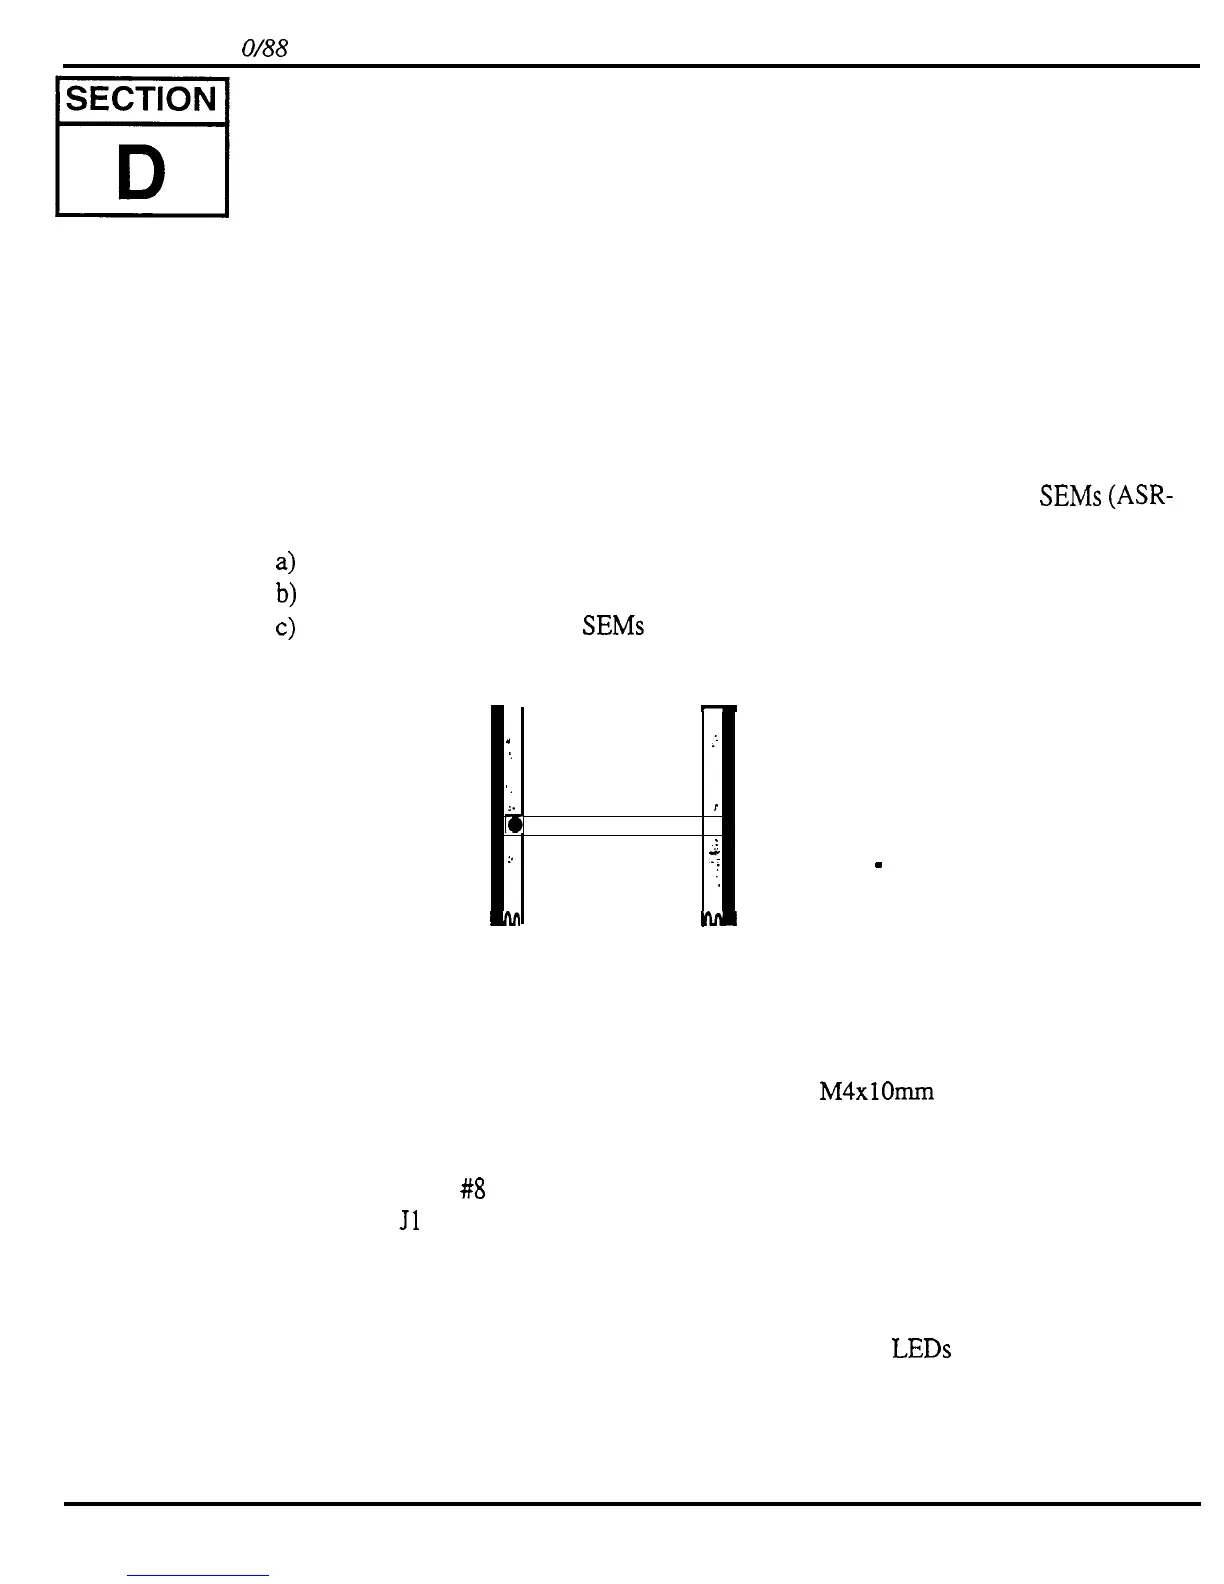
9.
Remove the center support bracket assembly by removing the two (2) 8-32 SEMs (ASR-
10 only):
a>
b)
c>
One (1) from the right center bracket to rear extrusion,
One (1) from left center bracket to rear extrusion, and
Remove the two (2) 6-32 SEMs holding the center string bracket to the right and left
center brackets.
left
center
bracket
-
.
,z
:
‘.
i. I
a
l
:,
center
$
stringer
:
hnr
bracket
nm
right
center
bracket
Figure 19
-
ASR-10 Center Support
Bracket Assembly
10. Unplug the disk drive power cable (4-pin) from the disk drive side of the keypad/display
board.
NOTE:
To make sure that later units don’t have stuck buttons, an M4xlOmm hex head set screw was
added to locate the keypad/display board properly. Don’t remove the hex head set screw.
Installing
11. Remove ten (10)
#8
screws that hold the keypad/display board to the front panel.
12. Disconnect
Jl
24-pin ribbon cable from the keypad/display board.
13. Disconnect J2 7-pin power cable from the keypad/display board and remove the board
from the unit.
14. Make sure the lens and display are clean.
15. Check to make sure that the following keypad/display board LEDs are straight:
DS 17
(left peak LED); DS 19 (left signal LED); DS18 (right peak LED); and DS20 (right signal
LED). If they are bent they will not fit into their LED lens on the front panel.
44
ASR Service Manual
 Loading...


