Important
l
If SIMMs are installed in a less than optimal configuration (see pp.
71-72),
the display will read SIMMs
IN WRONG SOCKETS after booting. If this message is displayed, you should power off and check the
SIMMs configuration.
l
SIMMs that have GAL (gate array logic) or PAL (programmable array logic) chips on them may be too
thick to fit into the standard sockets that are used on the ASR. Even if the SIMMs with
GALS
or
PALS
fit, they will draw too much power and certain configurations (i.e. 2M x8 SIMMs) will not work
properly.
l
See Important Information About SIMMs, p. 67.
THE DISK DRIVE
Transporting a unit
We do not, under any circumstances, recommend the insertion of an actual disk during transport. Only
transport the unit with the drive empty. Please do not ship an ASR or a replacement disk drive in a box
packed with foam peanuts. If you must use foam peanuts, wrap the entire unit in plastic first. Foam peanuts
may cause severe damage to the disk drive or keyboard.
What disks to use
It is very important to use double-sided, double-density (DD) or high density (HD) 3.5” micro-floppy disks.
The ASR writes information to every track on a disk, so it is imperative that the disk be of superior quality.
Disks that have been pre-formatted for MS DOS are not always reliable and should not be used.
Testing the Disk Drive
The best way to test the disk drive is by formatting a disk. When a disk is formatted, the ASR reads and
writes every track on that disk. If the formatting fails, the disk itself may be faulty. Try formatting another
disk before determining that the disk drive is faulty. Unlike some computer systems, the ASR does not
automatically discard bad sectors when formatting. The entire disk must be good for successful formatting.
There is an exception, a disk that has been pre-formatted for MS DOS may be able to be formatted for use in
an ASR and still not work reliably in the ASR.
e
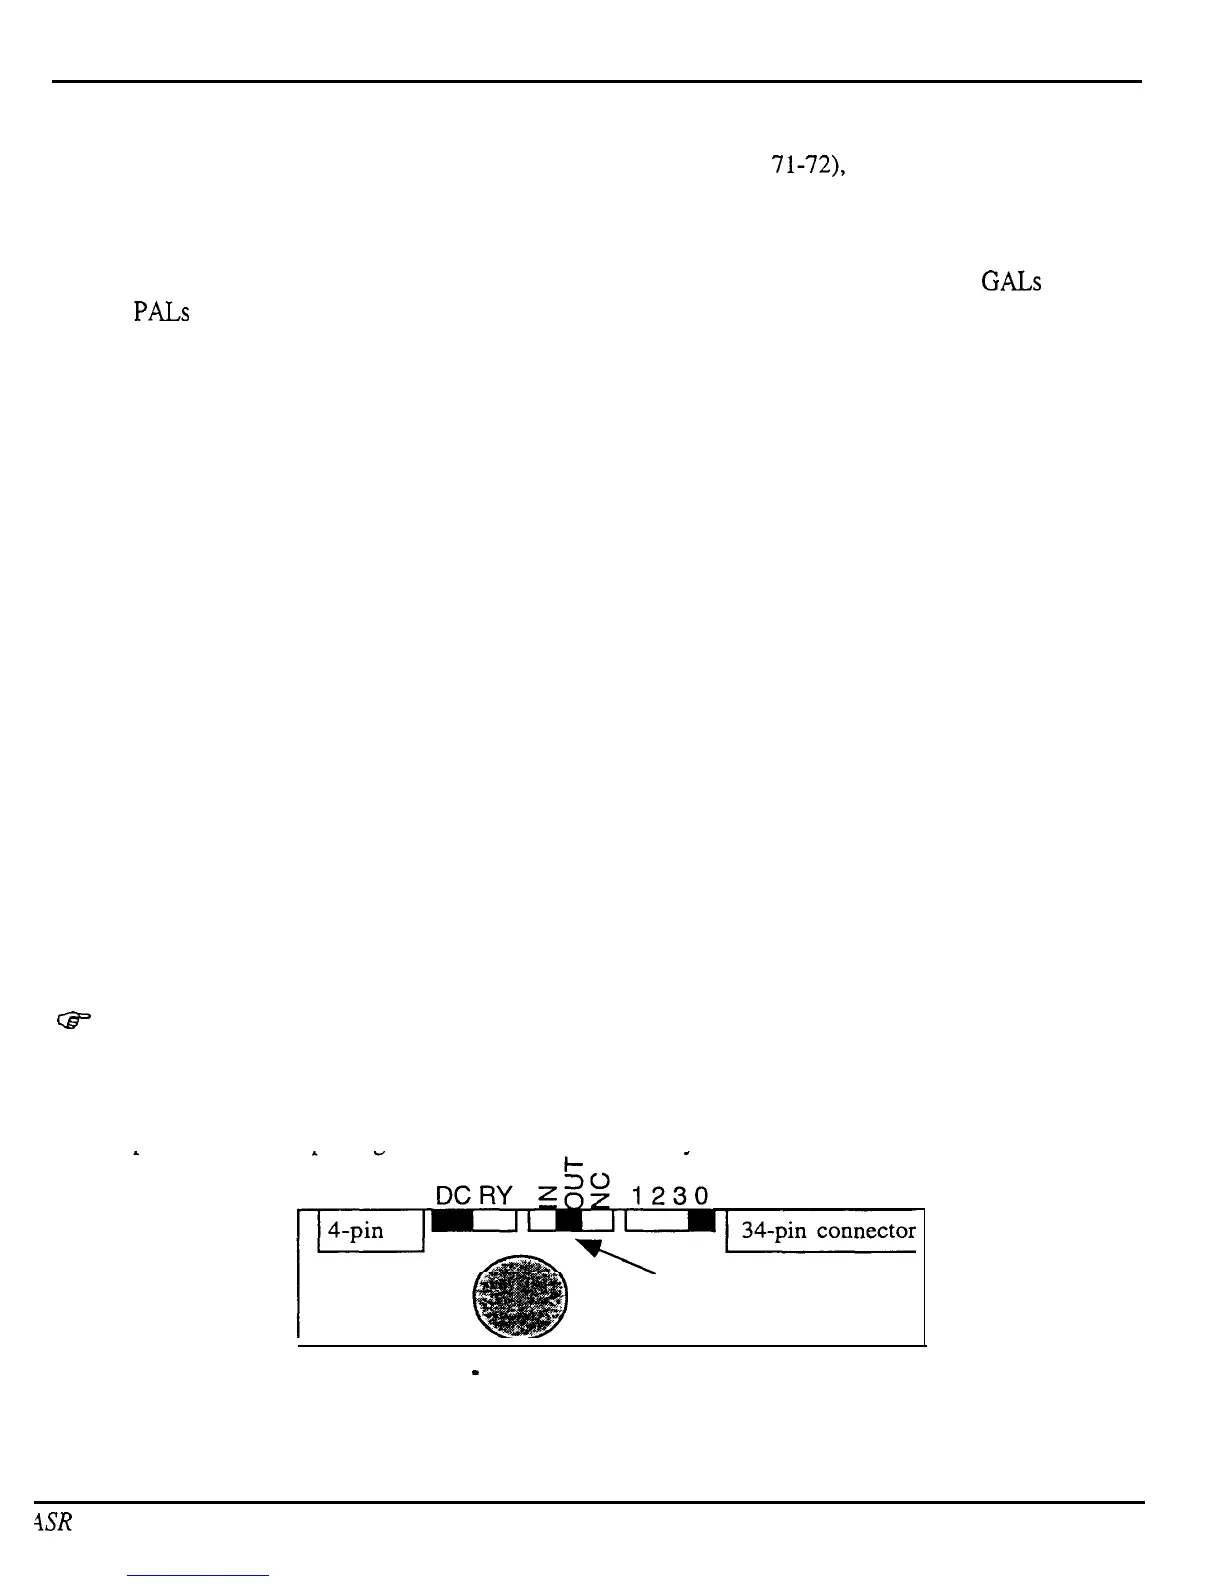
A few different disk drives were used in the ASR: two types of Panasonic drive and one Sony drive.
Make sure that when you install a new Panasonic disk drive that the switches on the rear of the drive are set as
shown in Figure 3. On some Panasonic disk drives, the Drive Select Switch has only two positions instead of
four. The drive select should always be set to zero (0). If the drive cable is too short, you may also need a
new 34 pin cable when replacing a Panasonic drive with a Sony drive.
-Make
sure that this
switch is in the middle!
Figure 3
-
Rear view of Panasonic Disk Drive
4SR
Service Manual
3

 Loading...


