Installing the S4 Chassis
3-4 Chassis Setup
Installing Rubber Feet
To install the rubber feet:
1. Place the chassis on its side on a sturdy flat surface to access the bottom of the chassis.
2. Remove the four rubber feet/screw assemblies from their plastic bag in the shipping box.
3. Locate the four tapped holes in the four corners on the bottom of the chassis.
4. Screw and hand tighten each of the four rubber feet into the four tapped holes.
Installing the Mid-Mount Brackets
To install the mid-mount brackets on the S4 chassis:
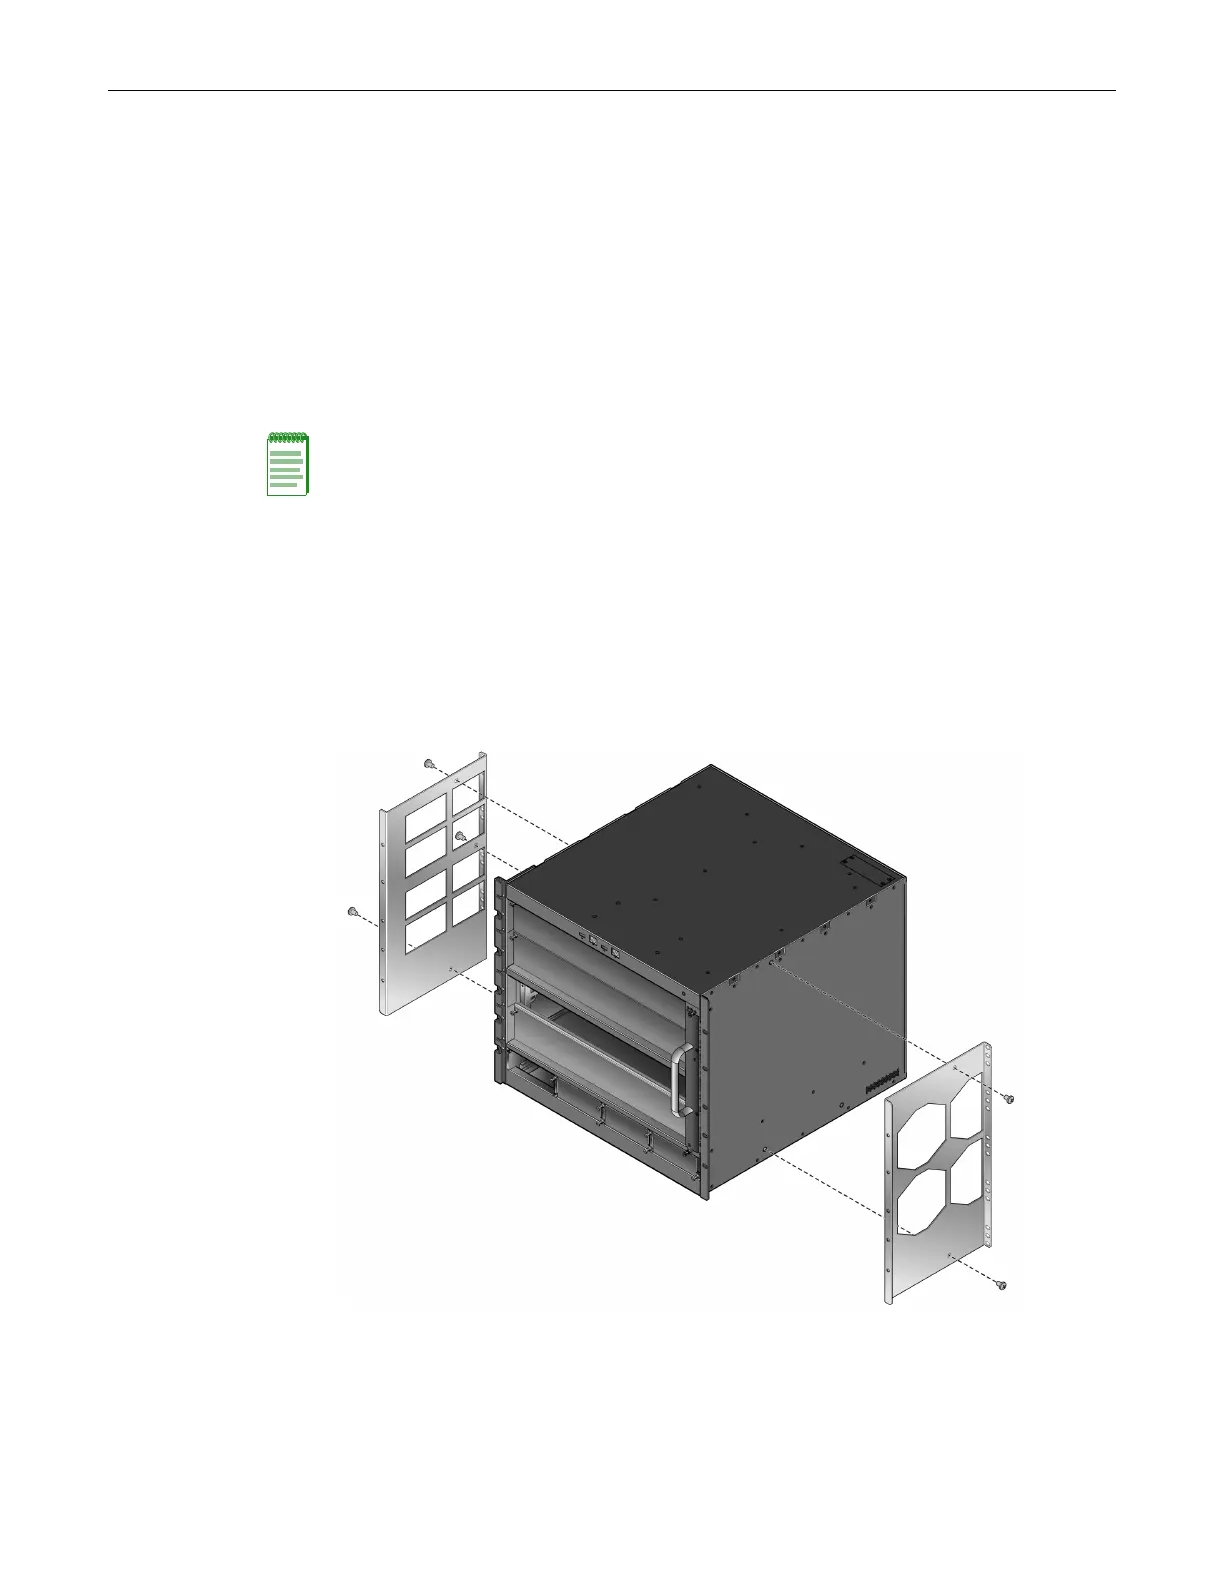
1. Attach the mid-mount brackets to each side of the S4 chassis with the five 1/4-20 x 3/8 pan
head screws supplied with the mid-mount bracket kit ( three for the left bracket, two for the
right bracket). See Figure 3-1.
The cutouts on each bracket match the airflow holes on the S4 chassis. The right bracket has
octagonal cutouts; the left bracket has rectangular cutouts.
Figure 3-1 Attaching the Mid-Mount Brackets to the Sides of the Chassis
Note: The mid-mount bracket kit (S4-MIDMOUNT-KIT), which you must order separately, ships
separately from the S4 chassis.