Powering Up the S4 Chassis with S-DC-PS Power Supplies
3-22 Chassis Setup
Powering Up the S4 Chassis with S-DC-PS Power Supplies
1. Remove the clear plastic shield over the terminal studs.
2. Attach your cables to the terminal studs, making sure that the negative cable is attached to the
negative (-) studs and the positive cable is attached to the positive (+) studs. See Figure 3-15.
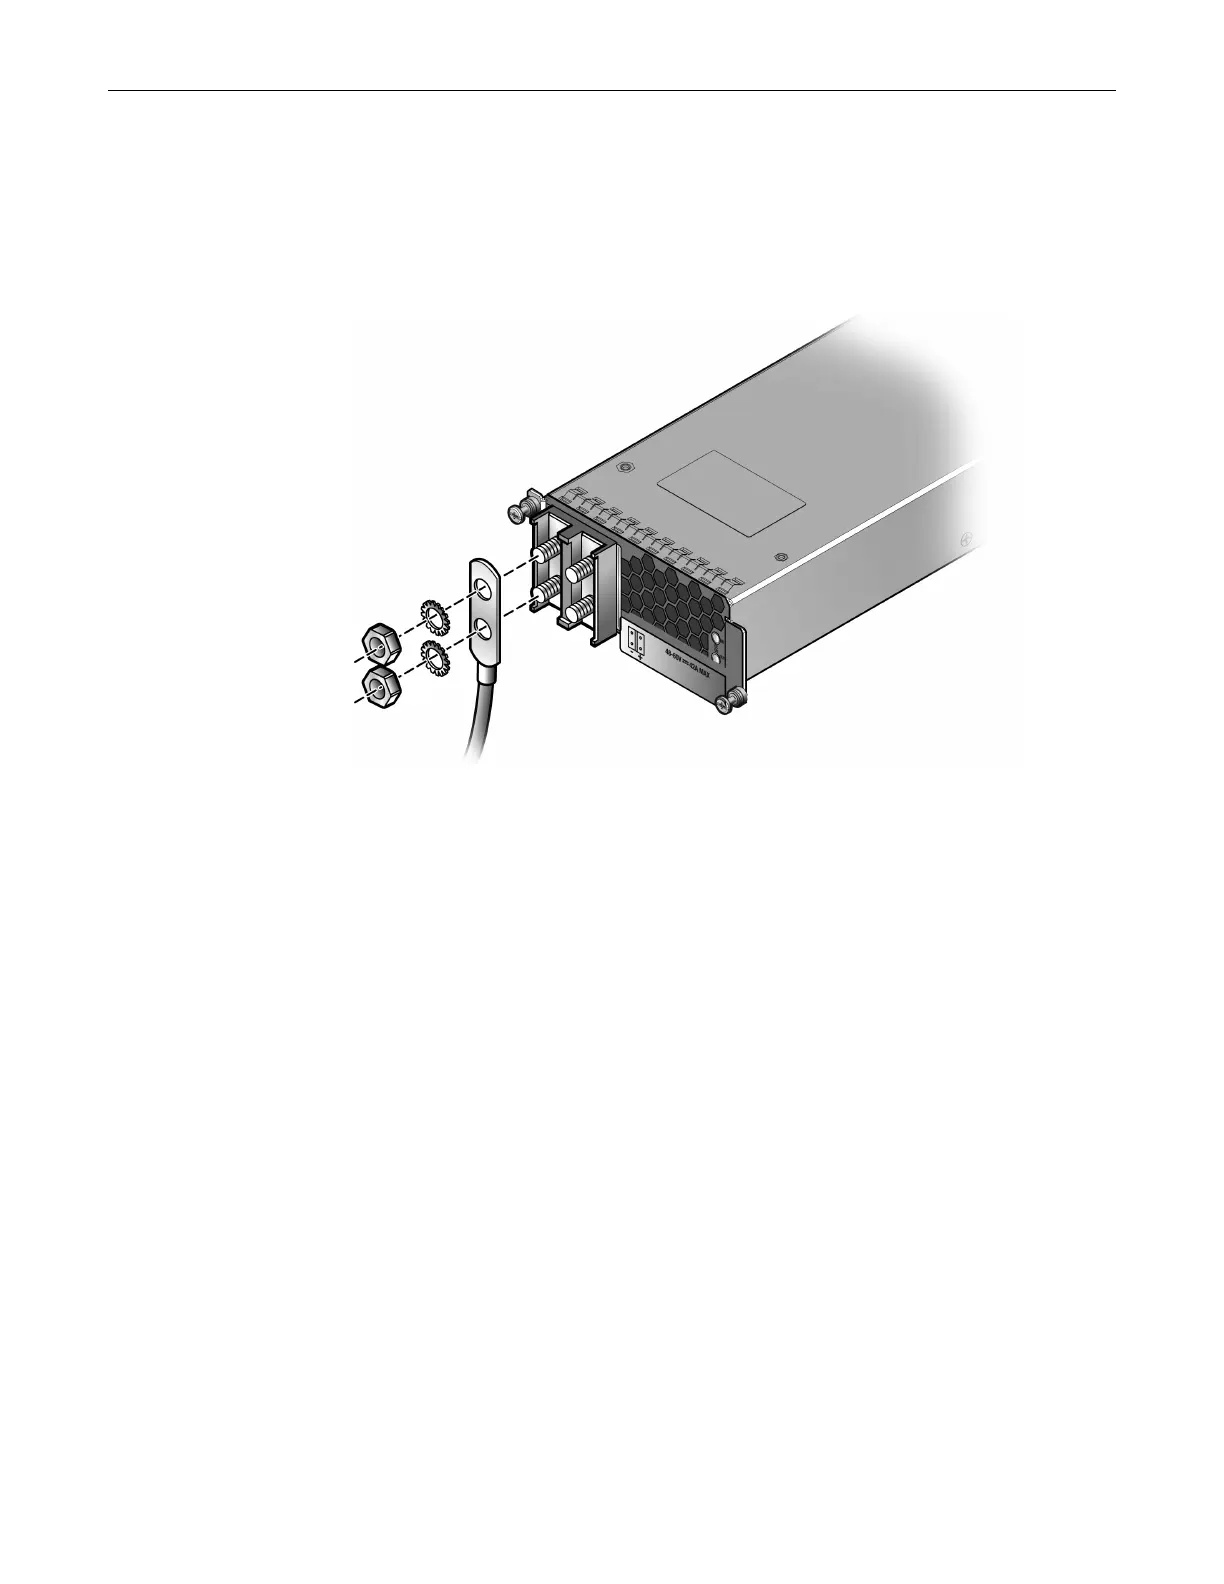
Figure 3-15 Cabling the S-DC-PS Power Supply
For your convenience, Enterasys Networks has provided two 2-hole compression lugs and
four nuts and lock washers of the correct size to fit over the terminal studs. If you are using the
compression lugs provided, crimp your cabling to the lugs, then:
a. Place the appropriate 2-hole compression lug over the corresponding terminal studs
(positive and negative).
b. Place the lock washers over the positive and negative studs.
c. Place the nuts over the lock washers and tighten. Torque applied must be 36 in-lb.
3. Replace the plastic shield.
4. Repeat steps 9 through 12 for each power supply.
5. Connect the DC input wiring to the DC power source.
6. Switch the branch circuit disconnect device to allow power to reach the DC power supply.
7. Set the circuit breakers on each DC power supply to On.