105
2. In the Select Action window, click Attach to Email.
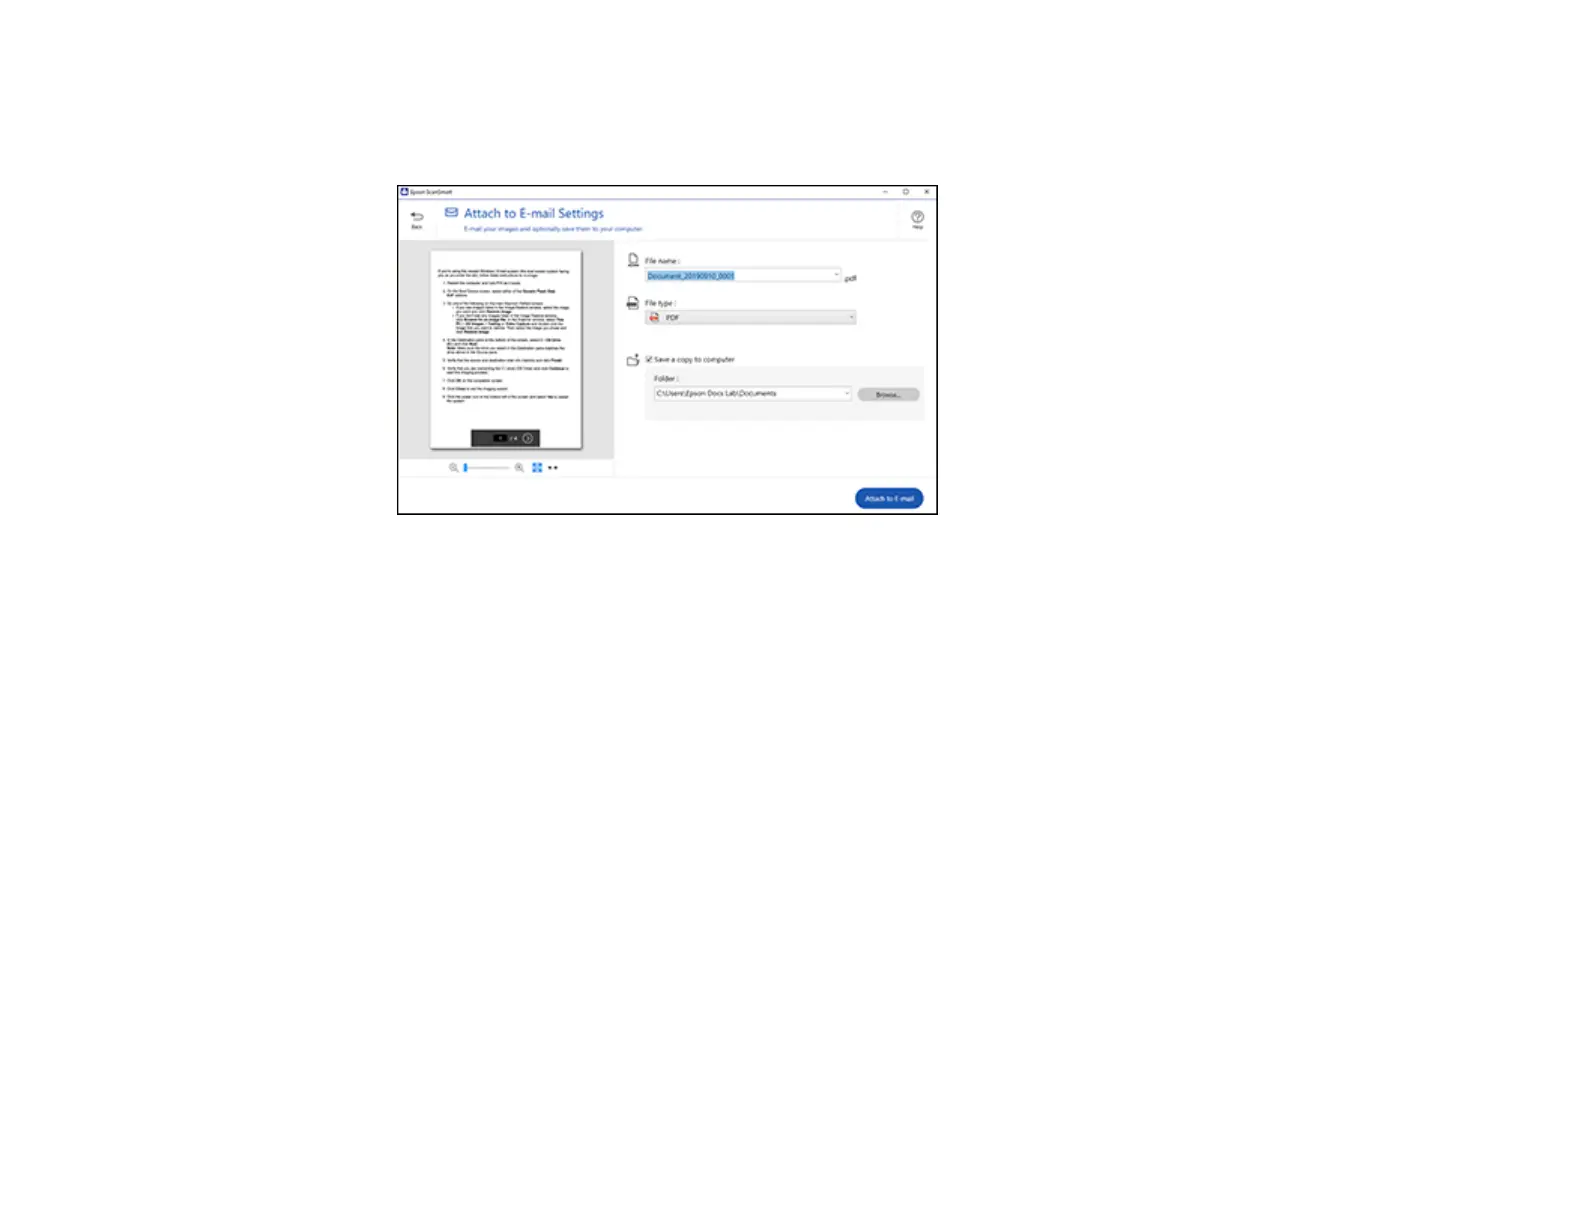
You see a screen like this:
3. Change the settings as follows:
• The document type and scan date for the file name are automatically detected. You can change
them as necessary.
• You can save the scanned image in a variety of formats. If you select Searchable PDF as the File
type setting, you can select the OCR (Optical Character Recognition) language.
• If you also want to save a copy of the scanned image to your computer, make sure the checkbox
is selected and select the folder on your computer in which to save the file.
4. Click Attach to E-mail.
Your email program opens with the file attached to a new email.
Parent topic: Scanning a Document in Epson ScanSmart
Sending a Scan to a Cloud Service
You can upload scanned images to a cloud service. Internet access is required.
1. Make sure your originals are scanned and reviewed. See the link at the end of this section.
2. In the Select Action window, click one of the cloud service send options.