EasyManuals Logo

Epson RC700 Series Maintenance Manual

Epson RC700 Series
90 pages
To Next Page IconTo Next Page
To Previous Page IconTo Previous Page
Page #57 background imageLoading...
Page #57 background image
Maintenance 7. Option Parts Replacement Procedures
RC700 Series Maintenance Rev.3 43
(5)
Mount the LED DISPLAY PLATE to the LED/7
segment board. (Mounting screw
×2)
When installing the LED DISPLAY PLATE, be
careful not to drop any screw inside the Controller.
(6)
Mount the LED DISPLAY FIXING PLATE to the
Controller. (Mounting screw
×2)
(7)
Mount the LED DISPLAY PLATE to the LED DISPLAY
FIXING PLATE.
(Mounting screw
×2)
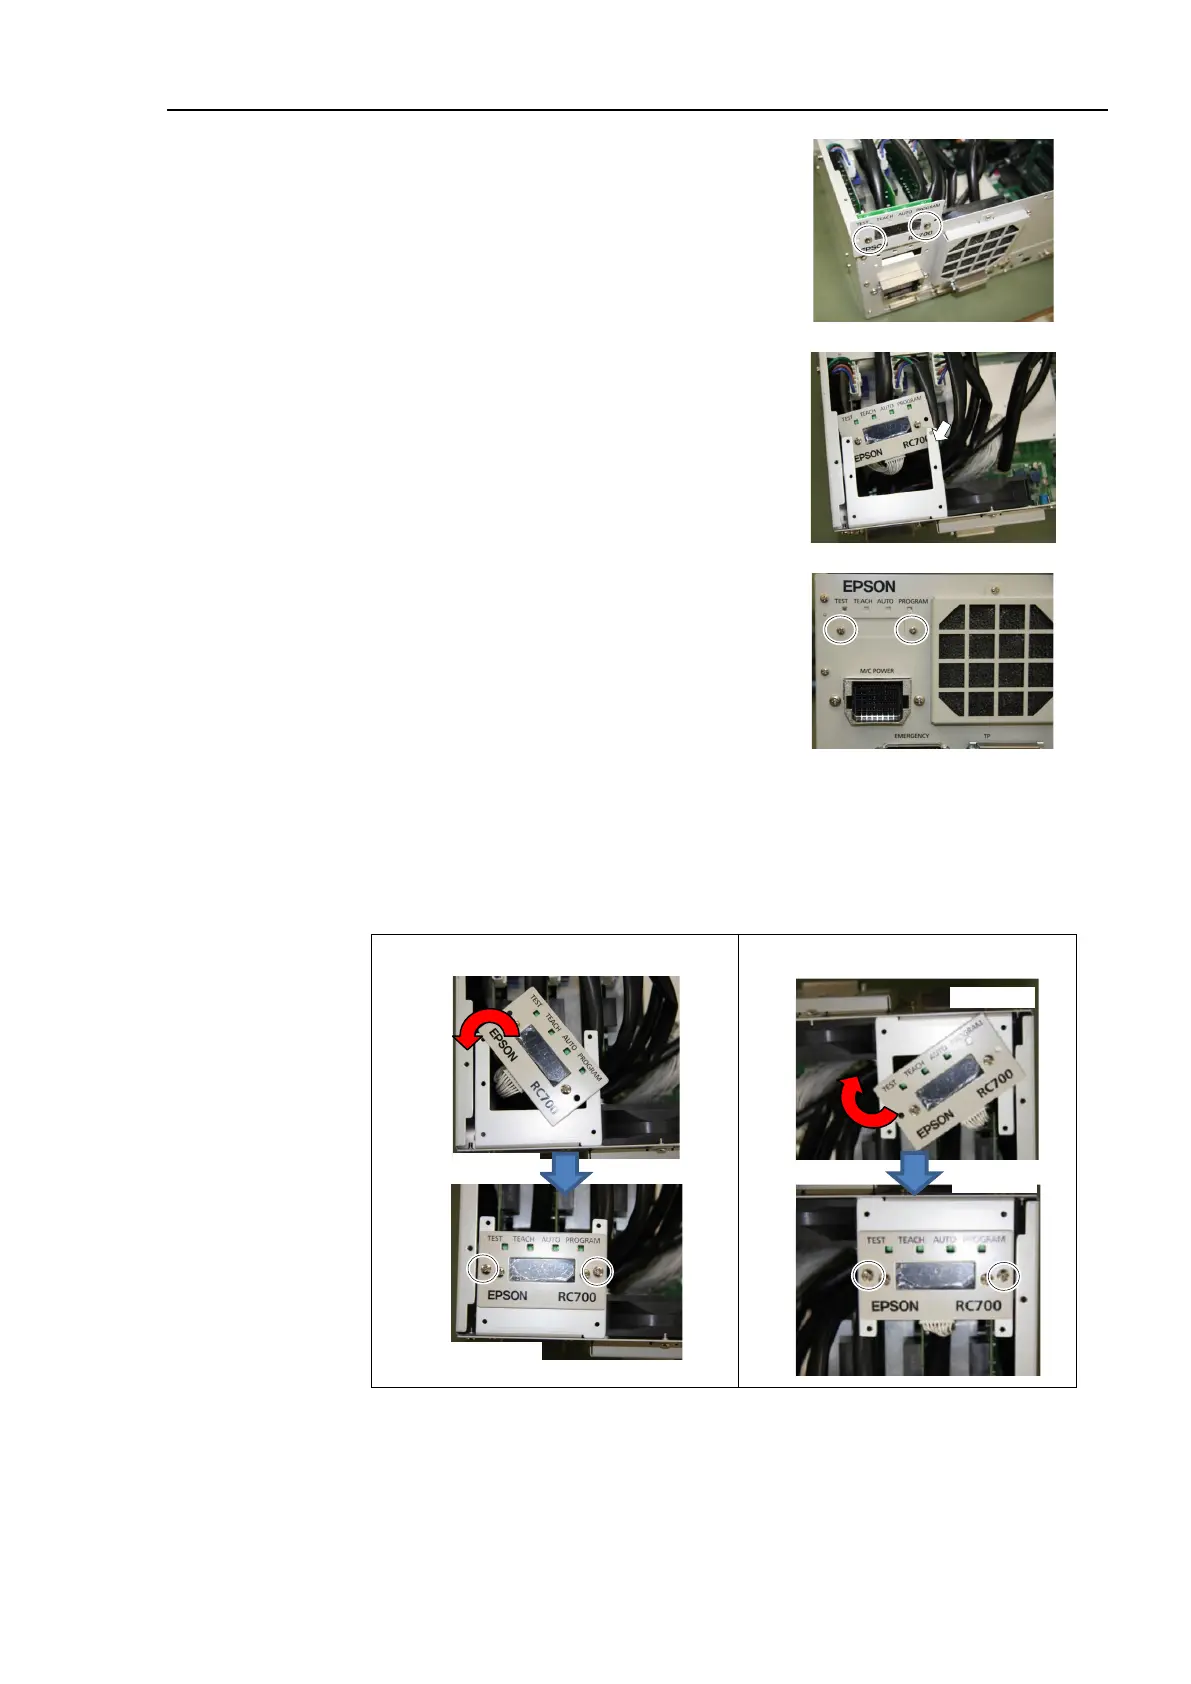
There are two installation methods.
Turn the LED DISPLAY PLATE horizontally to the Top Cover in the direction
indicated by a red arrow.
Wall mounting with the front side down
Front side
Front side
(1)
(2)
Wall mounting with the front side up
Front side
Front side
(1)
(2)
Be careful not to pull the cable.
NOTE
NOTE

Table of Contents

Other manuals for Epson RC700 Series

Questions and Answers:

Question and Answer IconNeed help?

Do you have a question about the Epson RC700 Series and is the answer not in the manual?

Epson RC700 Series Specifications

General IconGeneral
ModelRC700 series
CategoryController
Programming LanguageSPEL+
Safety StandardISO 10218-1
TypeRobot Controller
Communication InterfaceEthernet, RS-232, USB
Operating Temperature0°C to 45°C (32°F to 113°F)
Humidity20% to 80% (non-condensing)
Number of controllable robots4

Related product manuals