SC-F9200 Series Revision B
DISASSEMBLY & ASSEMBLY Disassembly and Assembly Procedure 192
SE Group Confidential (Related Staff Only)
.
Figure 3-135. Disconnecting the FFC
15. Remove the double-sided tape and remove the sheet downward.
.
Figure 3-136. Removing the Sheet
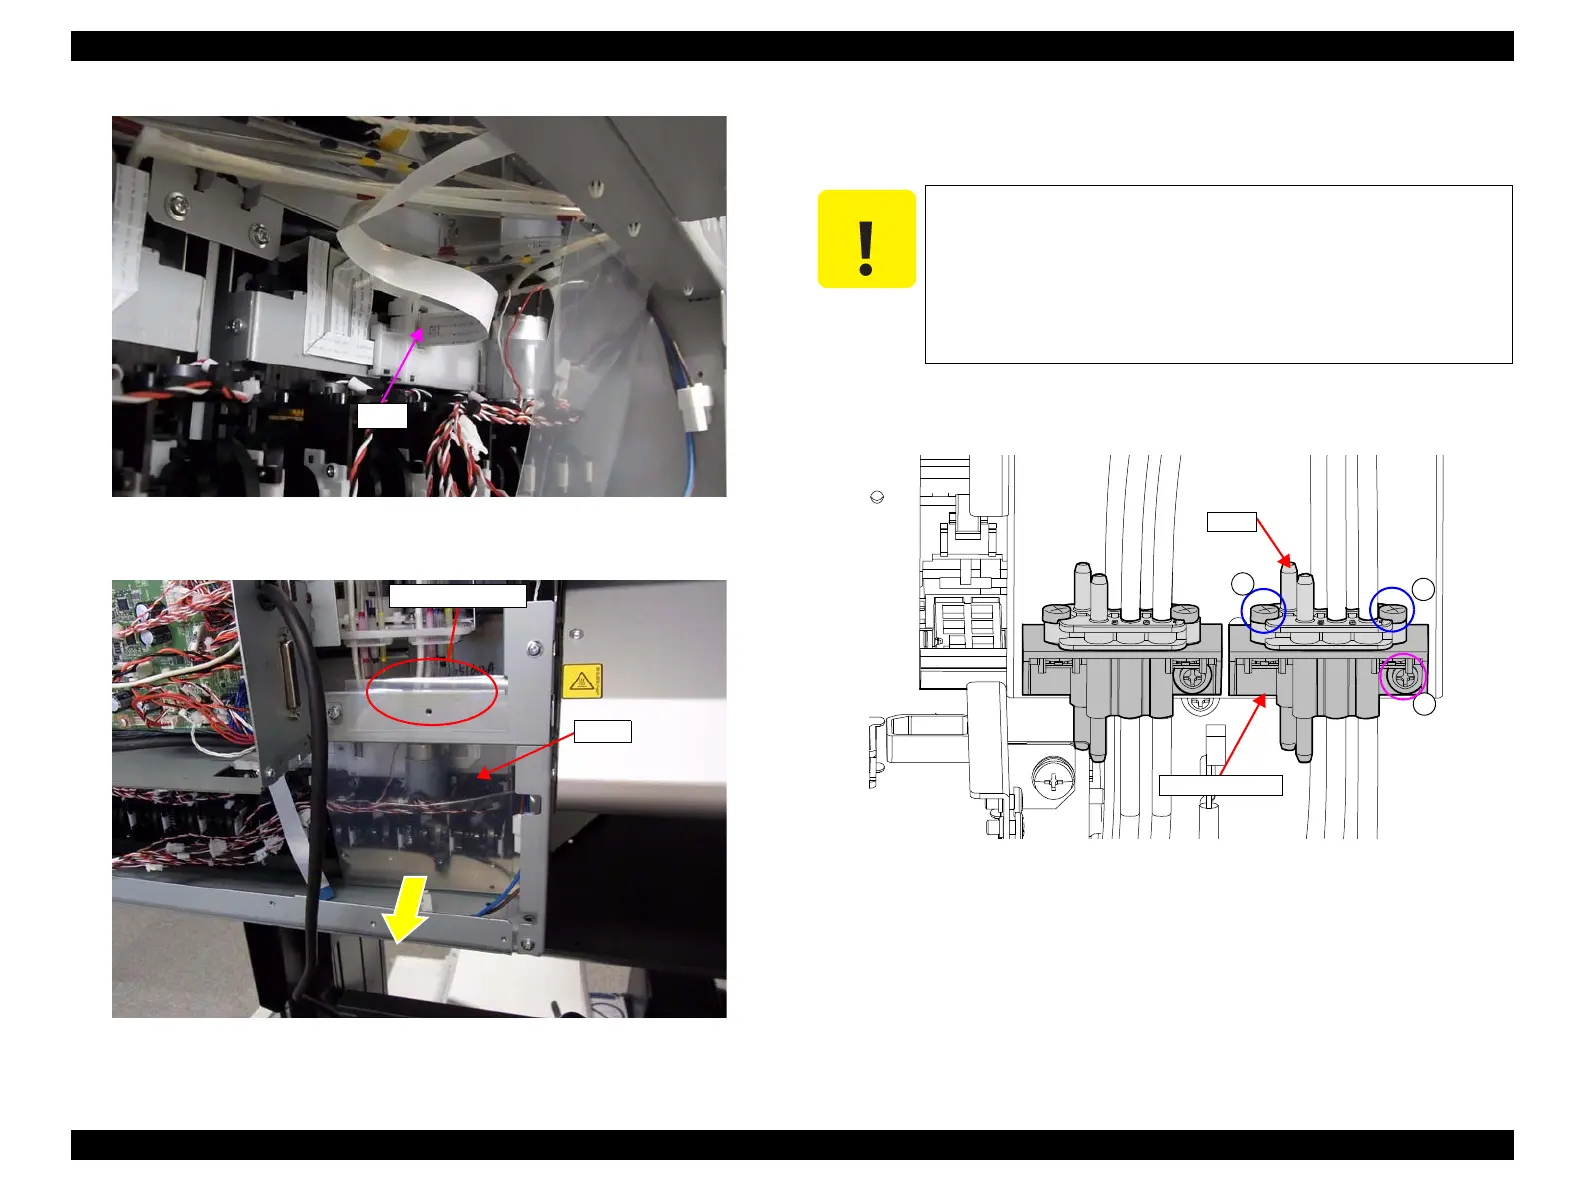
16. Remove the screw that secure the Joint.
F)Silver M3x6 S-tite screw with built-in washer: 1 pcs
17. Remove the two screws, and separate the upper joint and lower joint.
G)Silver M3x10 screw: 2 pcs
.
Figure 3-137. Removing the Joint
When the joint is removed in the next step, ink may drip off
from the tube. Prepare a waste cloth or the like in advance and
be careful not to contaminate the surroundings.
When removing/attaching the screw that secures the joint, hold
the mounting plate with your hand during the work to prevent
the plate from being deformed. If the plate becomes deformed,
flatten it as it was.

 Loading...


