EasyManuals Logo

Epson SC-F9200 series Service Manual

Epson SC-F9200 series
412 pages
To Next Page IconTo Next Page
To Previous Page IconTo Previous Page
Page #209 background imageLoading...
Page #209 background image
SC-F9200 Series Revision B
DISASSEMBLY & ASSEMBLY Disassembly and Assembly Procedure 209
SE Group Confidential (Related Staff Only)
INSTALLING THE CARTRIDGES
1. Loosen the four screws inside the ink holder.
A)Silver M3x20 S-tite screw with built-in washer: 8 pcs
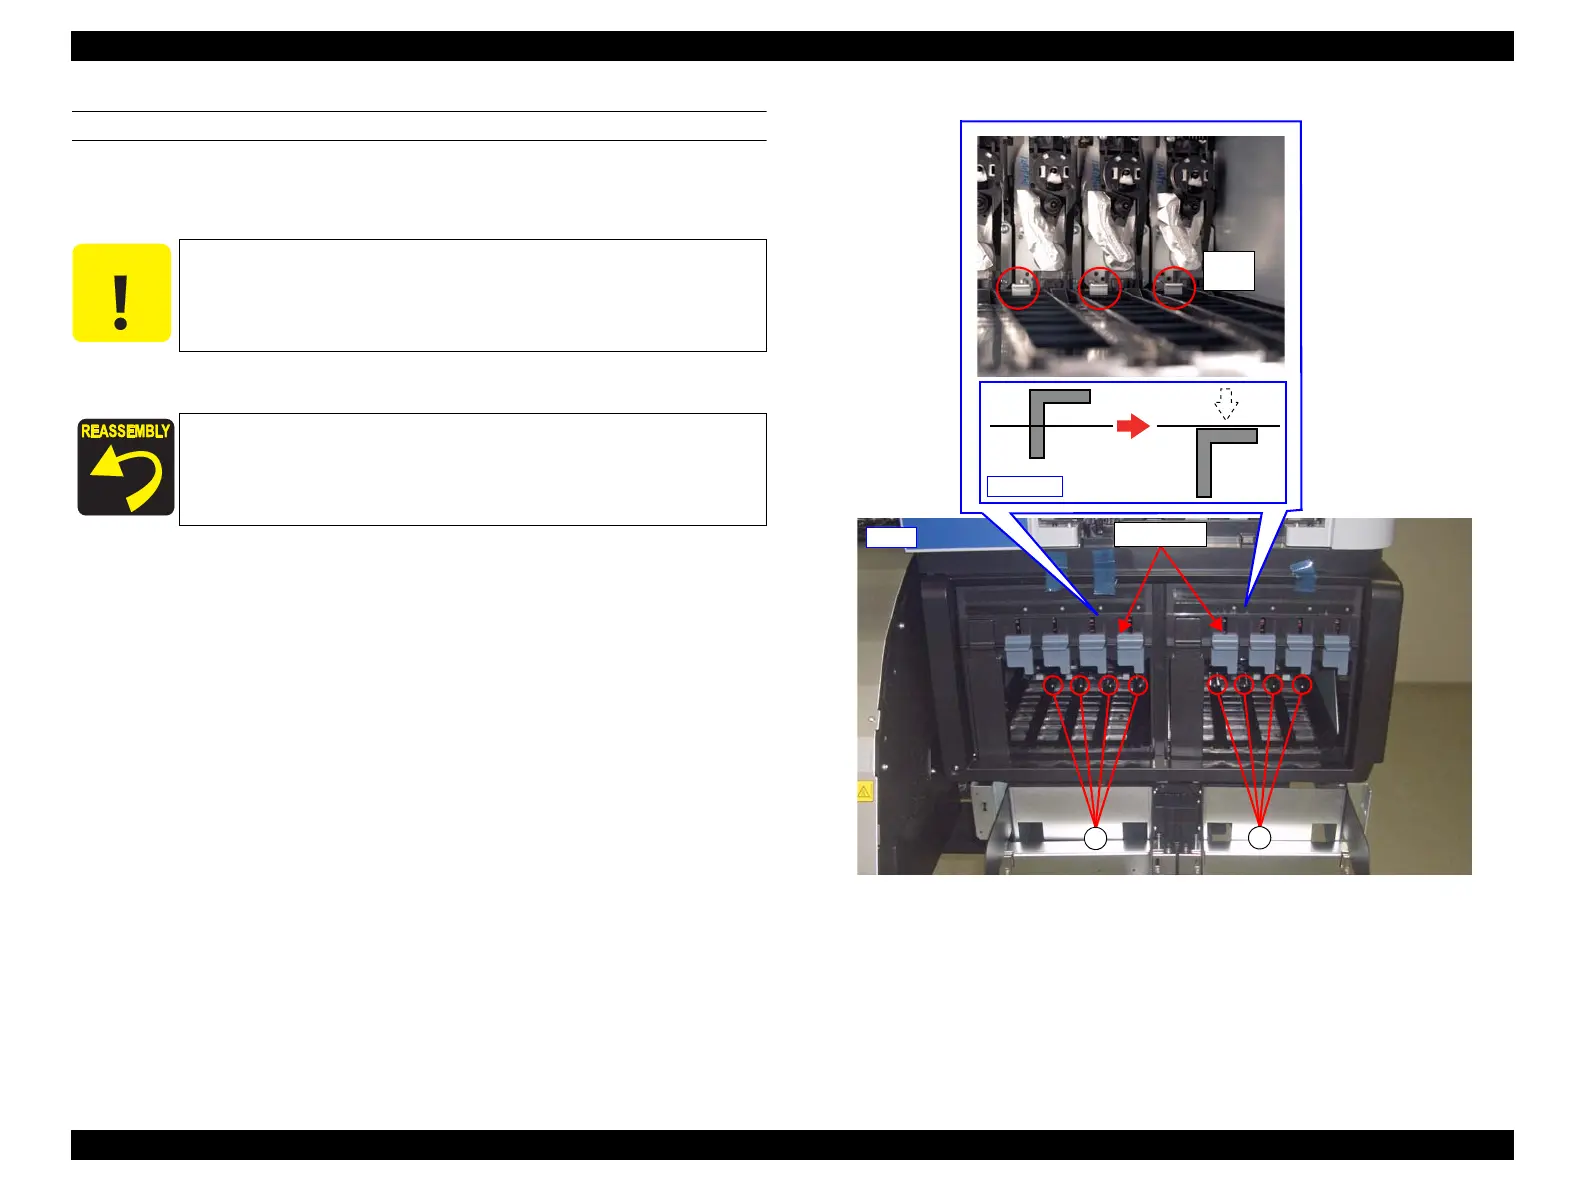
2. Confirm the hooks (plates) shown below are evenly lowered.
Figure 3-155. Plates
3. Install the cartridges.
4. Lower the lock levers.
C A U T I O N
Just loosen the screws, but do not remove them.
When attaching the ink tank, make sure to push up the eight hooks
(plates) for fixing the ink tank.
Front
Hook
(plate)
Side view
Ink Holder
A
A

Table of Contents

Other manuals for Epson SC-F9200 series

Questions and Answers:

Question and Answer IconNeed help?

Do you have a question about the Epson SC-F9200 series and is the answer not in the manual?

Epson SC-F9200 series Specifications

General IconGeneral
BrandEpson
ModelSC-F9200 series
CategoryPrinter
LanguageEnglish

Related product manuals