EasyManuals Logo

Epson SC-F9200 series Service Manual

Epson SC-F9200 series
412 pages
To Next Page IconTo Next Page
To Previous Page IconTo Previous Page
Page #234 background imageLoading...
Page #234 background image
SC-F9200 Series Revision B
DISASSEMBLY & ASSEMBLY Disassembly and Assembly Procedure 234
SE Group Confidential (Related Staff Only)
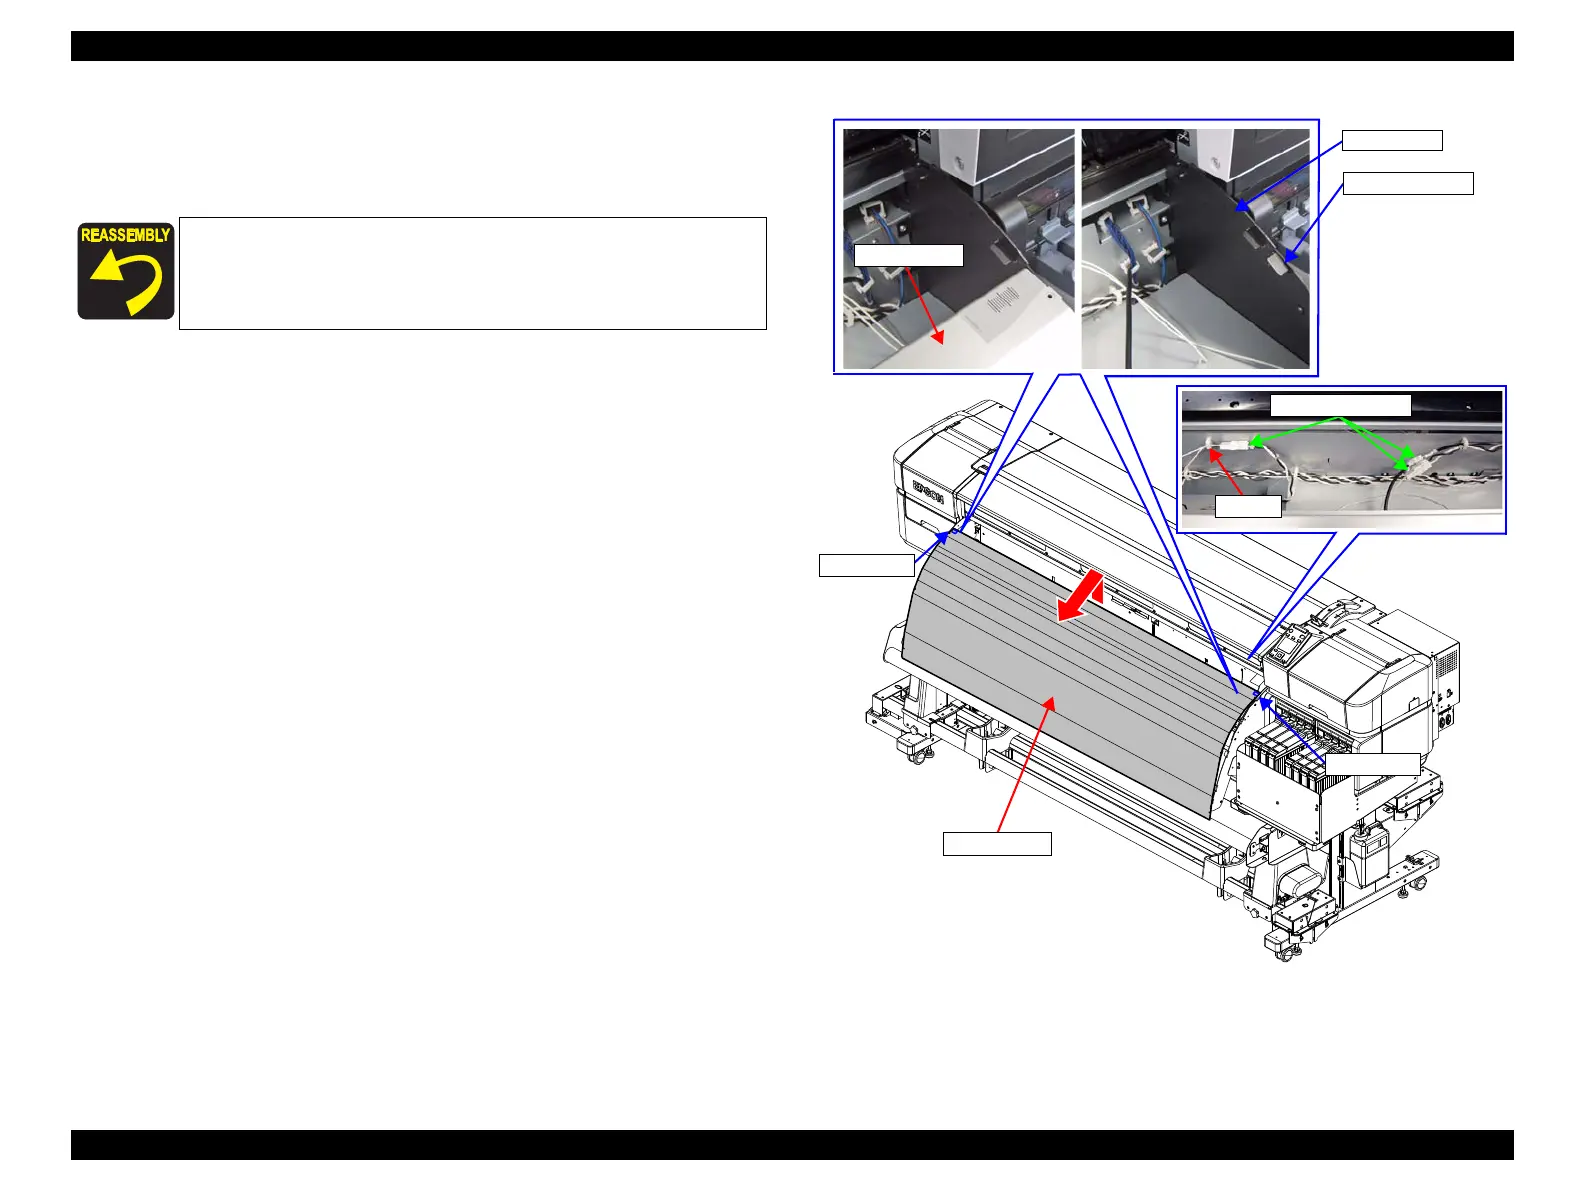
3. Remove the After Heater in the direction of the arrow, and hook it with the third
protrusion from the top on the Front Frame.
4. Release the cables from the clamp.
5. Disconnect the cables from the three relay connectors, and remove the After Heater.
Figure 3-187. Removing the After Heater
When installing the After Heater, be careful not to let the cables get
caught in between the heater and the main body.
Clamp
Relay Connectors
After Heater
Front Frame
Protrusion
Protrusion
After Heater
Protrusion (3rd)

Table of Contents

Other manuals for Epson SC-F9200 series

Questions and Answers:

Question and Answer IconNeed help?

Do you have a question about the Epson SC-F9200 series and is the answer not in the manual?

Epson SC-F9200 series Specifications

General IconGeneral
BrandEpson
ModelSC-F9200 series
CategoryPrinter
LanguageEnglish

Related product manuals