SC-F9200 Series Revision B
DISASSEMBLY & ASSEMBLY Disassembly and Assembly Procedure 235
SE Group Confidential (Related Staff Only)
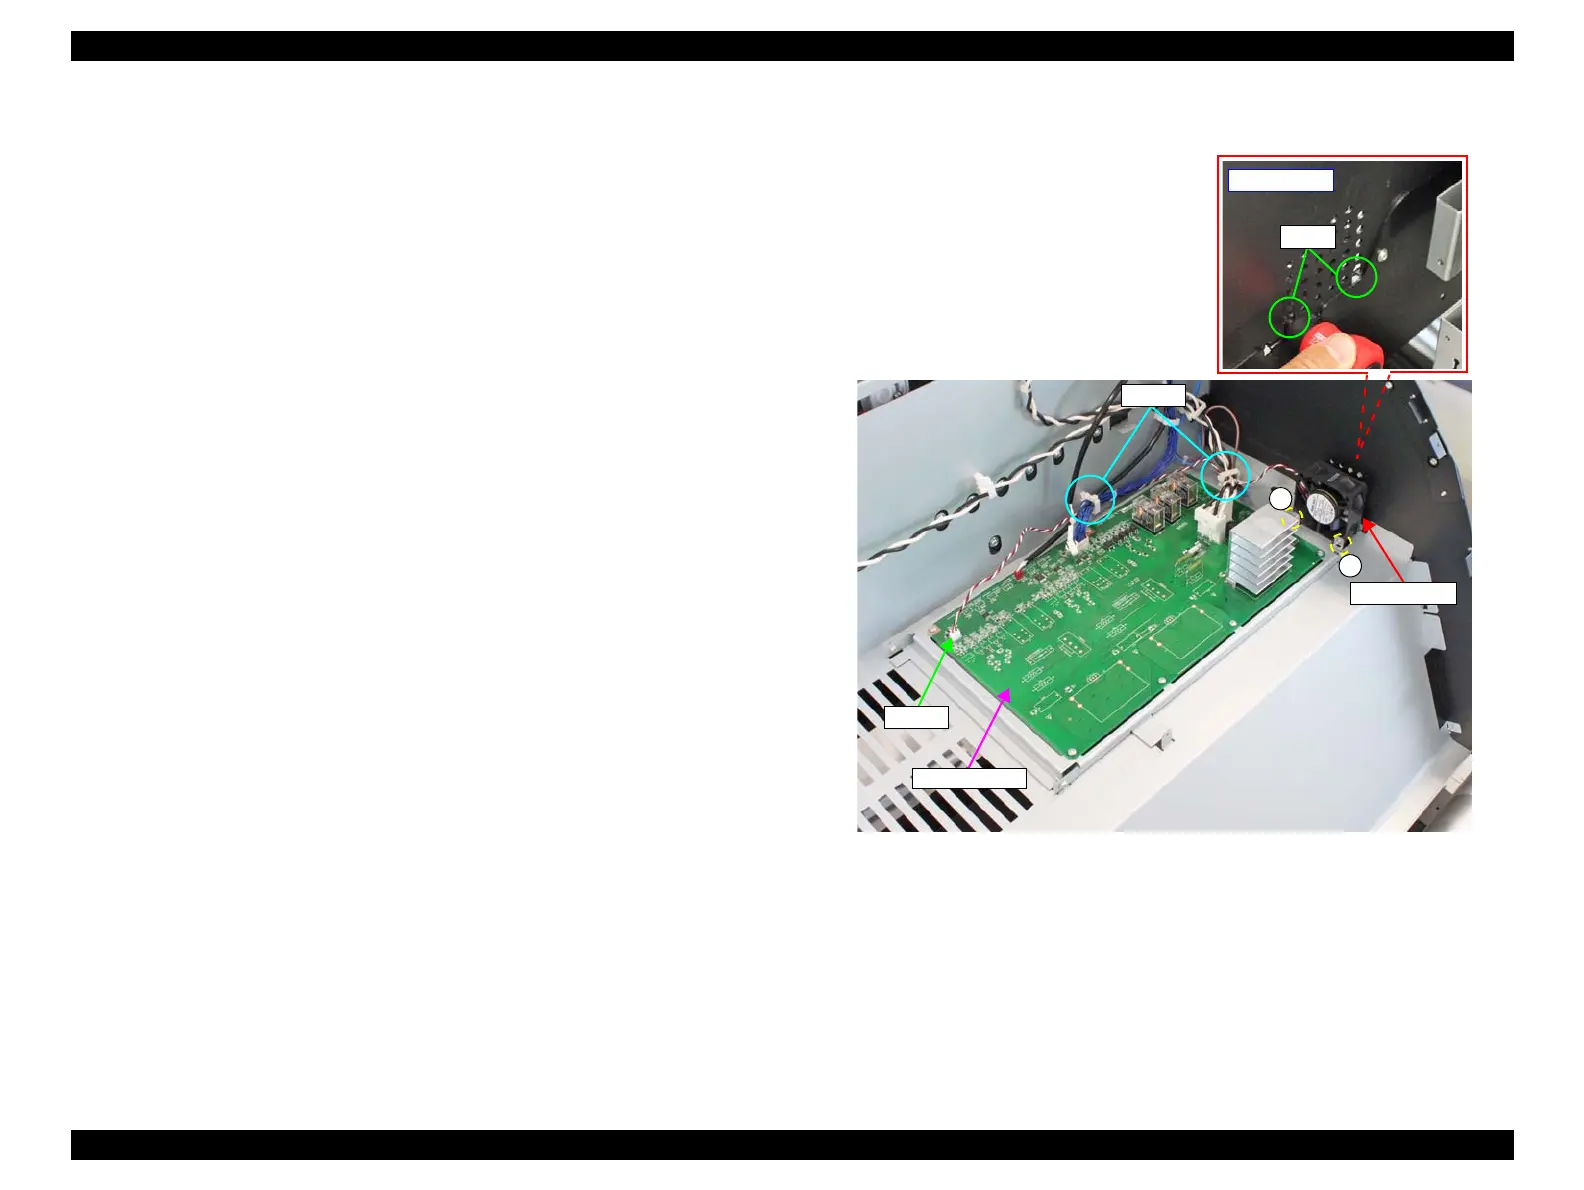
3.4.7.2 Cooling Fan
1. Remove the After Heater. (p233)
2. Remove the Heat Shield Assy. (p207)
3. Remove the Lower Ink Holder. (p106)
4. Remove the Sub-E Board Cover. (See Step 2 in “3.4.4.6 Sub-E Board” (P.
133)
)
5. Disconnect the cable of the Cooling Fan from the connector (CN518) on the Sub-E
Board.
6. Release the cable of the Cooling Fan from the two clamps.
7. Insert the stubby screwdriver through the holes on the frame at the Cooling Fan
side to remove the two screws that secure the Cooling Fan, and remove the
Cooling Fan.
A) Silver M3x22 S-tite screw: 2 pcs
Figure 3-188. Removing the Cooling Fan
Clamps
Cooling Fan
Sub-E Board
A
A
CN518

 Loading...


