SC-F9200 Series Revision B
DISASSEMBLY & ASSEMBLY Disassembly and Assembly Procedure 257
SE Group Confidential (Related Staff Only)
3.4.10.5 Drying Fan
1. Remove the Drying Fan Unit. (p252)
2. Remove the Drying Fan Cover. (p254)
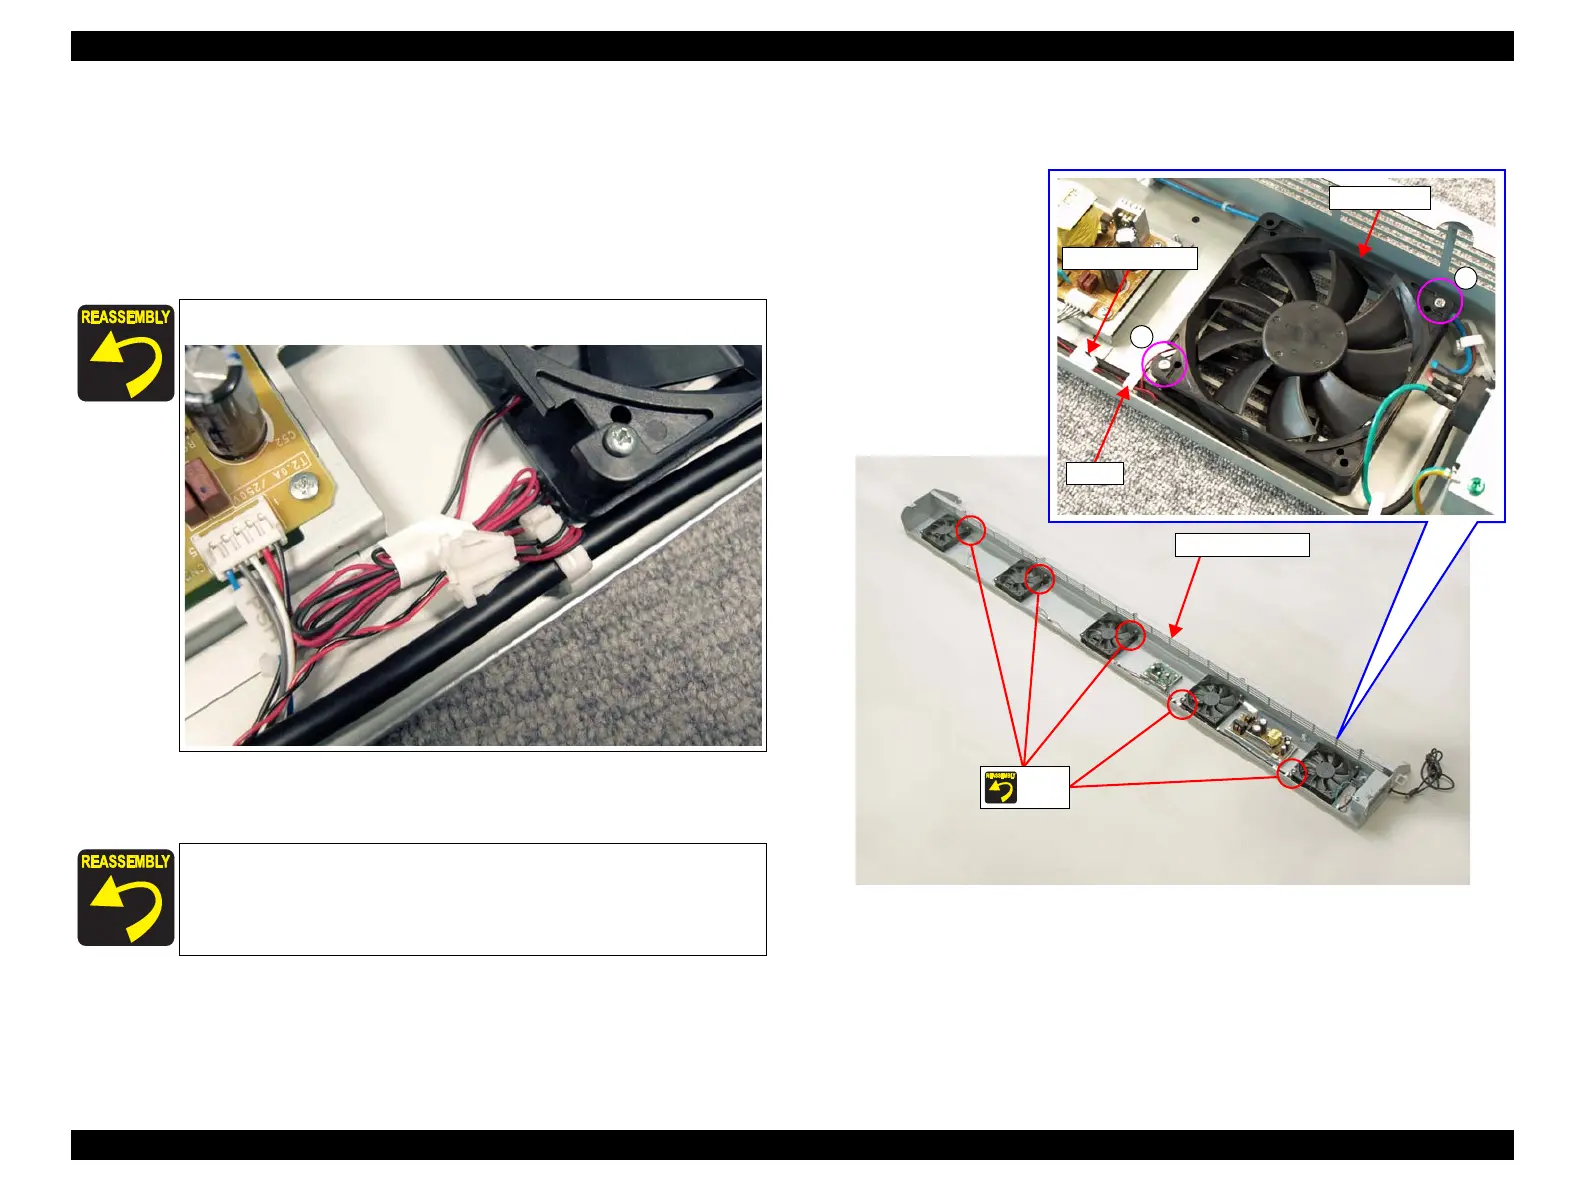
3. Disconnect the cables of the Drying Fan from the relay connector.
4. Release the cables from the clamp.
5. Remove the two screws, and remove the Drying Fan.
A) Silver M3x30 screw: 2 pcs
Figure 3-215. Removing the Drying Fan
Route the cables as shown below.
Make sure to install the Drying Fan in the correct orientation
checking the cable position.
A
A
Relay Connector
Drying Fan
Clamp

 Loading...


