B
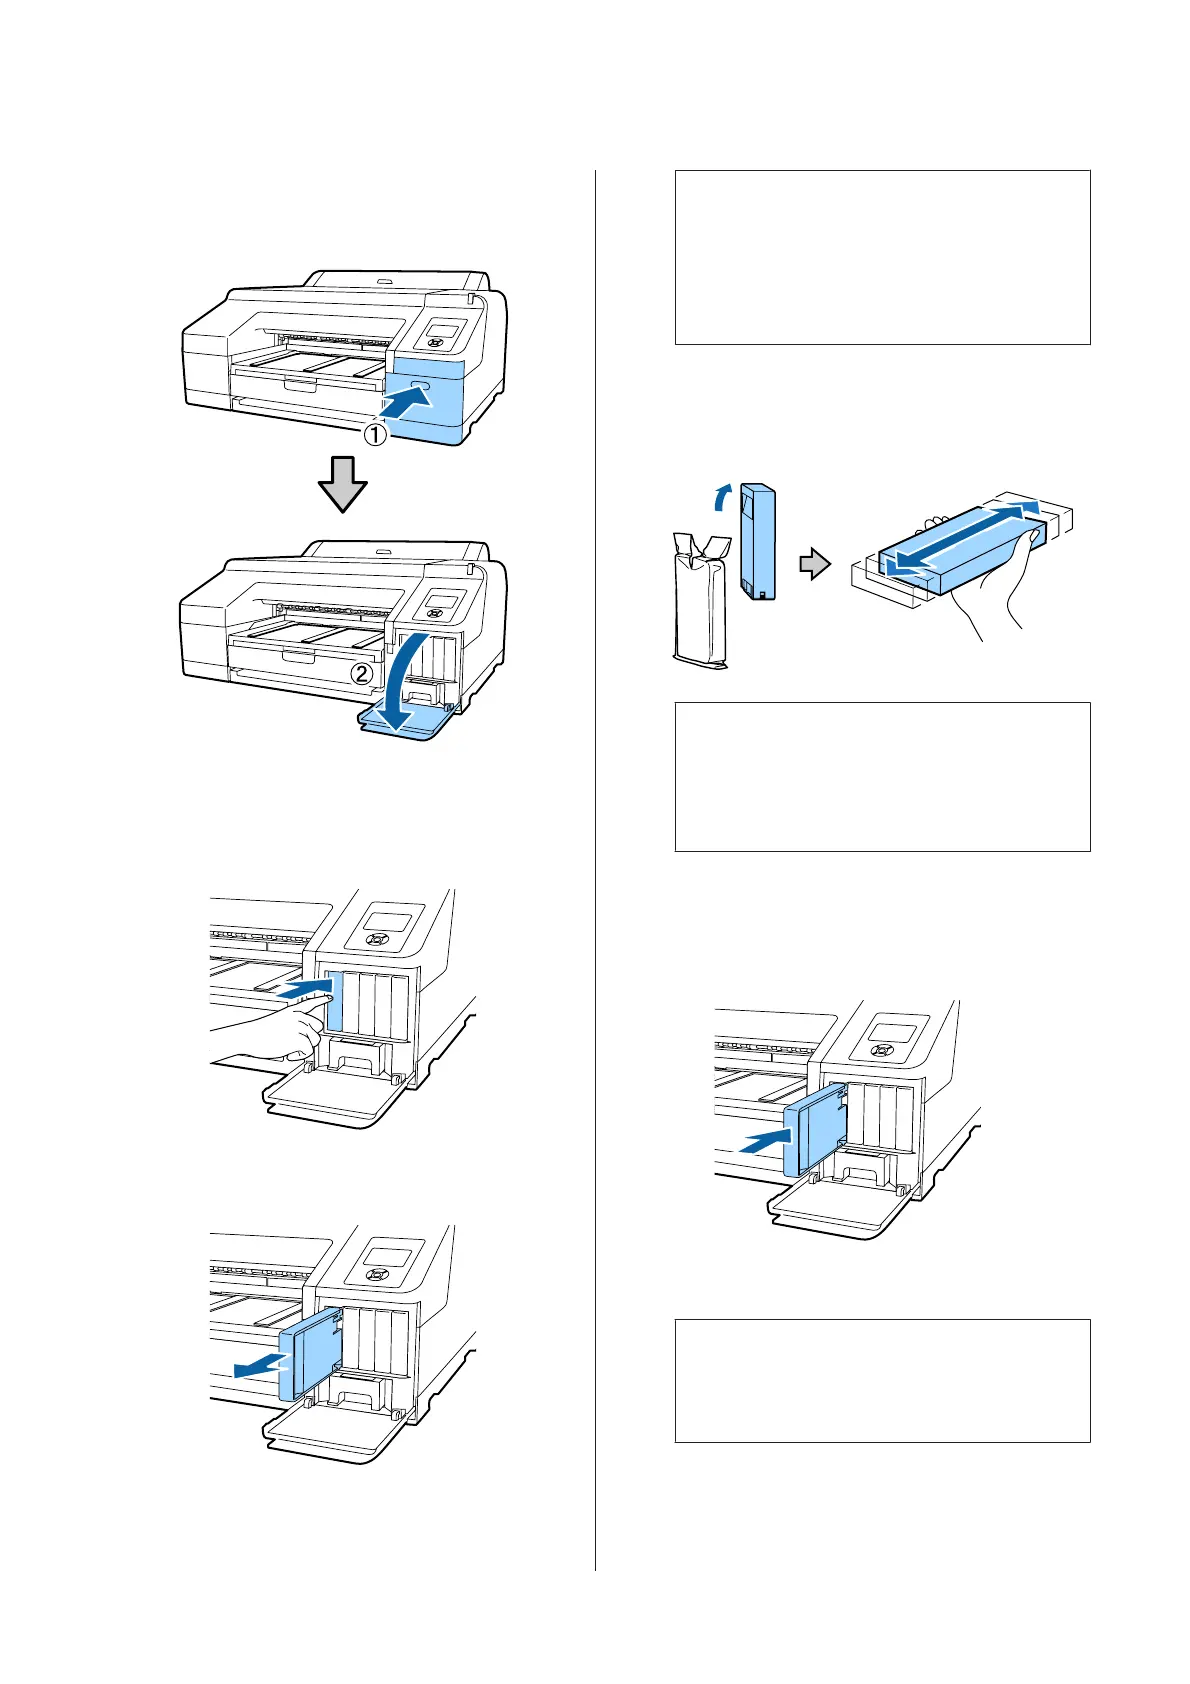
Open the cartridge cover.
Press the groove in the cartridge cover to open
the cover.
C
Push back the ink cartridge that you want to
replace.
You will hear a click and the ink cartridge pops
out slightly.
D
Carefully pull the cartridge straight out of the
slot.
c
Important:
Removed ink cartridges may have ink
around the ink supply port, so be careful not
to get any ink on the surrounding area when
removing the cartridges.
E
Remove the new ink cartridge from the bag.
Shake the ink cartridge for 5 seconds, 15 times
horizontally in approximately 5 cm movements
as shown in the illustration.
c
Important:
Do not touch the IC chips on the ink
cartridges. You may not be able to print
properly.
F
With the u mark on the ink cartridge facing
up, press it in until you hear it click.
Match the ink cartridge color with the color
label on the back of the cartridge cover.
Repeat steps 3 to 6 to replace other ink cartridges.
c
Important:
Install all ink cartridges into each slot. You
cannot print if any of the slots are empty.
SC-P5000 Series User's Guide
Maintenance
131

 Loading...