EPSON Stylus CX3100/3200 Revision A
Disassembly and Assembly Scanner Unit Disassembly 42
4.3.3 Motor Unit Removal
1. Remove the scanner unit. (Refer to “Scanner Unit Removal” on page 38)
2. Remove the hinge. (See “Hinge Removal” on page 40)
3. Remove the upper housing. (See “Upper Housing Removal” on page 41)
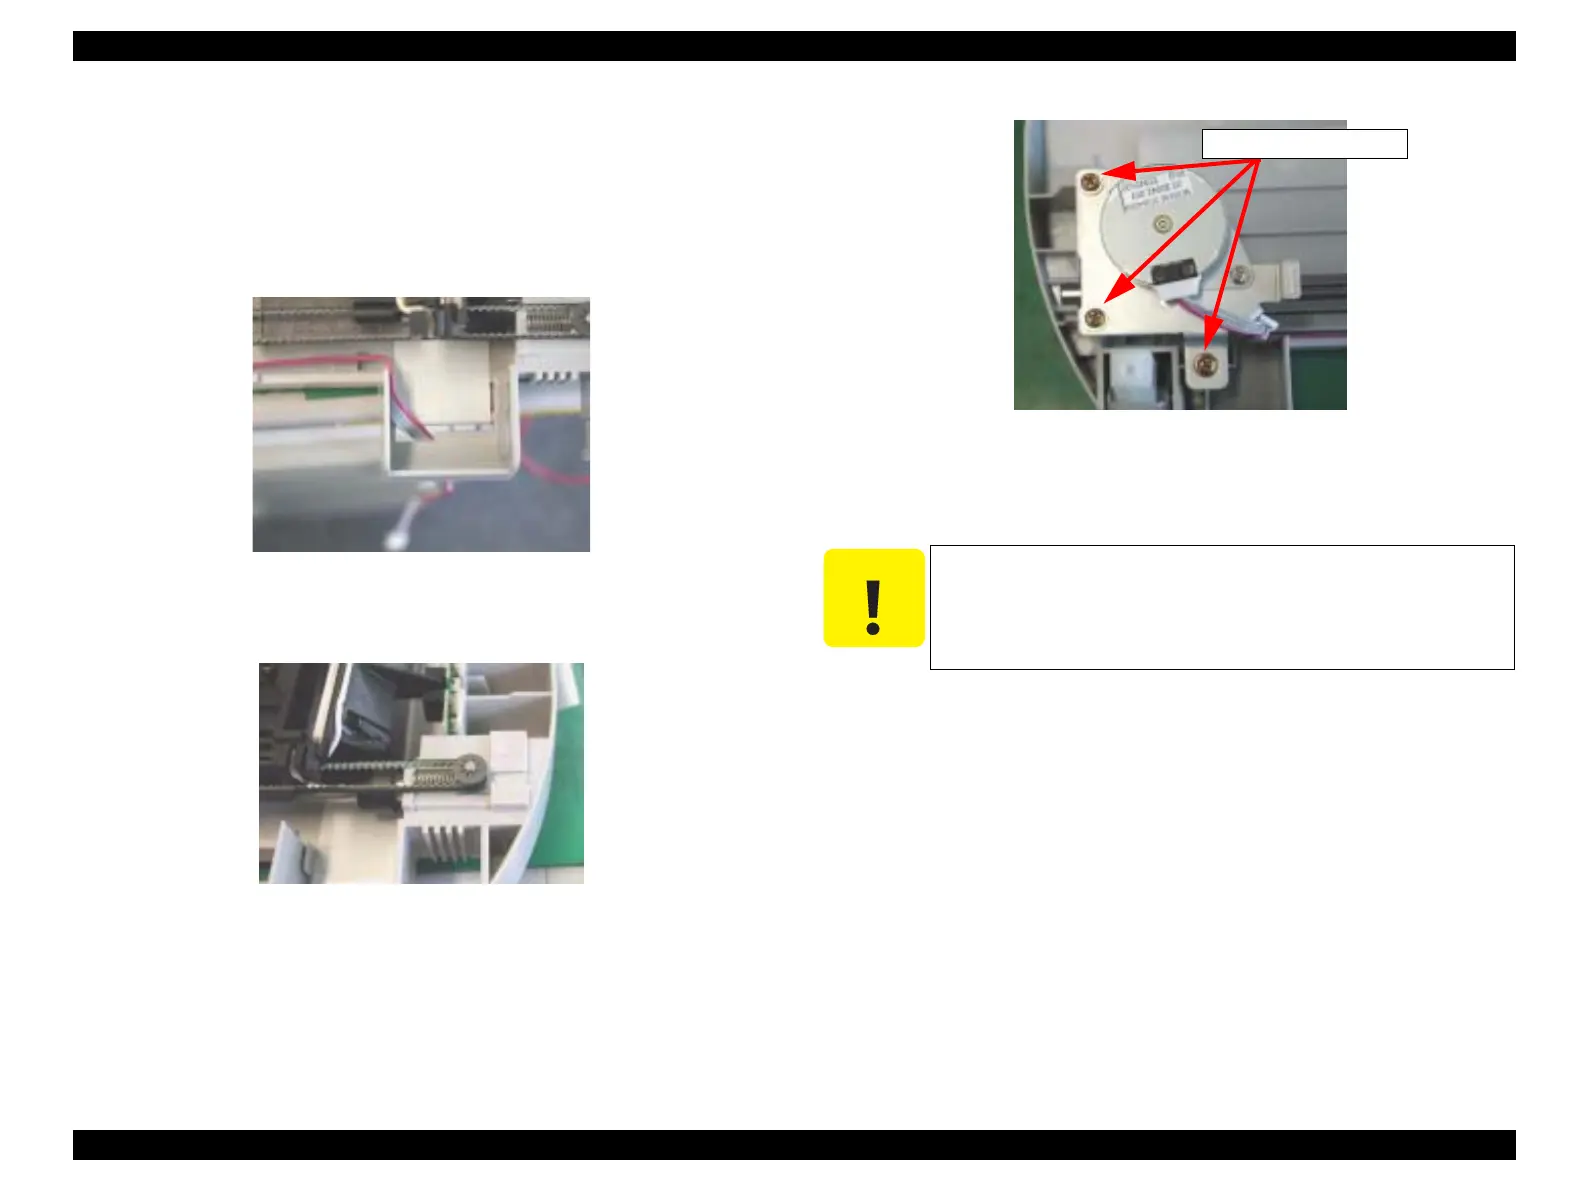
4. Disconnect the motor harness from the lower housing.
Figure 4-12. Motor Harness
5. Loosen the timing belt by pushing the driven pulley and remove the timing belt.
Figure 4-13. Driven Pulley for Timing Belt
6. Remove the three screws (CCP-Tite 3x8 F/Zb) securing the motor bracket to the lower
housing.
NOTE: Screw tightening torque: TBD
Figure 4-14. Screws securing the Motor Unit
7. Remove the motor unit.
C A U T I O N
Lead the harness of the motor along the groove in the lower
housing without floating.
CCP-Tite 3x8F/Zn
 Loading...