EPSON Stylus CX3100/3200 Revision A
Adjustment Overview 58
5.1 Overview
This Chapter describes the necessary adjustment items and adjustment procedures for
applicable Unit / Parts.
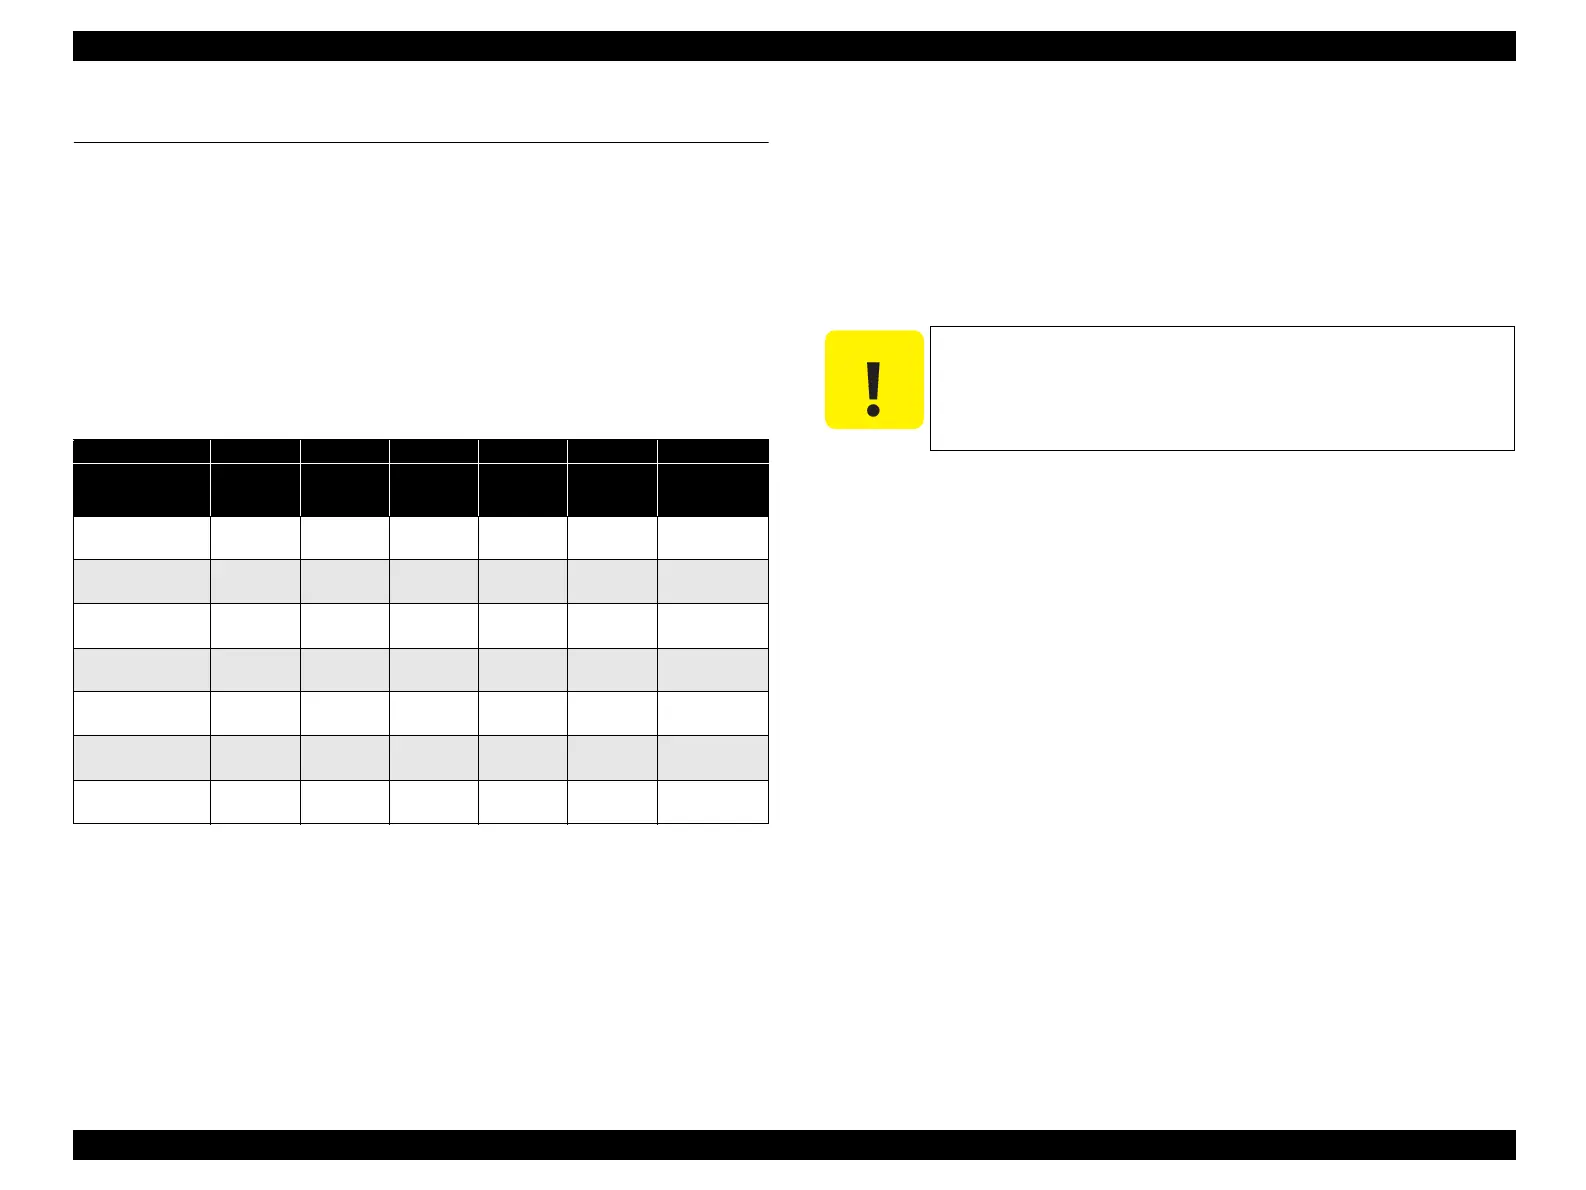
5.1.1 Printer Mechanism Adjustment Items
The adjustment items for this product are as indicated below. When performing any of
these adjustments, be sure to execute all the related items so that this product operates
normally.
Note 1: { mark shows that adjustment work is necessary. The circled figures indicate the order
in which the adjustment work is to be carried out.
2: The following adjustment is not necessary for this product.
•
Head Slanting Adjustment
This section shows details of each Adjustment Process according to Adjustment
Program.
Adjustment Information for each Printer Mechanism needs to be set for this product in
order to maintain reliable printing function and print quality for each printer
mechanism. Accordingly, once the Printer Mechanism, Main Board or Print Head has
been replaced, it is necessary to set and save the correct information of the mechanism
into the Main Board by using the Adjustment Program.
Table 5-1. Mechanism Adjustment Items
1 2 3 4 5 6
Adjust contents
Firmware
upload
Head ID
input
Ink filling
Bi-D
adjust
USB-ID
input
Protect
counter reset
Head removal
Not
applicable
Not
applicable
Not
applicable
c
Not
applicable
Not applicable
Head replace
Not
applicable
c d e
Not
applicable
Not applicable
Main board
replacement
cc
Not
applicable
de
Not applicable
CR unit replace/
removal
Not
applicable
Not
applicable
Not
applicable
d
Not
applicable
Not applicable
CR motor replace
Not
applicable
Not
applicable
Not
applicable
c
Not
applicable
Not applicable
Printer mechanism
replace
Not
applicable
c d e
Not
applicable
Not applicable
Waste ink porous
pad replace
Not
applicable
Not
applicable
Not
applicable
Not
applicable
Not
applicable
c
C A U T I O N
During execution of the Adjustment Program, be sure to turn off
the power to the printer when parts are to be removed and
installed.
 Loading...