EPSON Stylus CX3100/3200 Revision A
Disassembly and Assembly Disassembly of Printer 50
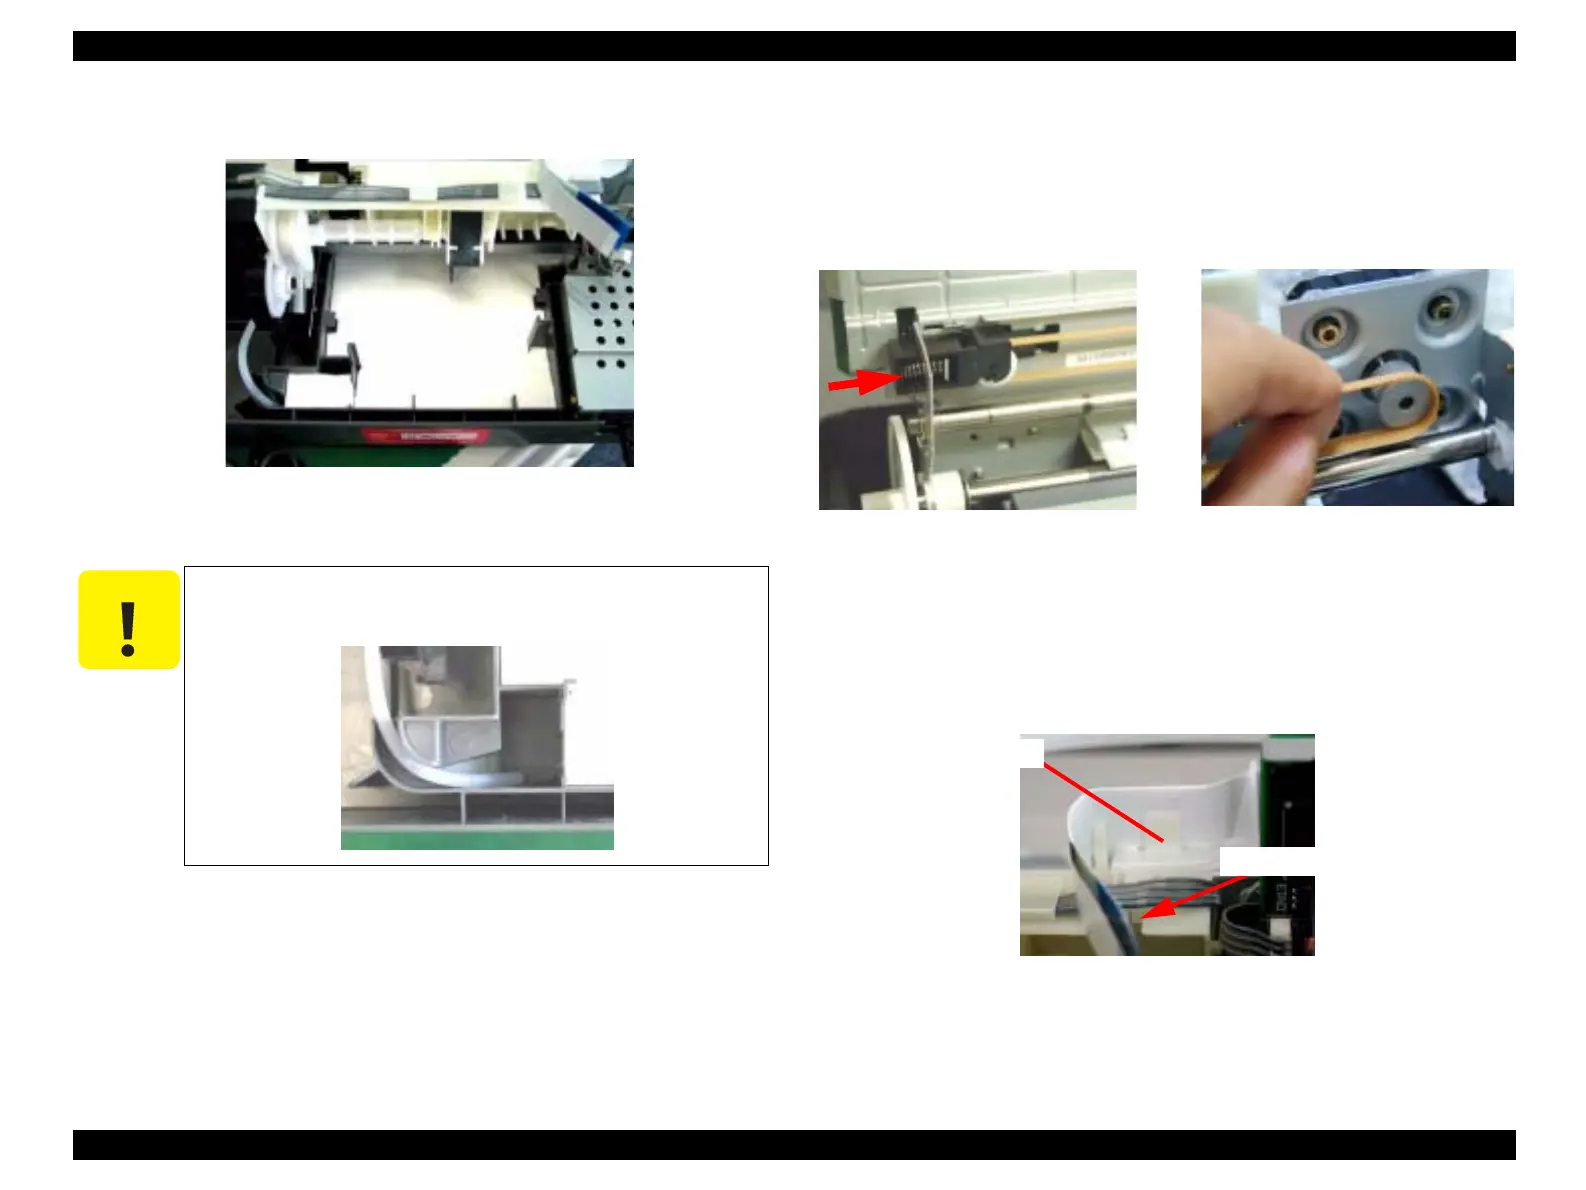
5. Remove the Waste Ink Pad.
Figure 4-29. Removing the Waste Ink Pad
4.4.5 CR Motor Removal
1. Remove the Middle Housing. (See “Middle Housing Removal” on page 44.)
2. Loosen the timing belt by pushing the driven pulley holder at the left end of the printer
mechanism and remove the timing belt from the CR Motor pinion.
Figure 4-30. Removing the Timing Belt
3. Disconnect the motor lead wires from the connector (CN14) on the Main Board.
4. Disconnect the Print Head FFC from the connectors (CN8 and CN9) on the Main
Board.
5. Disengage the one hook with which the FFC Spacer fastens the clamp to the Holder
Shaft Unit and remove the clamp upward.
Figure 4-31. Removing the FFC Clamp
C A U T I O N
When installing the Tube Holder Waste Ink Pad, make certain that
the tube is placed in the Porous Pad Tray.
FFC Spacer
Hook
 Loading...