92
Paper Layout Settings
To use die-cut labels or receipt paper with black marks with this printer, you must set a paper
layout according to the type and dimensions of the paper. Perform automatic settings (page 92
)
and then set the paper layout.
In addition, if a paper layout error occurs, you can dismiss the error and at the same time set a
new paper layout.
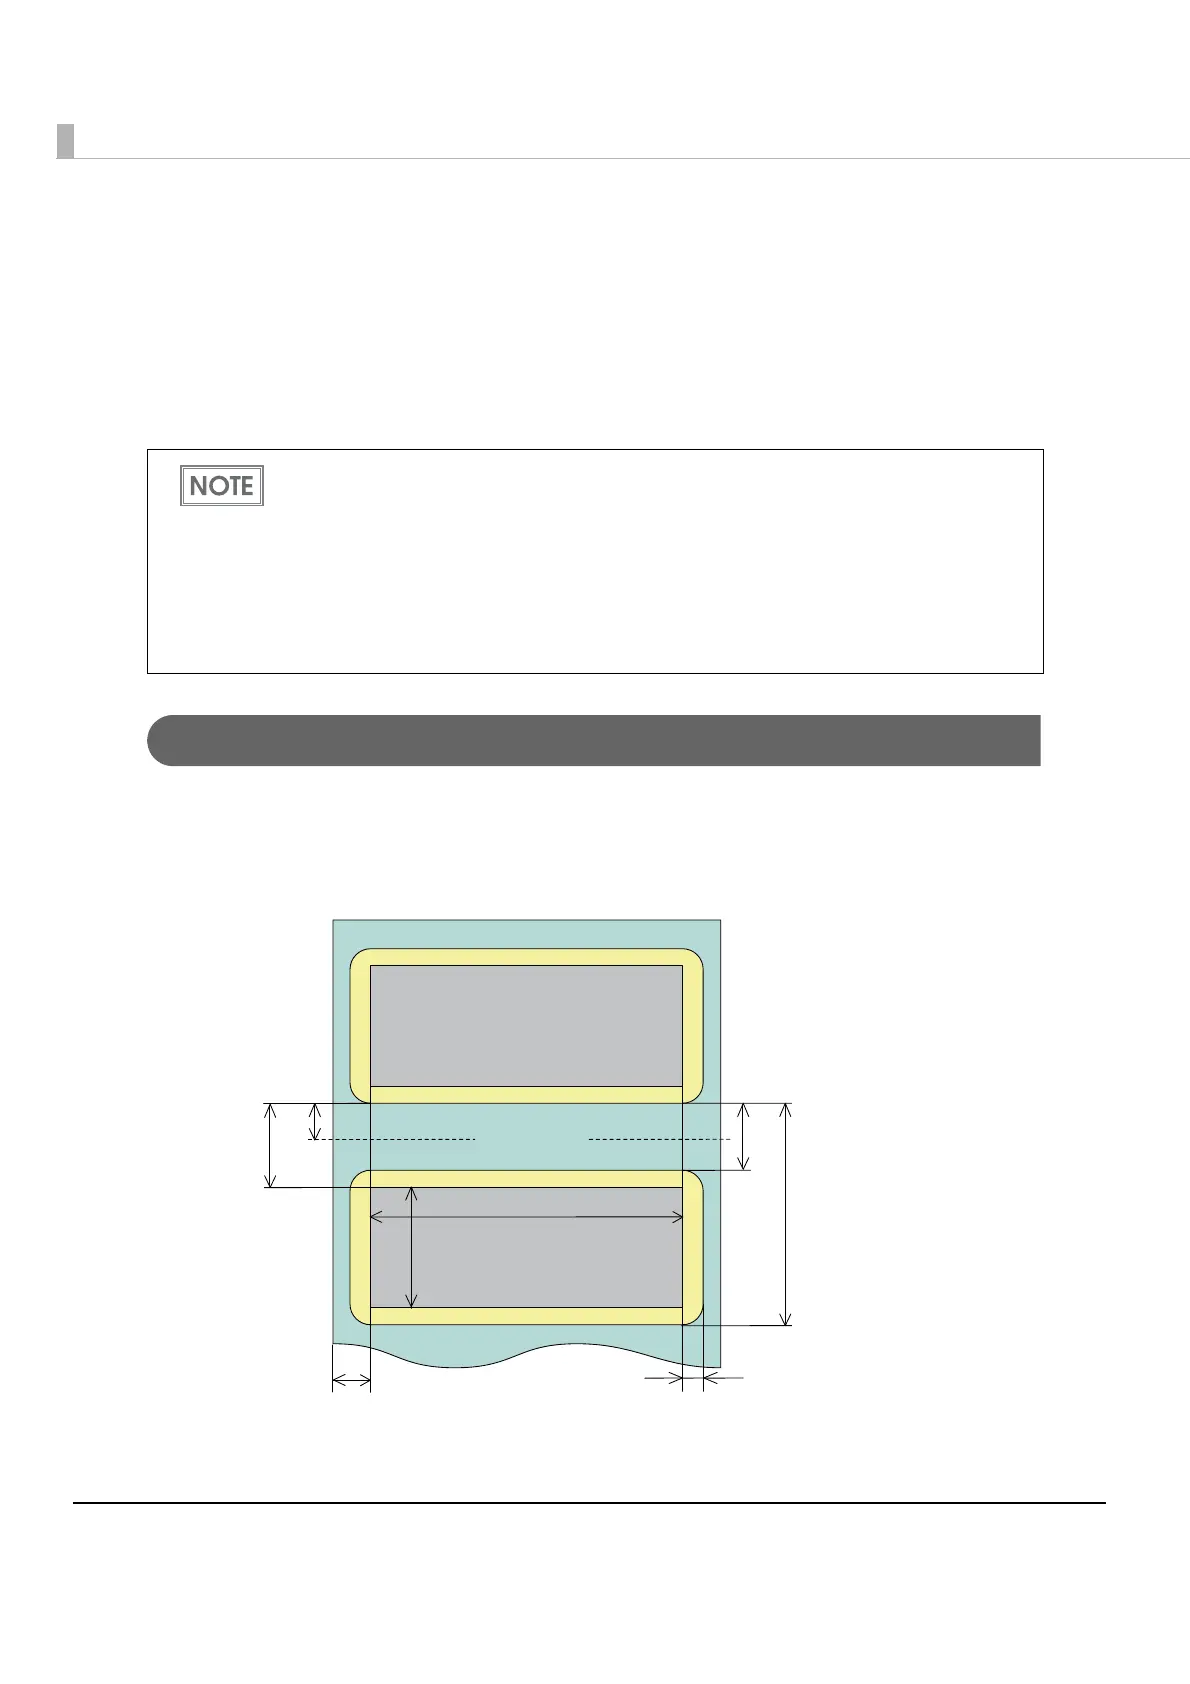
Automatic paper layout settings
If you use the following procedure to perform an automatic setting of paper layout, the printer
will automatically determine the type of the loaded paper. If the loaded paper is die-cut label
paper (without black marks) or receipt paper (with black marks), the intervals between labels or
black marks are measured and then the paper layout is set and saved as shown below.
•L1 (Measured by the printer): Label length + L2
• L2(Measured by the printer): Label length
In the initial settings, no paper layout is set.
When using full-surface label paper or receipt paper, it is not necessary to set a paper
layout.
Manual settings, possible by executing commands, allow more detailed settings than
when using automatic settings. For more information about commands, see the "ESC/
POS Application Programming Guide".
When using die-cut labels with black marks, automatic paper settings are not performed.
Make these settings manually.
L3
L4
Print area
Cut Position
L2
L1
L6
2.8mm or more
 Loading...