Chapter 3 Application Development Information
89
3
Setting the memory switch
Follow the steps below to run this mode.
Enter the memory switch setting mode.
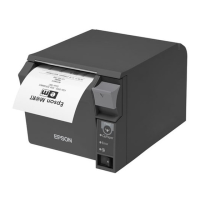
1. Check that the roll paper is set and that the printer is turned off.
2. While pressing the Feed button, turn on the printer. Keep pressing the Feed button until the printer
starts printing.
3. When the printer finishes printing the printer status, press the Feed button. Keep pressing the Feed
button until the printer starts printing.
4. Press the Feed button three times.
5. Then press the Feed button. Keep pressing the Feed button until the printer starts printing.
The printer starts printing instructions for settings. Follow the instructions.
Select the setting item
Select the setting item by the number of times the Feed button is pressed as follows.
When the Feed button is not pressed (0 times) or it is pressed more than 12 times, this mode finishes.
❏ 1: Print Current Settings
❏ 2: Print Density
❏ 3: Serial Interface Settings
❏ 4: Automatic Paper Reduction
❏ 5: Auto Paper Feed&Cut at
cover close
❏ 6: Default Character
❏ 7: Embedded Font Replacement
❏ 8: Interface Selection
❏ 9: USB Interface Settings
❏ 10: Printing Speed
❏ 11: Other Settings
When the button is pressed
less than or more than
shown on the left, the set-
ting has not been changed.
Set the conditions
You can make settings for each condition per setting item by the number of times the Feed button is
pressed.
❏ Print Current Settings
❏ Print Density (page 90)
❏ Serial Interface Settings (page 90)
❏ Automatic Paper Reduction (page 90)
❏ Auto Paper Feed&Cut at cover close (page 90)
❏ Default Character (page 91)
❏ Embedded Font Replacement (page 91)
❏ Interface Selection (page 91)
❏ USB Interface Settings (page 91)
❏ Printing Speed (page 92)
❏ Other Settings (page 92)
Finish the memory switch setting mode
Turn off the printer. Print out the new settings and save them to the NV memory. Software is reset, and the
printer is ready to print.
 Loading...