30
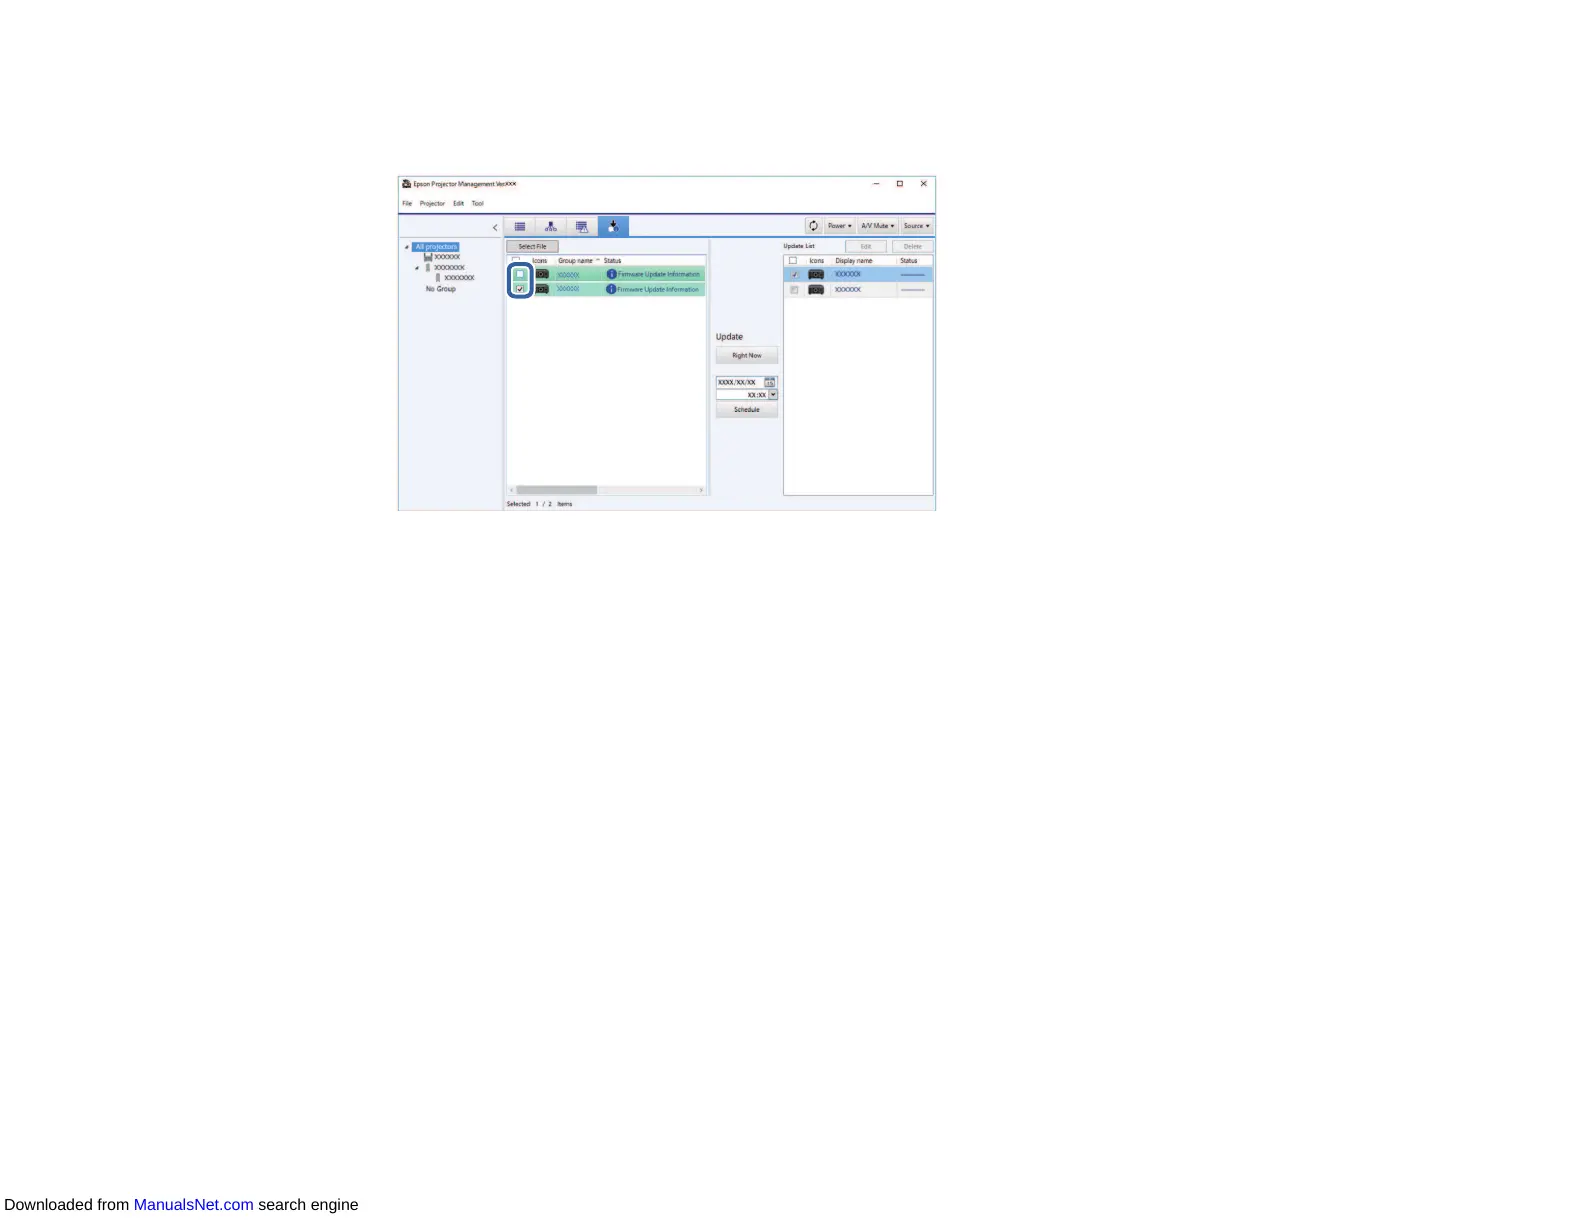
2. Select the projector you want to update. You can select multiple projectors or all projectors by
selecting checkboxes as necessary.
3. Select one of the following methods to update the firmware.
• Click Right Now to start the firmware update immediately.
• Set the date and time you want to perform the firmware update, and then click Schedule to
schedule the update.
The update schedule is displayed on the right pane of the Update List view.
Note:
• To change the update schedule, select the schedule on the right pane and click Edit.
• To delete the update schedule, select the schedule on the right pane and click Delete.
• You can view up to 500 schedules on the right pane of the Update List view. When the number of
schedules exceeds 500, schedules are deleted as necessary beginning with the oldest schedule.
• To delete all completed schedules, right-click at any point on the right pane and select Delete Old
Schedules.
The firmware is updated at the date and time you set, and the LED indicator on the projector turns on.
When the firmware update is complete, the projector turns off and it enters standby mode. While
updating, you can check the firmware update status on the right pane of the Update List view.
Downloaded from ManualsNet.com search engine