EasyManuals Logo

Epson WF-C20590 Installation Guide

Epson WF-C20590
60 pages
To Next Page IconTo Next Page
To Previous Page IconTo Previous Page
Page #39 background imageLoading...
Page #39 background image
WF-C20590 Installation Guide
Installing the Optional Units 37
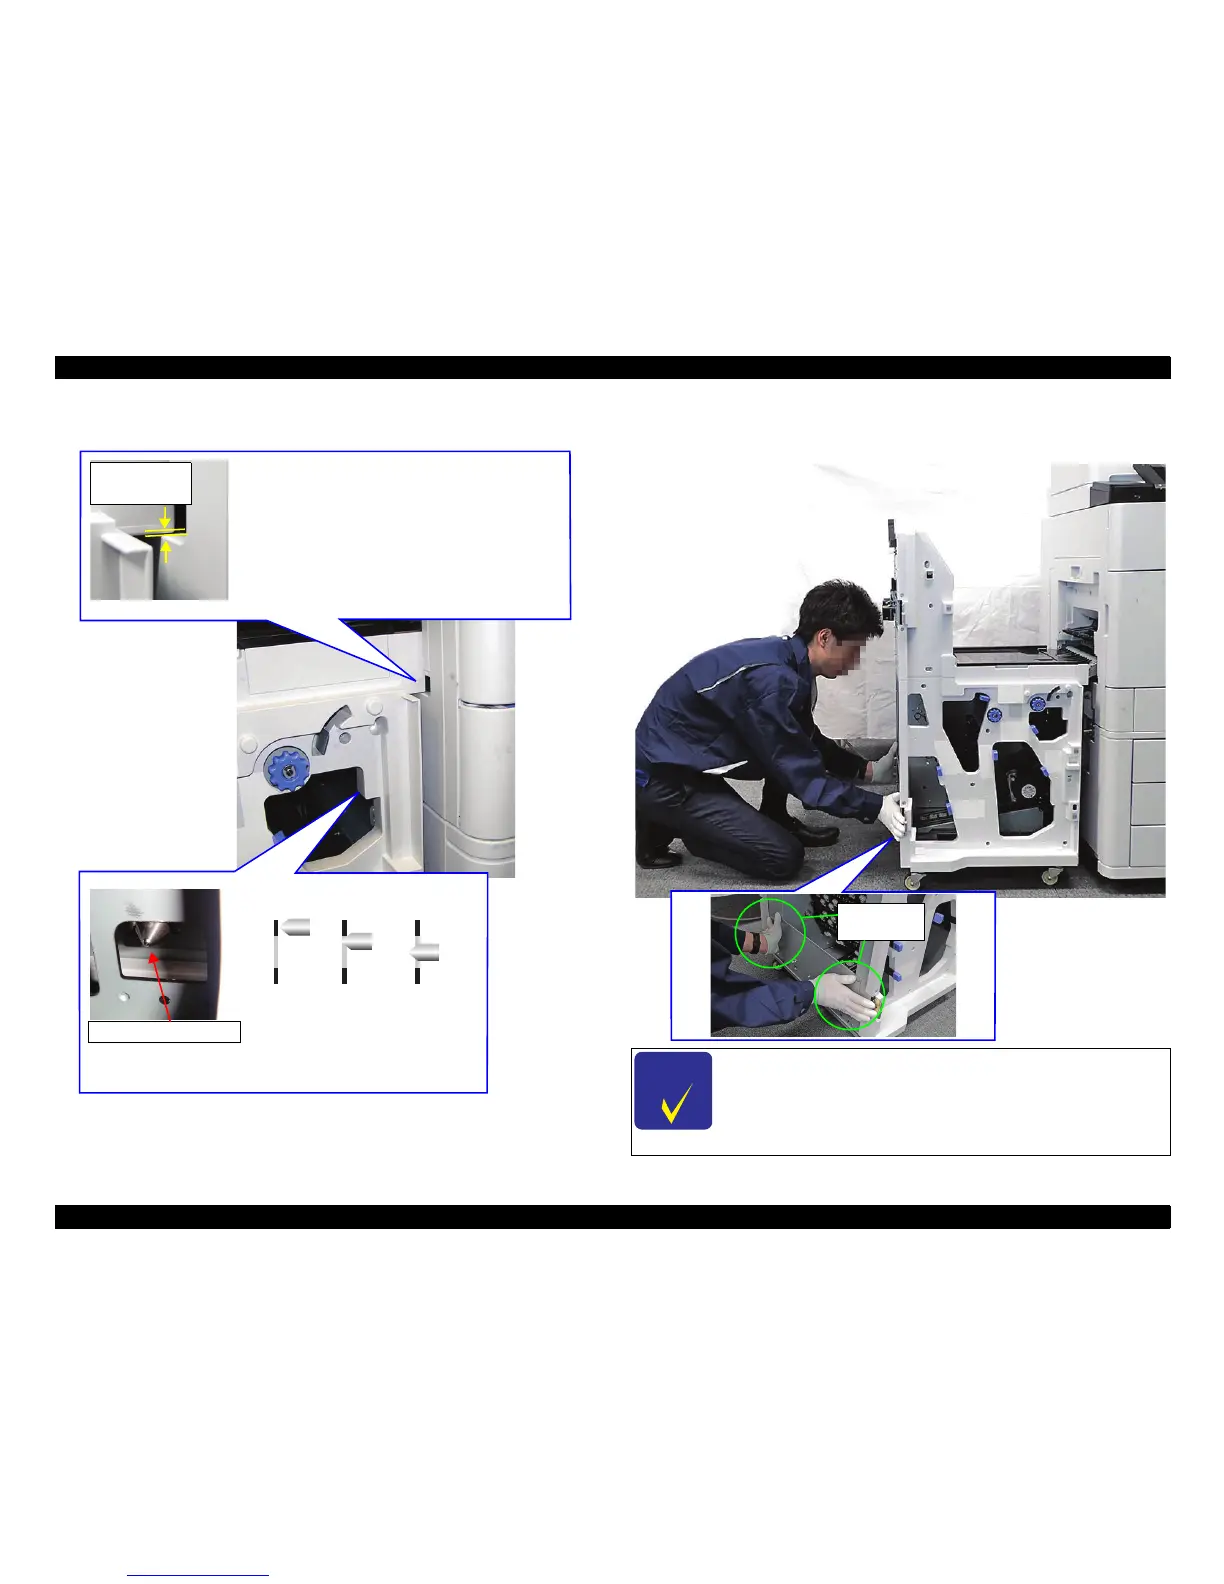
21. After aligning the Bridge Unit with the printer, check the following: 22. Push the Bridge Unit into the printer to connect them.
0.12 in (3 mm)
or less
The gap between the bottom of the EJ Unit
cutout and the bottom of the Bridge Unit paper
insertion portion must be 0.12 in (3 mm) or less.
(Depending on the flooring of the installation site,
the printer may sink and cause a gap larger than
0.12 in [3 mm]. In this case, adjust the height by
adjusting the casters [see Step 27].)
Joint Hook Guide Pin
NG NGOK
The tip of the Joint Hook Guide Pin must touch the upper
edge of the Cutout of the Bridge Unit.
C H E C K
P O I N T
When performing this step, you should feel slight resistance
because the Bridge Unit plate makes contact with the tip of
the Joint Hook Guide Pin. If you do not feel resistance, the
Bridge Unit height may be too high. Check the points in
Step
21
again.
Put your
hands here
PRELIMINARY

Table of Contents

Other manuals for Epson WF-C20590

Questions and Answers:

Question and Answer IconNeed help?

Do you have a question about the Epson WF-C20590 and is the answer not in the manual?

Epson WF-C20590 Specifications

General IconGeneral
ConnectivityUSB, Ethernet, Wi-Fi, Wi-Fi Direct
ADF Capacity150 sheets
Monthly Duty CycleUp to 400, 000 pages
CategoryAll in One Printer
FunctionsPrint, Copy, Scan, Fax
Duplex PrintingYes
Print TechnologyPrecisionCore
Print SpeedUp to 100 ppm (black/color)
Print Resolution600 x 2400 dpi
Scanner TypeColor flatbed/ADF
Scan Resolution600 dpi
Ink CartridgesBlack, Cyan, Magenta, Yellow
Display9-inch touchscreen

Related product manuals