EasyManuals Logo

Epson WF-C20590 Installation Guide

Epson WF-C20590
60 pages
To Next Page IconTo Next Page
To Previous Page IconTo Previous Page
Page #40 background imageLoading...
Page #40 background image
WF-C20590 Installation Guide
Installing the Optional Units 38
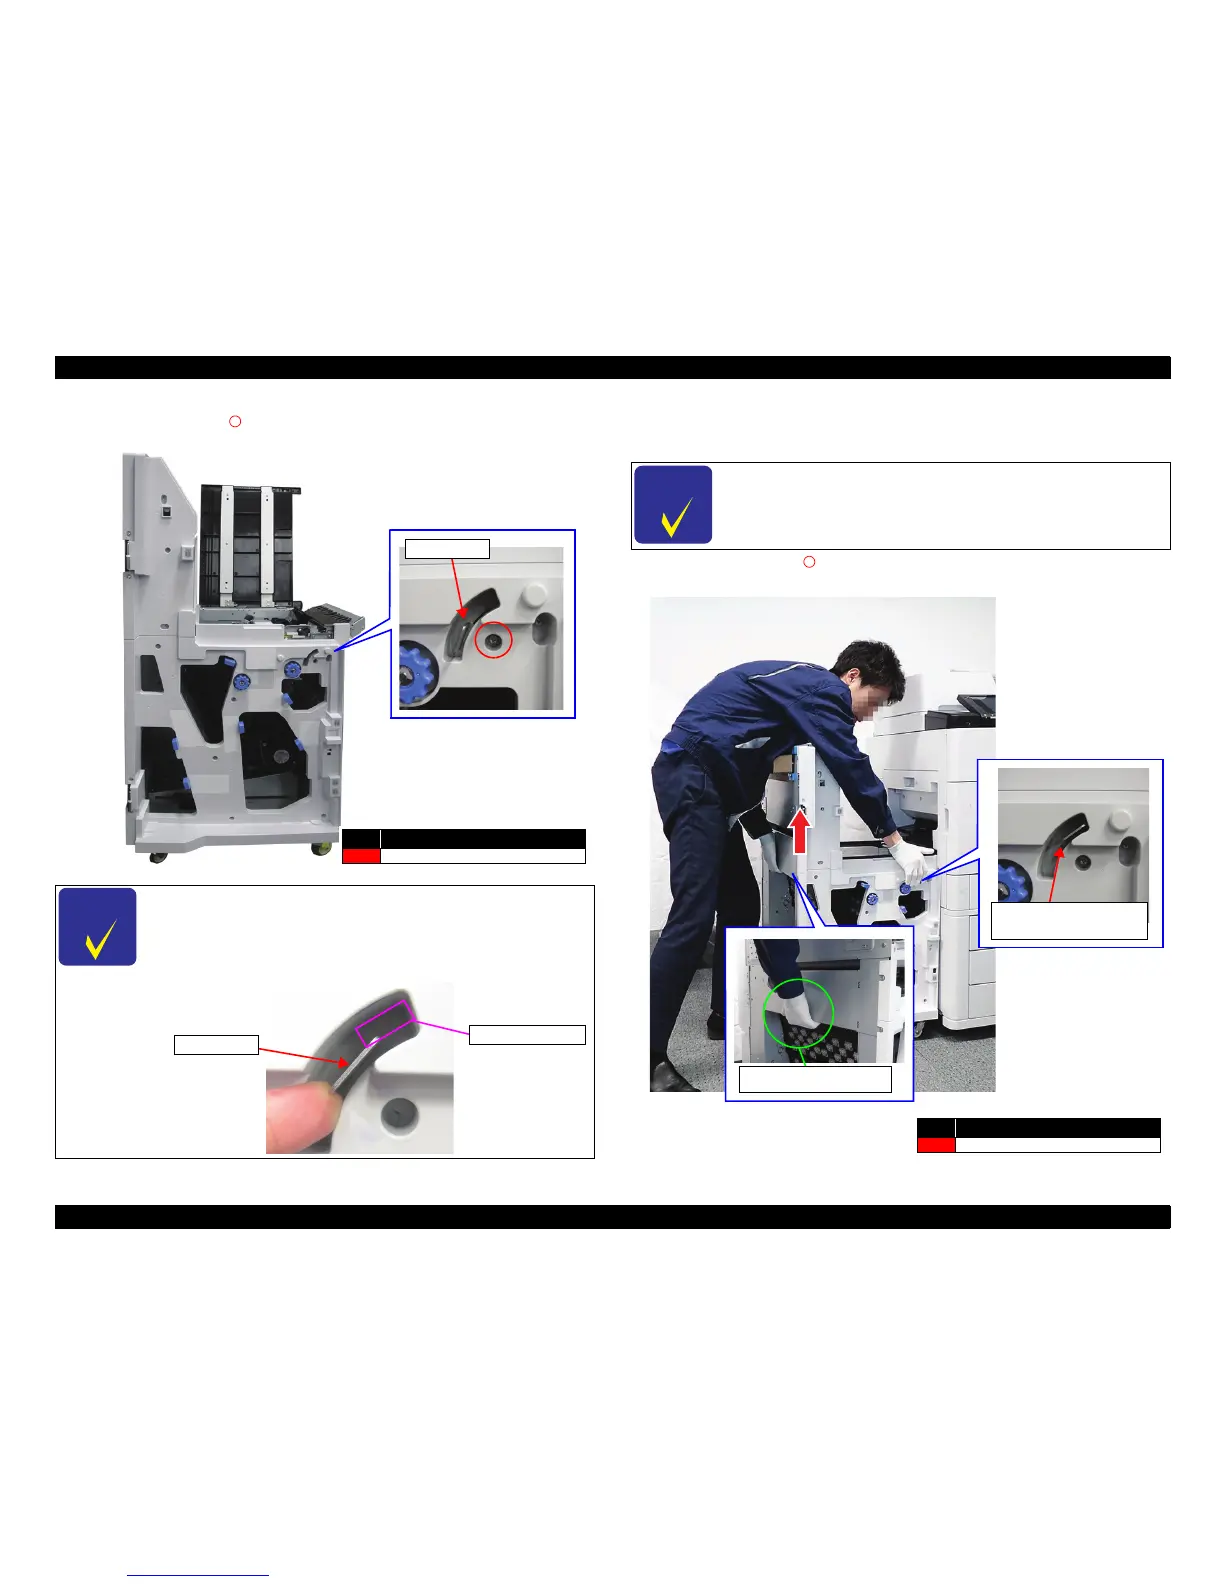
23. Remove the screw (S1: ) that secures the Lock Lever. 24. Put your hand on the left side of the Bridge Unit, and lift the unit slightly until the
Lock Lever is positioned at the lock position.
25. Replace the screw (S1: ) to secure the Lock Lever.
C H E C K
P O I N T
Do not attempt to move the Lock Lever until after you have
adjusted the height of the Bridge Unit. In the next step, adjust the
position of the Bridge Unit to secure the Joint Hooks and lock the
Bridge Unit.
Lock Lever
No. Screw type
S1 C.B.S-TITE R, SCREW, 3X8, F/ZN-3C
Lock Lever
Locked position
C H E C K
P O I N T
When the Lock Lever is moved to the lock position, the lever
stays at the center position even after you release your finger
from the lever.
No. Screw type
S1 C.B.S-TITE R, SCREW, 3X8, F/ZN-3C
Lock Lever
(locked position)
Place your hand here
PRELIMINARY

Table of Contents

Other manuals for Epson WF-C20590

Questions and Answers:

Question and Answer IconNeed help?

Do you have a question about the Epson WF-C20590 and is the answer not in the manual?

Epson WF-C20590 Specifications

General IconGeneral
ConnectivityUSB, Ethernet, Wi-Fi, Wi-Fi Direct
ADF Capacity150 sheets
Monthly Duty CycleUp to 400, 000 pages
CategoryAll in One Printer
FunctionsPrint, Copy, Scan, Fax
Duplex PrintingYes
Print TechnologyPrecisionCore
Print SpeedUp to 100 ppm (black/color)
Print Resolution600 x 2400 dpi
Scanner TypeColor flatbed/ADF
Scan Resolution600 dpi
Ink CartridgesBlack, Cyan, Magenta, Yellow
Display9-inch touchscreen

Related product manuals