ESAB CUTMASTER 80
Manual0-5396 INSTALLATION
3T-1
SECTION 3 TORCH:
INSTALLATION
3T.01 Torch Connections
Ifnecessary, connect the torch tothePowerSupply.
Connect only the model SL60 / Manual or SL100 / Me-
chanical Torch to this power supply. Maximum torch
leadslengthis100feet/30.5m,includingextensions.
WARNING
Disconnect primary power at the
source before connecting the torch.
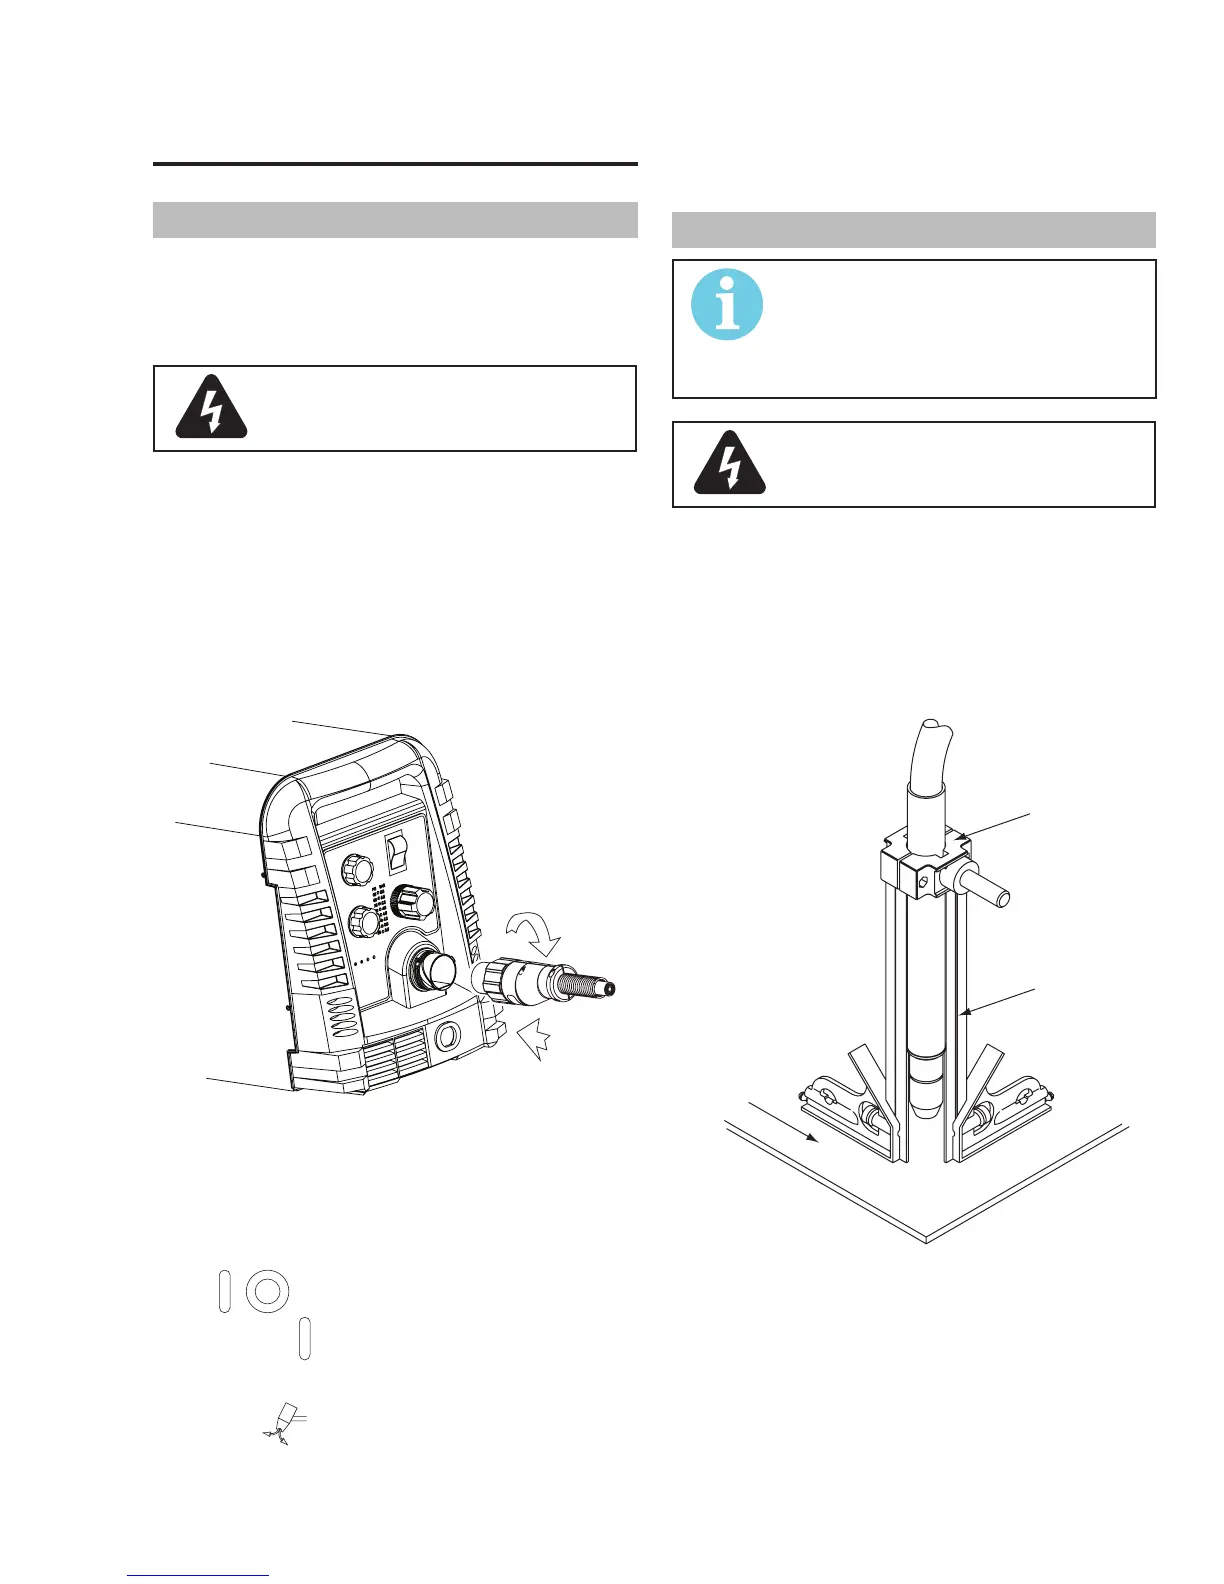
1. Align the ATC male connector (on the torch lead)
with the female receptacle. Push the male con-
nector into the female receptacle. The connec-
tors should push together with a small amount
of pressure.
2. Secure the connection by turning the locking nut
clockwiseuntilitclicks.DONOTusethelocking
nut to pull the connection together. Do not use
tools to secure the connection.
1
2
Art # A-07885
Connecting the Torch to the Power Supply
3. The system is ready for operation.
Check Air Quality
Totestthequalityofair:
1. / PuttheON/OFFswitchintheON(up)
position.
2. Put the Function Control switch in the SET posi-
tion.
3. Placeaweldinglterlensinfrontofthetorchand
turn on the air. Donotstartanarc!
Anyoilormoistureintheairwillbevisibleonthelens.
3T.02 Setting Up Mechanical Torch
NOTE!
An adapter is required to be installed
inthepowersupplyifconverting
a hand torch system to operate a
machine torch.
WARNING
Disconnect primary power at the
source before connecting the torch.
The mechanical torch includes a positioning tube with
rack and pinch block assembly.
1. Mount the torch assembly on the cutting table.
2. Toobtainacleanverticalcut,useasquareto
align the torch perpendicular to the surface of
the workpiece.
A-02585
Workpiece
Square
Pinch Block
Assembly
Mechanical Torch Set - Up
3. Thepropertorchparts(shieldcup,tip,startcar-
tridge,andelectrode)mustbeinstalledforthe
typeofoperation.RefertoSection4T.07,Torch
Parts Selection for details.