S2 Serial Number
The serial number for the fire can be found in two places. The first is in the battery compartment
of the wireless remote under the batteries. The second is on the data sticker on the chassis
under the firebox on the left hand side.
S3 Checking Operating Pressure
See section E14 on page 31 of this manual.
S4 Cleaning the Log Set and Glass
NEVER RUB THE FASCIA. The outside of the fascia’s must only be cleaned with a clean damp
cloth, dry o after cleaning. The high temp silver powder coating that is used on Escea fascia parts
contains certain amounts of aluminium that when rubbed too hard will oxidise leaving a black smudge
that cannot be removed. Always clean when cold.
This is a service procedure that will need to be carried out whenever soot builds up on logs and/
or inside of glass. If soot build up becomes excessive or regular then one of the following actions
may be required;
• Reset gas pressure, pressure may be too high;
• Reposition log set so that front edge of each log is just behind each row of holes in burner
top;
• Clear any blockage from primary air port of burner;
• Check flue tube is not damaged or disconnected.
For diagrams and further info on removing your fascia, reverse the steps found in section F on
page 34.
• Remove fascia bottom panel by pulling it o the magnets that retain it to the fire. Remove
the 2 screws holding the inner fascia, lift o the inner fascia by pulling the base of the inner
fascia out and lifting it up and o.
• Unscrew the side and top glass retainers and remove them. Take care that the glass does
not fall forwards at this stage.
• Lift out glass and place it carefully aside.
• Take out fuel bed and gently brush any soot from log with a soft hearth brush. The burner
tops can be vacuumed to remove any excess material.
• Clean the inside and outside of glass with normal glass cleaning products. Use a CLEAN
DRY cloth only. Stubborn marks may be cleaned with a ceramic glass cleaner.
• Replace in opposite order and test run heater.
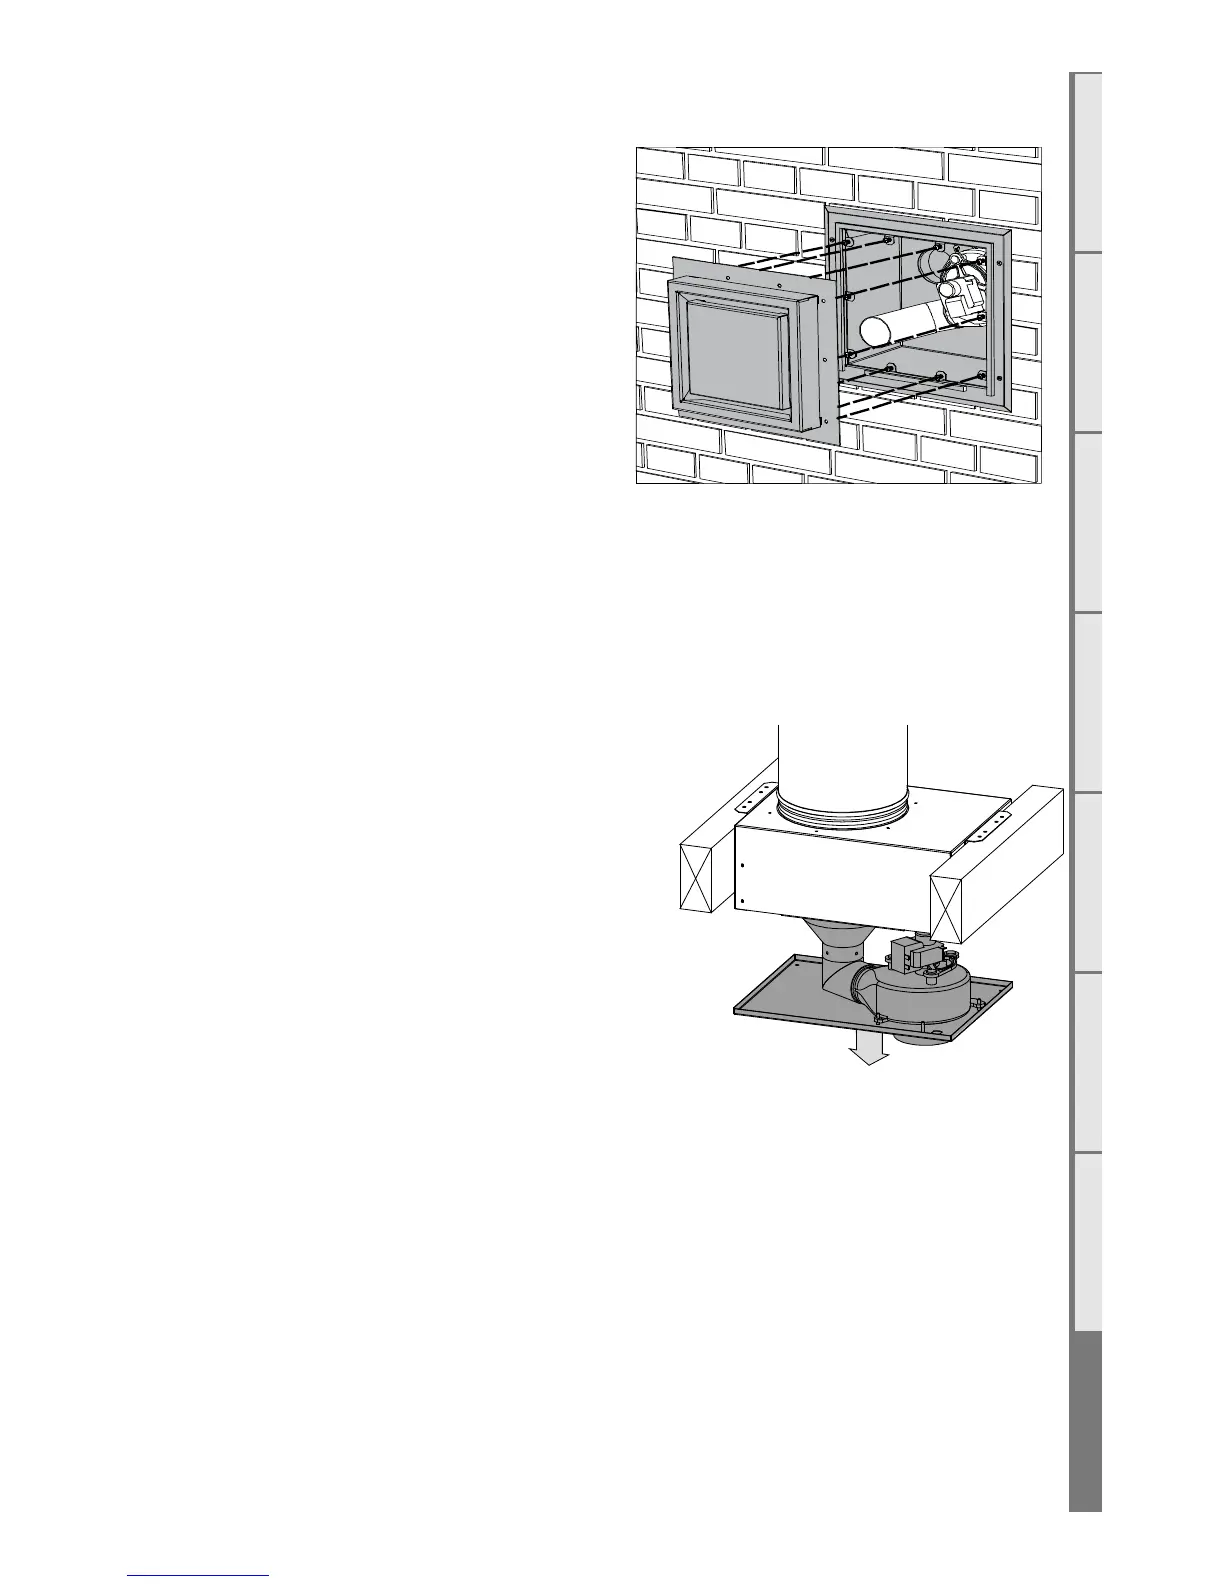
S5 Servicing the Horizontal Powerflue Wall Terminal
If the Horizontal Powerflue Wall Terminal needs servicing, the fan can be accessed from the
outside of the installation.
Ensure the power to the Horizontal Powerflue Wall Terminal is o by disconnecting the power
to the appliance inside. If the appliance has been running, allow the terminal to cool before
attempting to service it.
Undo the ten screws holding the outer cowl in place
and pull the whole plate and cowl directly outwards.
Note: Be careful of any flashing that may have been
installed above the terminal.
Removing this plate gives complete access to the
fan for servicing or replacement.
Check that all the seals are still intact. Check the
fan electrical terminals, motor and impellor are not
corroded. Ensure there is no signs of leakage in or
around the terminal.
When reassembling the terminal, line up the round silicon grommets with the outlet tube of
the fan and push the cowl back into place. Ensure all seals are still in place and replace all of the
screws to hold the cowl in the correct position.
Servicing a Vertical Powerflue
If the vertical Powerflue needs servicing the fan can be
accessed without disturbing the final twin walled flue
length or roof terminal.
To gain access to the fan and electrical terminals remove
the eight screws that hold the base of the Powerflue to
the lid, making sure to support the base while removing
the screws.
Note: When inspecting or working on the Powerflue
take care not to damage the two flexible flue pipes that
connect to the Powerflue base.
Once the base has been removed clean away any dust or debris found and check that the fan
electrical terminals, motor and impellor are not corroded. Also check for signs of leakage in or
around the Powerflue.
When reassembling the Powerflue support the base under the lid and replace the 8 securing
screws. After assembly check that the two flexible flue pipes are sealed and not damaged and
that the twin walled final flue length and roof terminal are still sealed.
NOTE: Take care not to trap any wires between the base and lid of the Powerflue when reassembling.