Chapter 13: Removing a Summit Family Switch from a Rack
Summit Family Switches Hardware Installation Guide
384
Overview
Depending on the switch model, the type of rack, and the position in the rack, a Summit family switch
may be installed using simple front-attached mounting brackets or a combinations of front and back
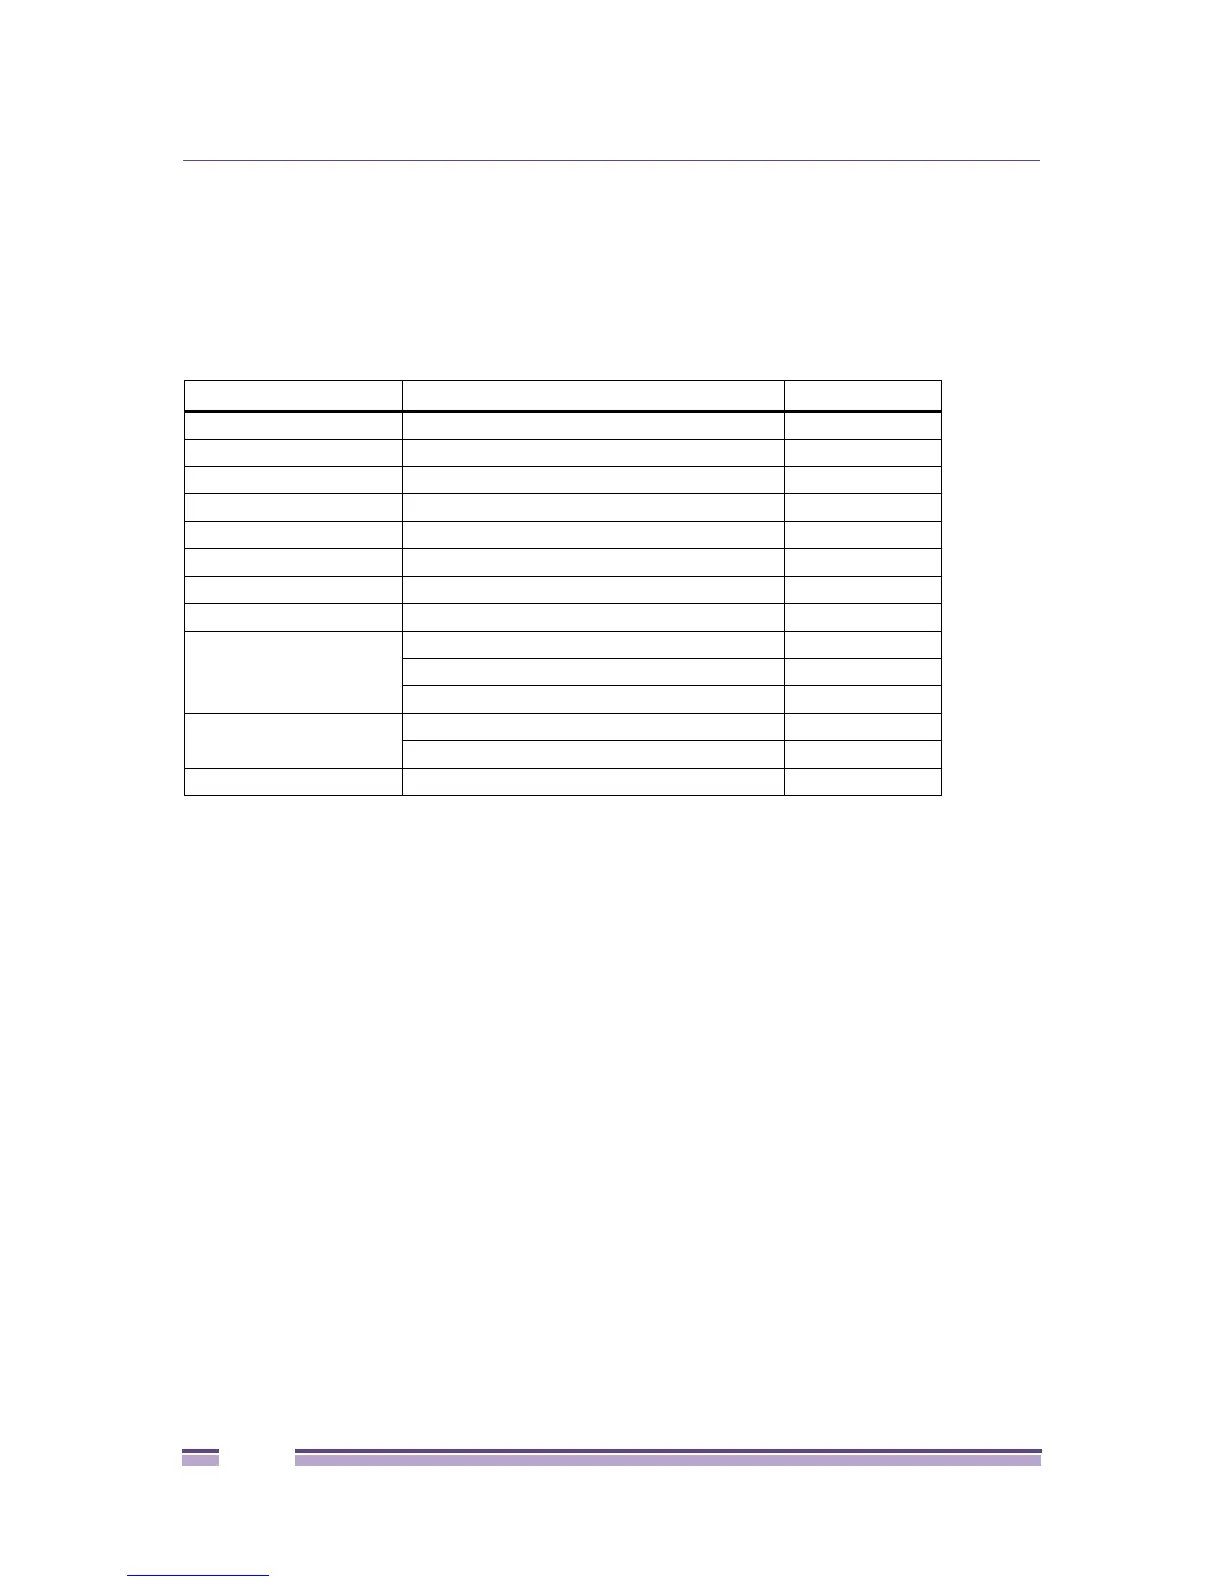
mounting brackets. Table 79 lists the locations of the removal instructions for each type of switch
installation.
Removing a Summit Family Switch (Models Other
than Summit X460, X480, X650, and X670 Series)
To remove a Summit switch from a rack:
1 Remove power from the switch in one of the following ways:
● AC-powered switch: Unplug the power cables from the from the wall outlets first and then from
the switch.
● DC-powered switch: De-energize the DC circuit for all power connections. Loosen the retainer
nut and unplug the DC power connector from the DC power socket on the rear of the switch.
2 Disconnect the Summit switch from the redundant power supply (if applicable).
3 For a DC-powered switch, disconnect the ground:
a At the back of the switch, loosen the retaining screw on the ground lug.
b Pull the ground wire out of the lug and move the ground wire out of the way.
4 Loosen and remove the four screws holding the switch in place in the equipment rack.
5 Carefully remove the switch from the rack and place it on a secure, flat surface.
Table 79: Summit Switch Removal Instructions
Switch Series Rack Type, Position Page Number
Summit X150 series N/A page 384
Summit X250e series N/A page 384
Summit X350 series N/A page 384
Summit X440 series N/A page 384
Summit X450 series N/A page 384
Summit X450a series N/A page 384
Summit X450e series N/A page 384
Summit X460 series Two-post, front-mount or mid-mount page 386
Summit X480 series Two-post, mid-mount page 390
Two-post, front-mount, page 391
Four-post rack page 392
Summit X650 series Two-post rack, mid-mount page 395
Four-post rack page 397
Summit X670 series Two-post rack, front-mount or mid-mount page 398
 Loading...