31
© Ferno s.r.l. Rel.05042024
XT Series Extrication Devices
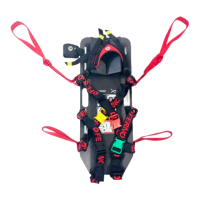
4. Insert the slot of the restraint with the female end into
hole no. 11, with the stitching facing the operator (Figure
35A).
5. Insert the yellow buckle into the newly positioned
restraint slot (Figure 35B).
6. Pull the restraint to tighten the loop knot (Figure 35C).
35A
35B
35C
Figure 35 - Yellow chest restraint application
RED CHEST RESTRAINT
In order to apply the red chest restraint:
1. Insert the slot of the restraint with the male end into hole
no. 13 on the extrication device, with the stitching facing the
operator, making sure that the red handle remains outside
the board.
2. Insert the red buckle into the newly positioned restraint
slot.
3. Pull the restraint to tighten the loop knot, ensuring that
the red handle always remains on the outside of the board.
4. Insert the slot of the restraint with the female end into
hole no. 6, with the stitching facing the operator.
5. Insert the red buckle into the newly positioned restraint
slot.
6. Pull the restraint to tighten the loop knot.
WARNING
It is important that during the assembly of the chest
restraints, the red handle always remains outside of
the board slot, to ensure that the restraint remains
securely on the board during patient handling
operations.
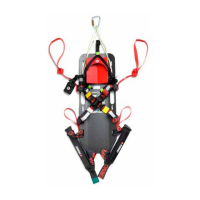
Figure 36 - Application of yellow and red chest restraint
Important
The positioning of the yellow and red chest restraints
can be performed by installing the female (lower) end
of the restraints also in the holes no. 5 and 12 if the
patient's build or clinical condition requires a higher
strap application.