T
OTAL
P
AC
2
Page 3 of 14
T
OTAL
P
AC
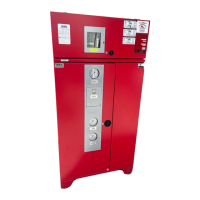
2 Integrated Fire Protection System
Air Supply
FM-086G-0-43E
Air supplies style "B" or "C":
1. To Apply Air Supply:
Turn on upstream air supply. Open APMD (Air Pressure
Maintenance Device) input valve (E6) by placing handle in
line with valve body then open APMD output valve (E7) by
placing handle in line with the valve body.
In order to accelerate filling of sprinkler piping by air
pressure, bypass valve (E8) can be opened by placing
handle in line with valve body while piping is initially filled by
the air compressor,. This valve (E8) must then be closed
(handle crossways to valve body) and kept in this position
once the system is filled with air.
2. To Close Air Supply:
Close APMD output valve (E7) by placing handle crossways
to valve body then close APMD input valve (E6) by also
placing handle crossways to the valve body. Be sure bypass
valve (E8) is closed (handle crossways to valve body).
3. To Adjust System Air pressure:
Be sure APMD input valve (E6) and APMD output valve (E7)
are both open (handle in line with the valve body), and
bypass valve (E8) is closed (handle crossways to valve body)
prior to performing this operation. Loosen lock nut and turn
pressure adjustment nut clockwise to increase air pressure or
counter-clockwise to decrease pressure. Tighten lock nut.
Note: Depending on site conditions, the internal filter of
the APMD may need maintenance on a regular
basis. Refer to Viking Data Sheet # 127 for more
details.
Air supply style "D":
7. To Apply Air Supply:
Turn on upstream air supply. Open air shut-off valve (E14)
by placing handle in line with valve body.
8. To Close Air Supply:
Close bypass air shut-off valve (E14) (handle crossways to
valve body).
1.4 Maintenance and inspection:
Air supply style "A":
1. To close the Air Supply:
This procedure requires turning OFF the air compressor's
AC power by switching off the compressor isolating switch
(E15) located in the control section of the unit before
servicing. Note that the air compressor motor is equipped
with thermal protectors that reset automatically. These
thermal protectors will stop the motor in case it overheats
and can automatically start the motor when they reset.
2. To remove and clean the check valve assembly (E11):
This procedure requires turning OFF the compressor's AC
power. Follow instructions "To close Air Supply" above.
a) Carefully loosen the ¼" copper adapter, remove
copper tubing, and proceed to disassemble the
check valve assembly (E11).
b) Once disassembled, carefully clean the check valve
seat, or replace the check valve (part #
40CHSW0002) altogether if worn out components
are found.
c) Remove all brass connections, by unscrewing
gently all tubing adapters from the fittings, removing
the previously installed Teflon tape and apply new
Teflon tape on all threads. Re-install all
components and check for leaks after reconnecting
power to the air compressor.
3. To clean or replace the compressor's air inlet filter:
This procedure requires turning OFF the compressor's AC
power. Follow instructions "To close Air Supply" above.
a) The motor compressor unit should be kept dirt-free.
A dirty filter restricts air flow, and causes the pump
to run hotter and results in longer operating cycles.
b) To inspect the inlet filter, turn the black plastic cover
counter-clockwise to remove it from its case (refer to
Figure 1). Remove old felt. Clean or replace with
new one (part # B300A). DO NOT CLEAN WITH
PETROLEUM-BASED PRODUCTS.
c) Re-install filter and cap. DO NOT OPERATE
COMPRESSOR WITHOUT A FILTER.
Note: Refer to the AIR COMPRESSOR Operation &
Maintenance Technical Manual provided with the
T
OTAL
P
AC
2
unit for more details.
Intake and exhaust filters are standard on most compressors
and will provide adequate filtration for most applications.
Check filters periodically and replace when necessary. Initial
inspection is suggested at 500 hours, then the user should
determine the frequency. Most problems can be prevented
by keeping filters and mufflers clean. Dirty filters and
mufflers decrease compressor performance and can
decrease compressor service life.
Should the compressor need rebuilding, field rebuilt kits are
available from Authorized Service Facilities. Refer to the
compressor's Owner's Manual provided with the T
OTAL
P
AC
2
unit. Maintain a clean air filter cartridge to insure best flow
and performance. The location and the quality of the air
being ingested indicate the frequency for inspection and
replacement. A dirty filter restricts air flow, causes the pump
to run hotter and results in longer operating cycles.