User’s manual FlexGain Plex, V2
Version 1.3 40 from 99
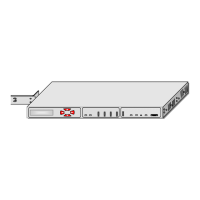
For Mini-Rack devices:
• If required, install daughter boards on the multiplexer:
Loosen the fixing screws and take off the upper lid from the device. Install the
daughter boards on the pin connectors of the basic motherboard. If necessary,
screw the daughter boards to the rack;
• Fix the upper lid of the device;
• Install the device into the 19” shelf or cabinet.
Sub-Rack devices:
• Install the daughter boards on the pin connectors of the basic motherboard. If
necessary, screw the daughter boards to the rack;
• Install the device into the FG-R-W-E rack (FG-COMPACT or FG-LIT racks).
For Stand Alone devices:
• Install the daughter boards on the pin connectors of the basic motherboard. If
necessary, screw the daughter boards to the rack;
• Install the device into the housing;
• Put the assembled device on a horizontal surface.
For all mechanic designs:
• Ground the equipment (operation of ungrounded equipment is strictly
forbidden and can result in the multiplexer failure as well as in the failure of
other equipment coupled to it);
• Connect the terminal equipment by using the corresponding cables;
• Interconnect the MONITOR connector on the device or shelf (FG-R-W-E, FG-
COMPACT, or FG-LIT) and the serial RS-232 port on the PC (terminal) by
using the RS-232 cable. Check if the PC is grounded before switching on the
equipment;
• Switch on the device.
Warning!
It is strictly prohibited to violate the installation order and operation of the device! The
manufacturer bears no responsibility and grants no guarantee for the device operated
under improper conditions.
After the device is switched on, initialization takes several seconds. After the
initialization the device is ready to be configured from the control terminal (PC).
To connect the terminal of control PC, one of the cables, whose pin assignment is
presented in Fig. 14, is used. The same cable is used to down load software via the RS-
232 interface (see “Programming guide” section).