User’s manual FlexGain Plex, V2
Version 1.3 81 from 99
• 3 files of software for FlexGain Plex, V2 devices (AK54.DAT, ALT.DAT,
ARM.DAT).
• Power supply.
Sequence of operations.
3.1.1. Install and connect the FlexGain Plex, V2 device to the shelf.
3.1.2. Connect the Ethernet cable to the RJ – 45 (female) connector on the front
panel of FlexGain Plex, V2. The connector is denoted as «Ethernet».
3.1.3. Switch on the power supply on the shelf.
3.1.4. Wait for the completion of the POST (Power On Self Test). The S and Eth
LEDs blink by turn. The test being completed, the S LED is lit green and the Eth
LED will blink amber if the connection is established (amber means
transmission of TCP/IP packets).
3.1.5. Remove the three data files AK54.DAT, ALT.DAT и ARM.DAT into the folder
with the installed NetLoader program.
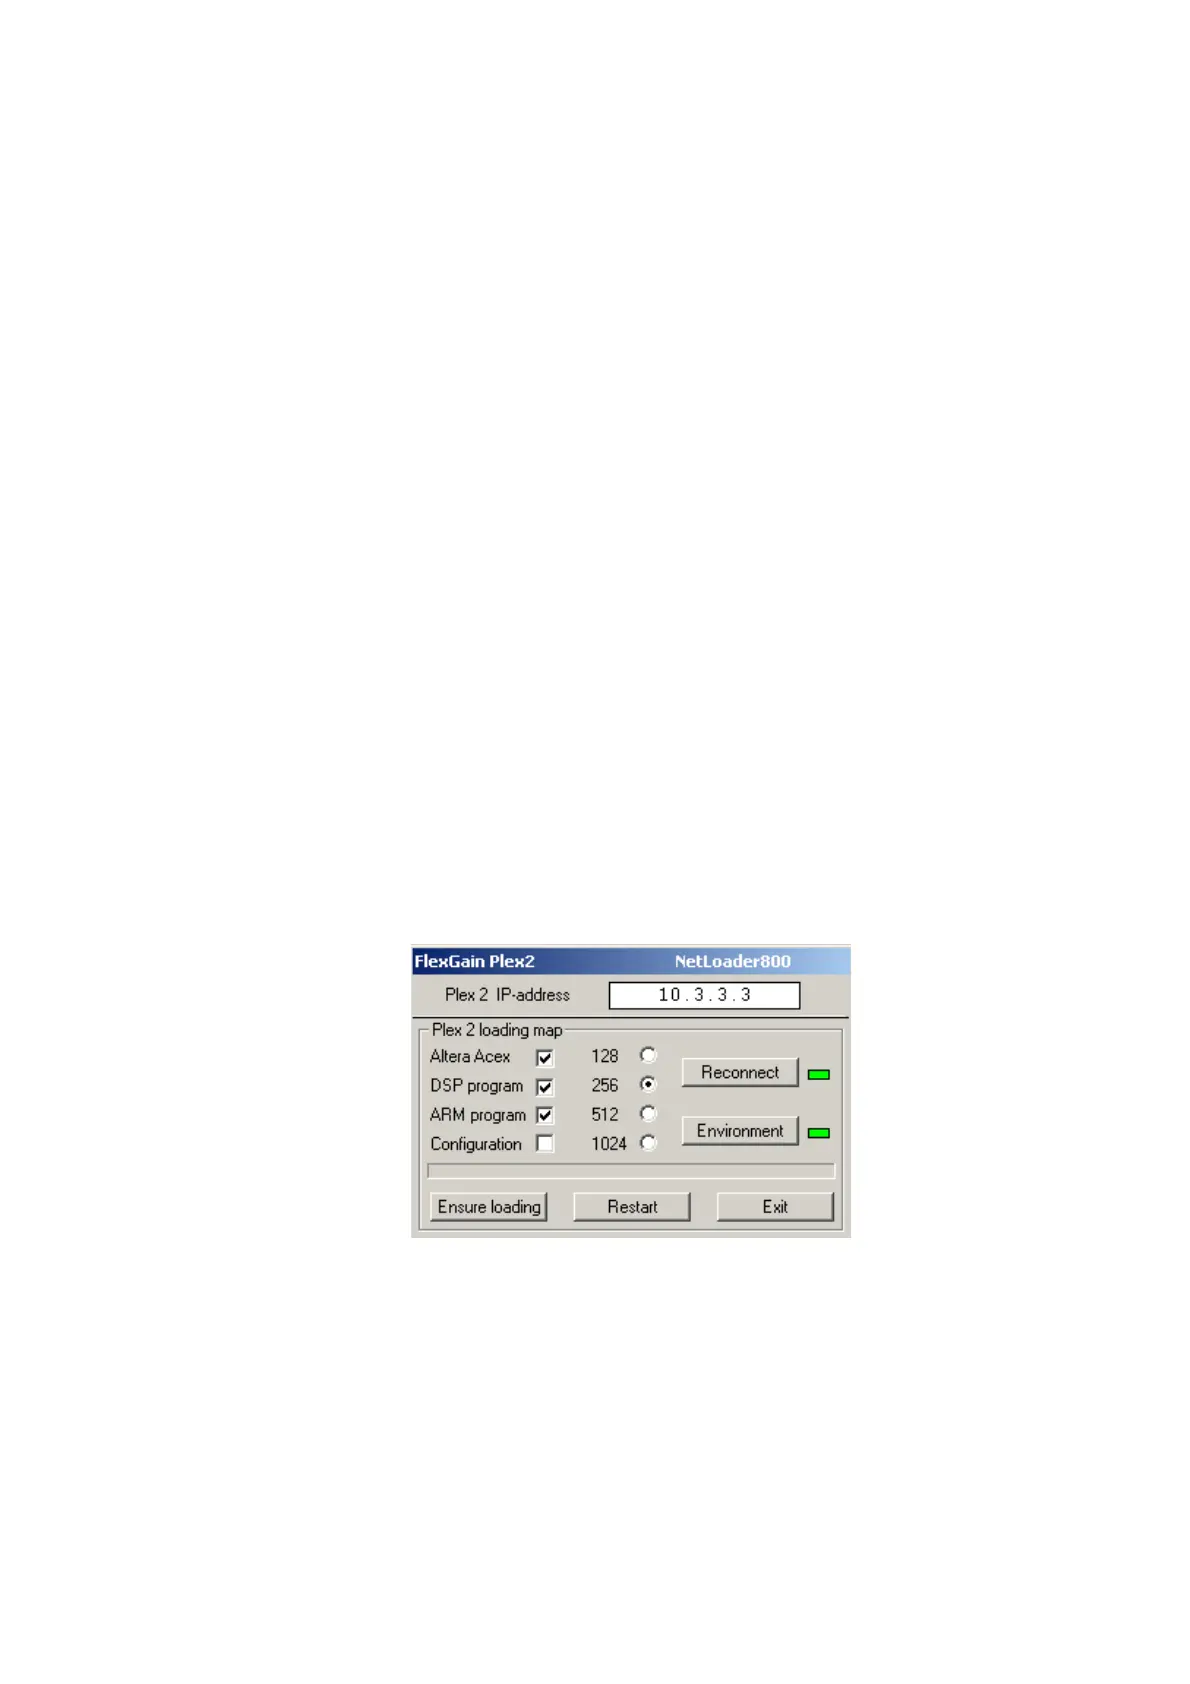
3.1.6. Click NetLoader800.exe.
3.1.7. Configure the IP address of the FlexGain Plex, V2 device in the Plex 2 IP-
address field of the NetLoader window. By default, the IP address is 10.3.3.3.
3.1.8. Tick Altera Acex, DSP Program and ARM Program.
3.1.9. Click Reconnect in the NetLoader window to establish communication with
the device over the Ethernet network. If the communication is established
correctly, the red LED opposite the Reconnect button will be lit green. In this
case you may start with item 3.1.10. Otherwise, if the communication is not
established, it is recommended to do the following: