FLUXUS WD100, WD200 6 Installation of the Transmitter
24 UMFLUXUS_F5WDV1-1EN, 2016-04-08
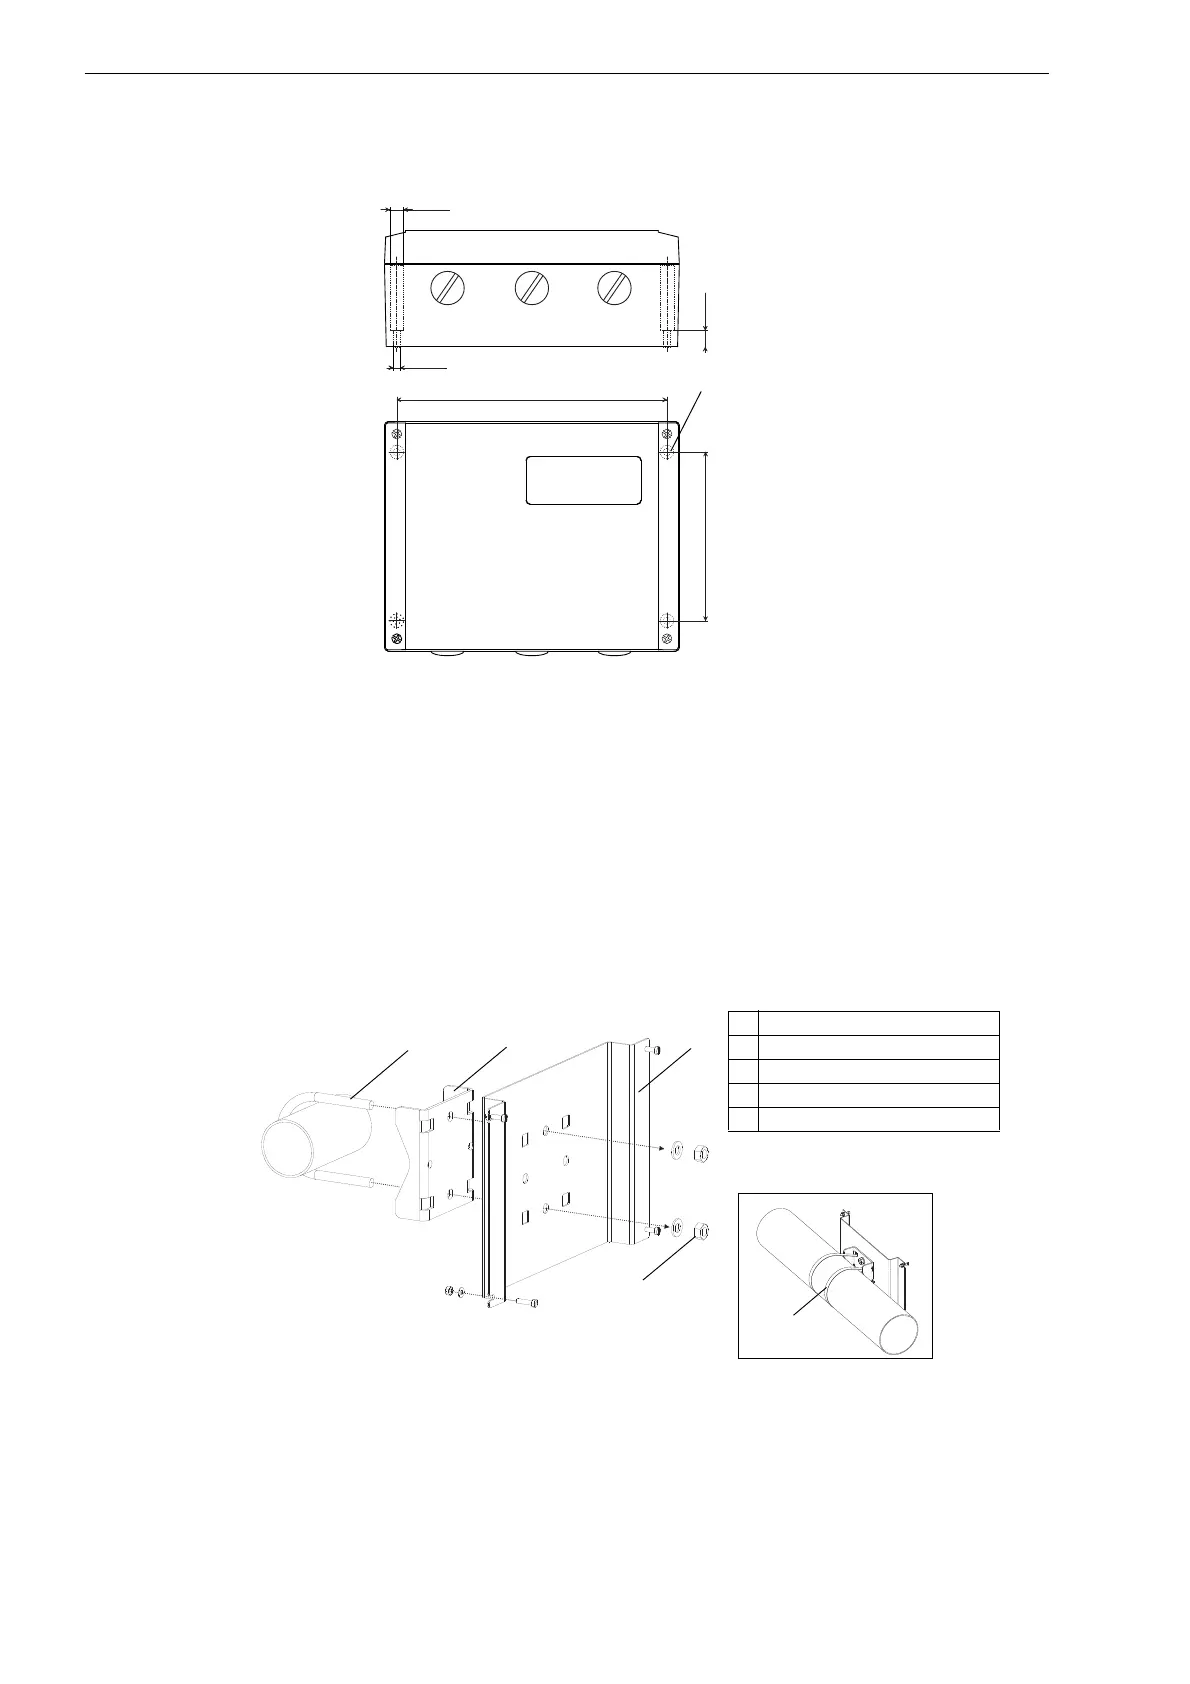
6.2.3 Pipe Installation
Installation on a 2 " pipe
• Fix the pipe mounting plate (2) to the pipe (see Fig. 6.3).
• Fix the instrument mounting plate (3) to the pipe mounting plate (2) with the nuts (4).
• Fix the bottom side of the housing to the instrument mounting plate (3).
Installation on a pipe > 2 "
The mounting kit is fixed to the pipe with tension straps (5) instead of the shackle (see Fig. 6.3.).
• Push the tension straps (5) through the holes in the instrument mounting plate (3).
Fig. 6.2: FLUXUS WD100, WD200 (dimensions in mm)
Fig. 6.3: Pipe installation set
Ø 8.4
165
10
103
Ø 4.5
screw holes
for wall mounting
1 shackle
2
pipe mounting plate
3
instrument mounting plate
4nut
5 tension strap
1
2
3
4
5