Page 94 CWT Compact Touch Installation and Maintenanace Manual Issue 13
8.9.2.2 Assembly
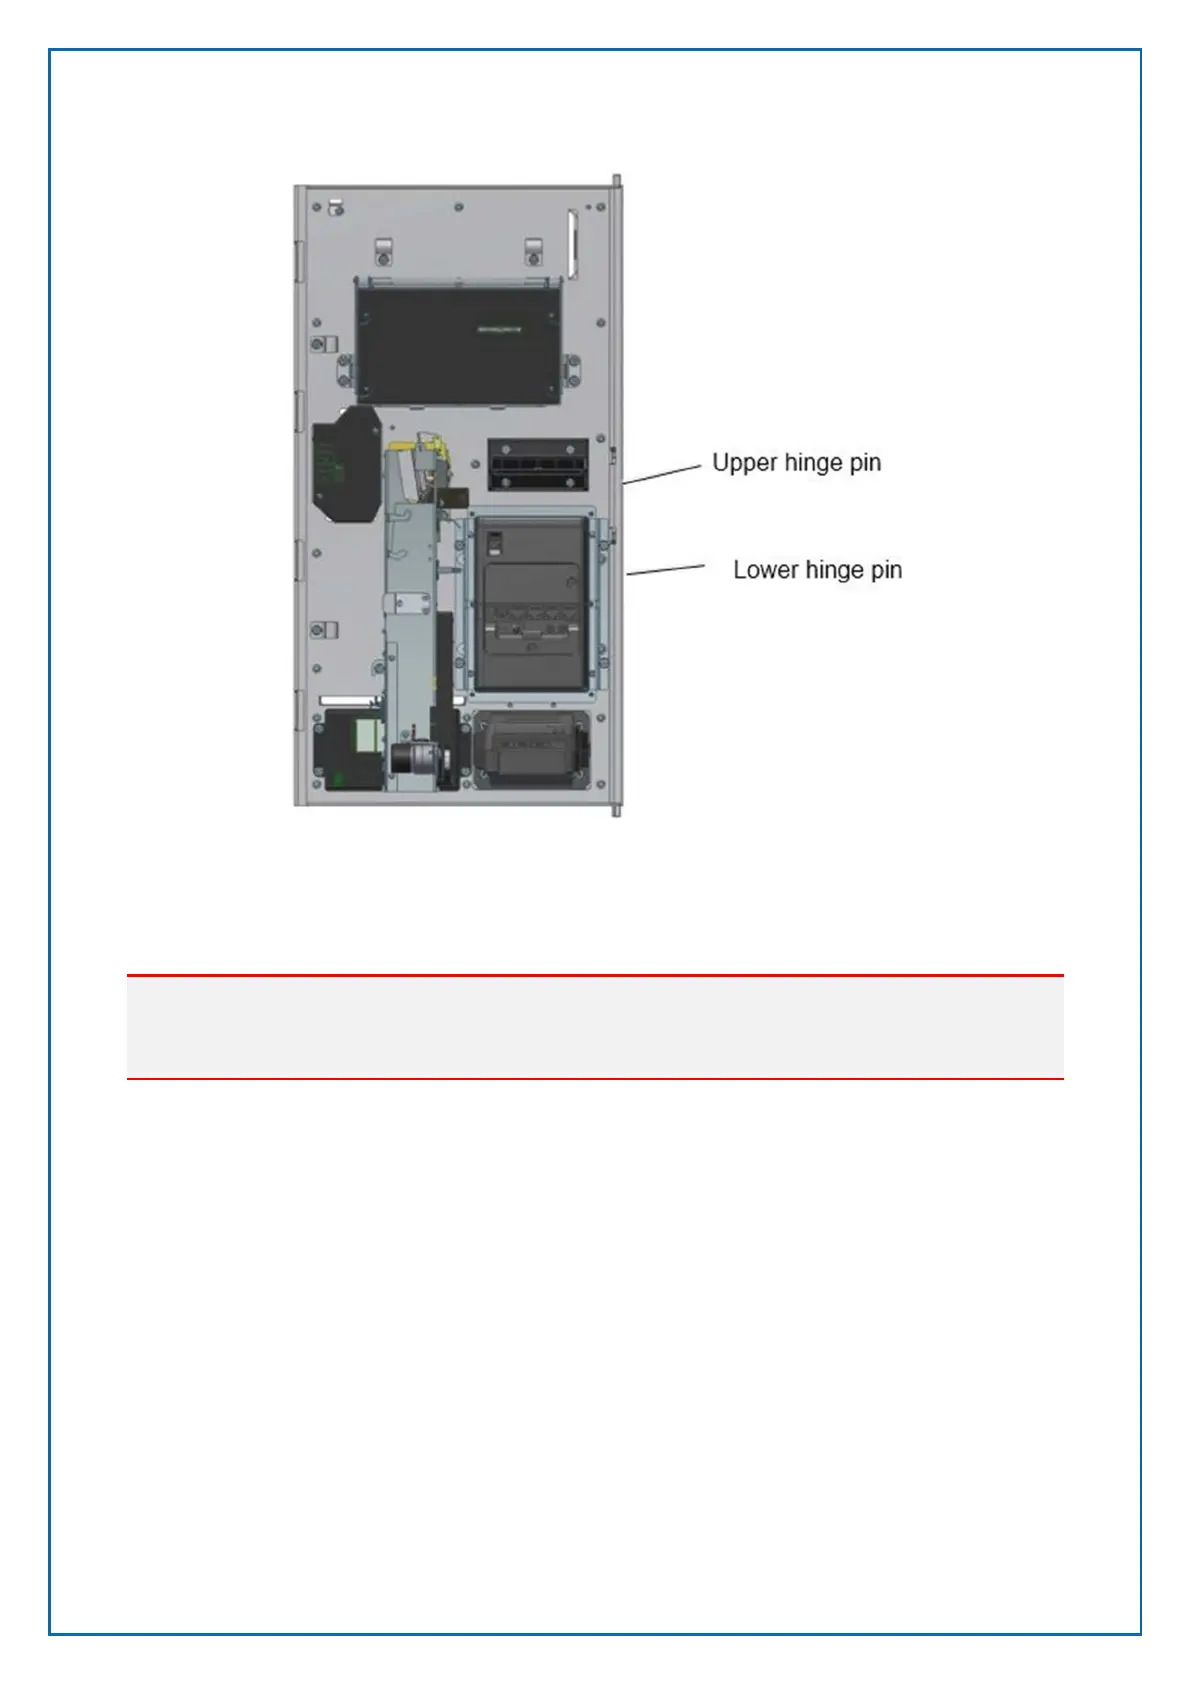
Follow the directions above in reverse order.
Important:
Loosen the lower hinge pin’s locking screw to let the hinge pin enter the
corresponding hole in the cabinet.
8.9.3 E-lock replacement
8.9.3.1 Removal
1. Disconnect the cables from the E-lock.
2. Remove four nuts and remove the E-lock. A small box spanner (10 mm) is
required to remove the lower E-lock due to limited space.
8.9.3.2 Assembly
Ensure that the dowel pin (see arrow) mates with the locking latches.
Figure 60, The door hinge mechanism.