69
Limitorque MX Maintenance and Spare Parts FCD LMENIM2314-00 – 07/08
flowserve.com
4.11.2 Remounting
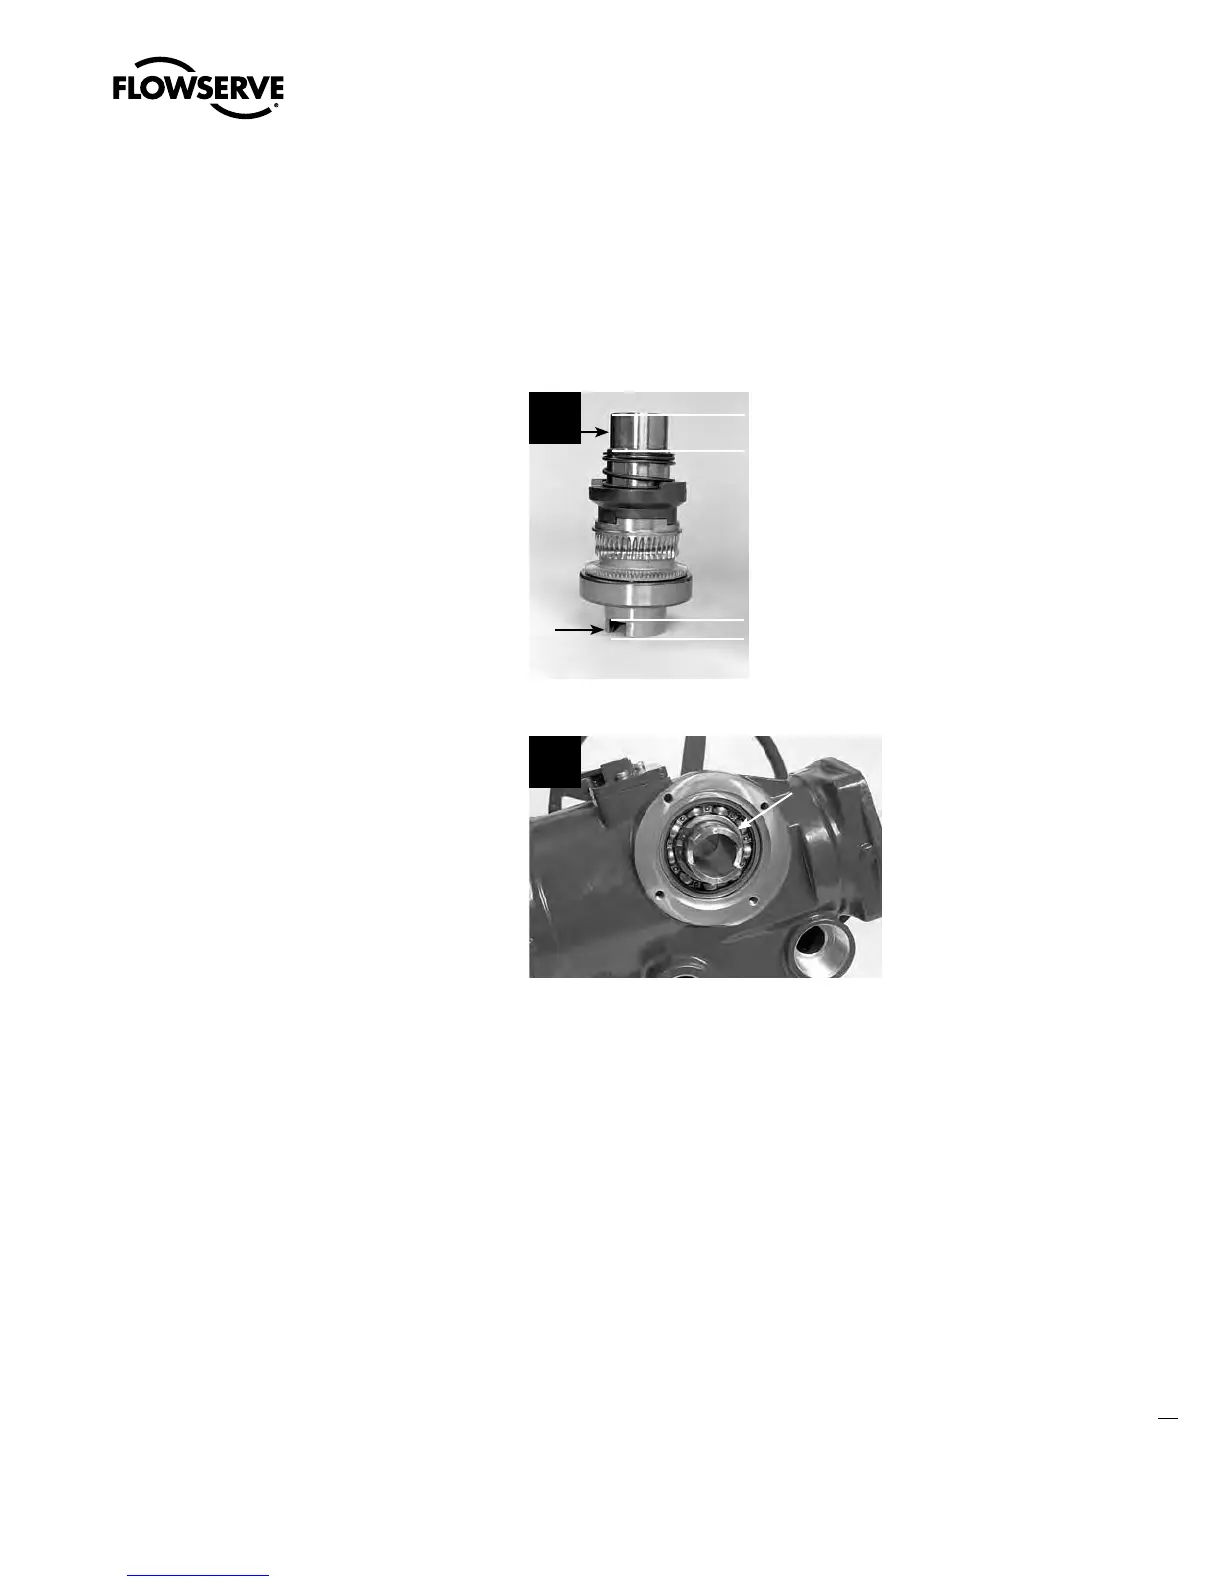
STEP 2
a
CAUTION: The drive sleeve surface serves as an oil-sealing surface. Use caution not to
scratch the drive sleeve while completing removal and remounting.
Lightly lubricate the top and bottom of the drive
sleeve assembly as shown.
2
STEP 3
Insert the drive sleeve assembly into the
actuator housing base until the lower bearing
(#2-4) is fully engaged in the housing (seated
on actuator shoulder). If the bearing is a tight
fit, gently tap the bottom of drive sleeve (#2-1)
with a mallet to properly seat.
3
2-4
STEP 4
Remount all removed subassemblies according to their remounting instructions in the following
order:
1. Base plate (subassembly #11). (See Section 4.9.2.)
2. Worm shaft (subassembly #3). (See Section 4.10.2.)
3. Motor (subassembly #4). (See Section 4.1.2.)
4. Thrust base (subassembly #10) - if fitted. (See Section 4.7.2.)
Swanson Flo | 800-288-7926 | www.swansonflo.com