1672/1673 FC/1674 FC
Users Manual
32
Test Results
The display shows the main result as resistance and the sub-result is the test voltage.
The resolution of the measurement depends on the test voltage set, for example, set to 100 V,
the resolution is 100 kΩ and the measurement range is up to 100 MΩ. When the measurement
is higher than the full range, the result shows as >100 MΩ. The limits are different for each
selected test voltage. See 1672/1673 FC/1674 FC Product Specifications at www.fluke.com
for more information.
Continuity Measurement
A continuity test is used to verify the integrity of connections with a high-resolution resistance
measurement. This is important when you check Protective Earth connections. Measurements
may be adversely affected by impedances, parallel circuits, or transient currents.
Note
If electrical circuits are laid out in a ring, Fluke recommends that you make an end-to-
end check of the ring at the electrical panel.
XW Warning
To prevent possible electrical shock, fire, or personal injury, measurements
should only be done on de-energized circuits.
To measure continuity:
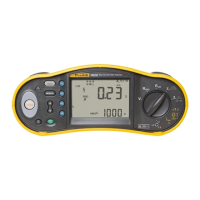
1. Select the R
LO
mode. See Figure 10.
2. Choose the test lead pair and use the appropriate terminals for this test.
3. Select if a measurement is for positive current (Ω+), negative current (Ω-), or both (Ω+/-).
This test type is for tests at the ring installation or to verify the connection between
protective earth and neutral at a mains socket. To avoid tripping the RCD, use the 10 mA
test current.
The + is positive current. The – is negative current. The ± option gives the average between
the positive and negative current results and shows in the center of the display. Choose
the maximum test current. To not trip an RCD, use the 10 mA setting for a ring installation
test that includes the neutral or phase wire.