General Maintenance
Disassembly Procedures
3
3-7
3-14. Disassembly Procedures
The following paragraphs describe disassembly of the Fluke 45 in sequence (from the
fully assembled meter to the chassis level.) Start and end your disassembly at the
appropriate heading levels.
3-15. Remove the Meter Case
Use the following procedure to remove the meter case.
1. Make sure the meter is turned off and unplugged from the power outlet.
2. Discharge the power supply capacitor by turning on the meter (with the meter
unplugged from the power line). After five seconds, turn the meter off.
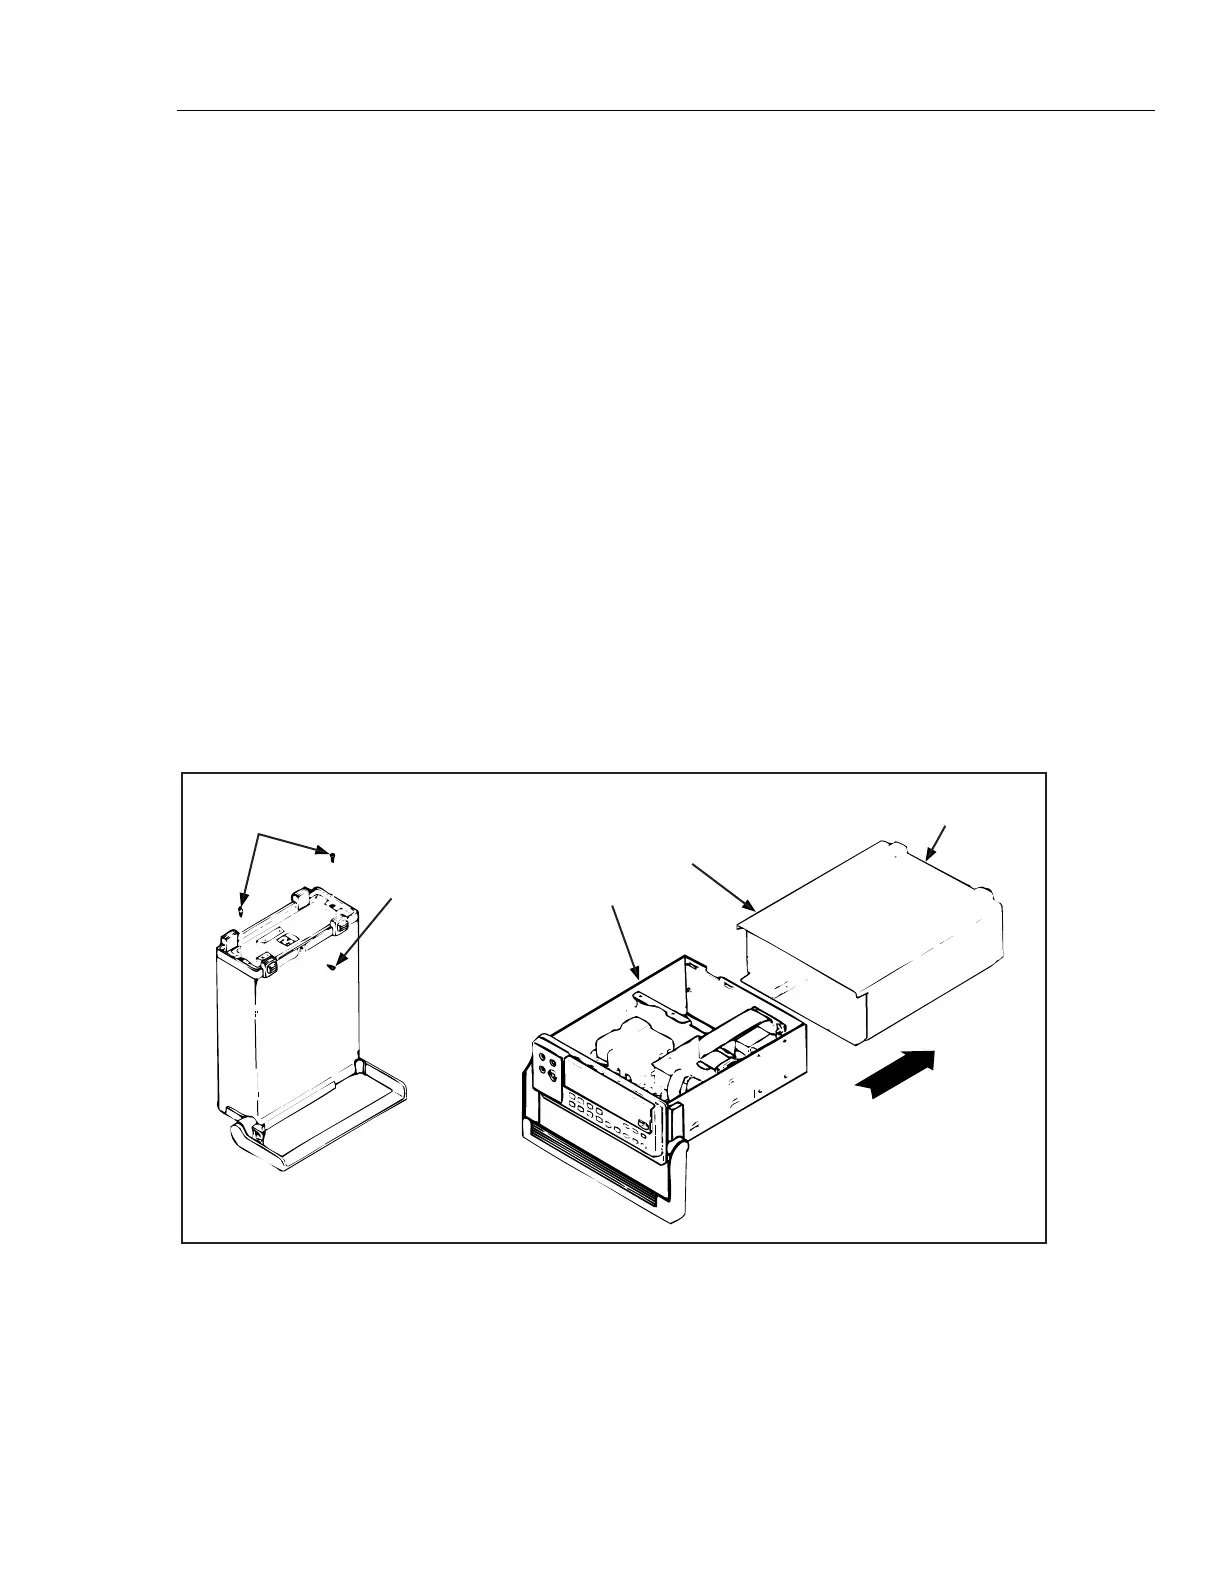
3. Remove the screw from the bottom of the case, and remove the two screws from the
rear bezel as shown in Figure 3-3 section A. While holding the front panel, slide the
case and rear bezel off the chassis. (See Figure 3-3 section B.) (At this point, the rear
bezel is not secured to the case.)
Caution
If the Main PCA is to be serviced and the Battery Option is
installed, first unplug the battery ribbon cable from the Main
PCA, or disconnect the wires to the battery. This measure
prevents damage to the meter when you are servicing the Fluke
45 Main PCA.
A.
Mounting Screw (2)
Chassis
Case
Rear Bezel
Grounding Screw (2)
B.
qb14f.eps
Figure 3-3. Removing the Case
3-16. Remove Handle and Mounting Brackets
Refer to Figure 3-4 during this procedure. Pull each handle pivot out slightly at the
handle mounting brackets, then rotate the handle up over the display. With the handle
pointing straight up, pull out and disengage one pivot at a time.