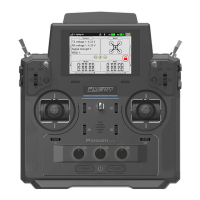
FS-ST8
Digital Proportional Radio Control System
6
4. Operation guide
After setting up, follow the instructions below to operate the system.
This LED is a multi-color indicator. It displays in a variety of colors such as red, green, blue, yellow, cyan, purple,
white, and dazzling colors. You can set a color as required. You may set it to none.In addition, you may set it to
display the electricity level. The brightness of LED can also be adjusted via TX SET> SYSTEM SETTINGS >LED.
Follow the steps below to perform the settings:
1. Poweronthetransmitter.PressMENUtoenterthefunctionmenu.SelectTX SET(TransmitterSettings)andthen
pressScroll Wheeltoenter.
2. SelectSYSTEMSETTINGSandpressRollertoenterthesystemsettingsmenu.ScrolltheScroll Wheel toselectLED
COLOR andpressScroll Wheel,theselecteditemisashingnow.
3. ScrolltheScroll WheeltoselecttheappropriateitemandpressScroll Wheel. Press EXIT to save and exit.
Follow the steps below to turn on the transmitter:
1. Checktomakesurethatthatbatteryisfullychargedandinstalledcorrectly.
2. Pressandhold untilthescreenlightsup.
3. Poweronthereceiver.
4.3 Binding
The transmitter and the receiver have been pre-bound before delivery. If you are using another receiver, follow
the steps below to bind the transmitter and the receiver. The transmitter supports two-way binding and one-way
binding, and two-way binding is the default setting. The transmitter will display the information returned from the
receiver after the two-way binding is completed.
4.1 Power On
Note • Operate with caution in order to avoid damage or injury.
Note • For your safety, please turn the transmitter switch and throttle to the safe position.
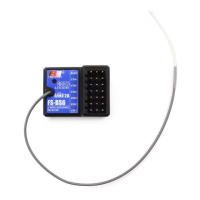
• Applicable to the FS-ST8 transmitter and the FR-SR8 receiver. Dierent receivers have dierent bind
procedures. For more information visit the FLYSKY website for manuals and other related information.
• Product information is updated regularly, please visit our website for more information.
4.2 LED
1. Turnonthetransmitter,thenpressMENUtoenterthemainmenu.ScrolltheScroll Wheel tonavigatetotheRX
SETandpresstheScrollWheeltoenterRX SETTINGSmenu.ThenscrolltheScroll WheeltonavigatetotheBIND
SETTINGSandpresstheScroll Wheel toenter.Scrollthe Scroll Wheel tonavigatetothe STARTandpresstheScroll
Wheel toputthetransmitterintobindmode.
2. PlugthepowercabletotheBVD/VCCinterfaceofthereceiver,theLEDofthereceiverashesslowlythismoment.
PressandholdtheBINDbuttonofthereceiverover3S,ortaptheBINDbuttonandthenpoweronthereceiver.The
LEDofthereceiverashesfast,thenreleasetheBINDbutton.
3. Afterthebindingprocessiscompleted,theLEDofthereceiverstopsashingandissolidon.
4. Checktomakesurethetransmitterandthethereceiverareworkingcorrectly,ifthereareanyissuesorunexpected
operationarise,followthestepsabovetobindagain.
Note: If the transmitter that has its radio frequency set to 1WAY enters bind mode, the LED of the receiver will be in slow ashing state.
You need to put the transmitter to exit bind mode manually and if the LED of the receiver stops ashing and is solid on, indicating that the
binding is completed.
This product system is compatible with most of our ANT Protocol receiver models. The details are as follows:
RFstandard:2.4GHzANT protocol
 Loading...