25CI400A/W • 25HI400A • 50CI400A/W • 50HI400A 15
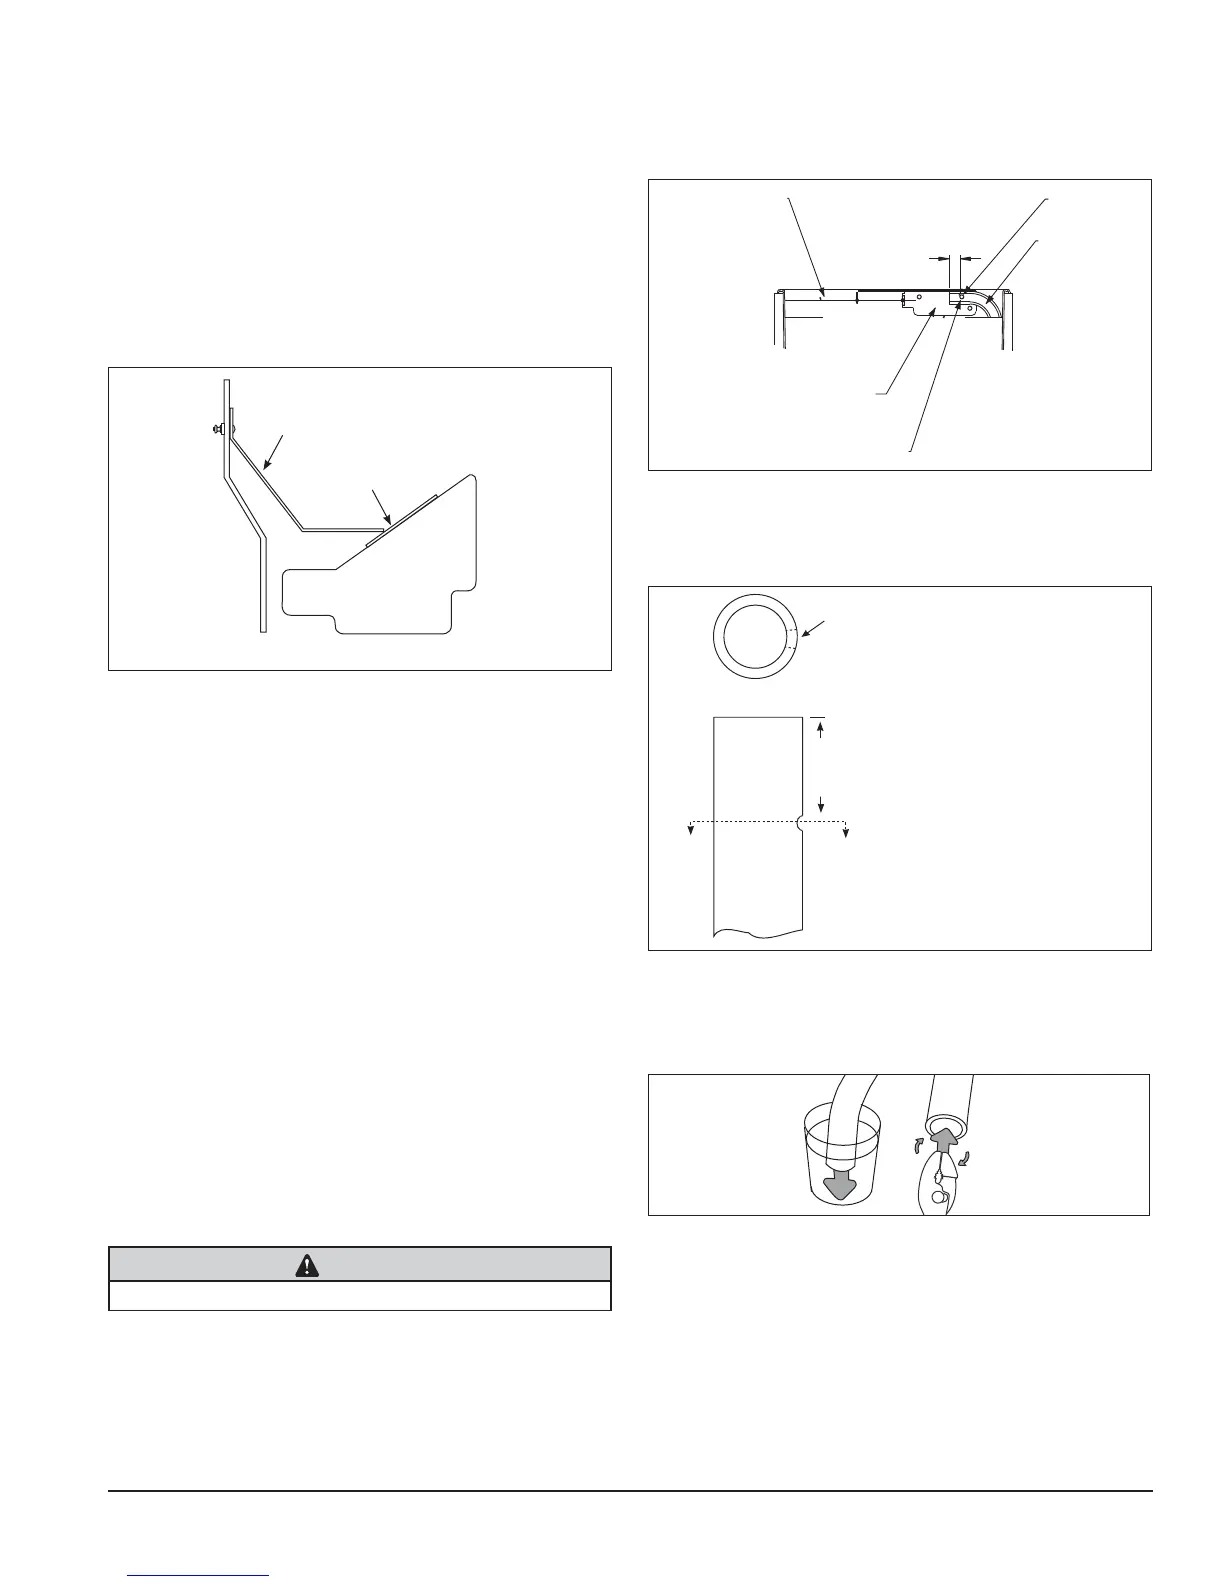
3. Disconnect existing ice tube from engaging pin on
transport tube bracket in ice storage bin and pull
tube up through dispenser chase.
Fig. 13
n
a
in
pin
engaging pin
3/16" (5mm) ice tube hole
ice tube mounting bracket
ice level control stat
capillary tube
tu
ice tube
1"
(26mm)
(26mm)
4. Run the new ice transport tube down through chase
making sure that the end with the 3/16" (5 mm) hole
is in the bin (Fig. 13).
Fig. 14
A
A
1"
(26 mm)
Section A – A
.3/16" (5 mm)
dia. hole
5. Push the 3/16" (5 mm) hole near end of tube into
pin on ice tube bracket (Fig. 14).
6. Reinstall insulation
Fig. 15
15.2
15.1
7. Heat end of transport tube in cup of 160 F (71 C)
hot water to soften (Fig. 15.1) and spread with pliers
before making connection (Fig. 15.2).
8. Slip supplied hose clamp onto tube and push tube
onto compression nozzle on exit port of evaporator.
Do not twist tubing when securing to evaporator.
9. Secure tube on port with hose clamp, being sure
that clamp is positioned on evaporator side of
nozzle ange.
Disassembly and replacement instructions
Dispense wheel removal and installation
1. Remove all ice from storage area of dispenser.
2. Remove center thumb nut from dispense wheel.
3. Remove thumb nuts holding baffle inside bin and
remove baffle.
4. Tilt rear of wheel up and lift off motor drive shaft.
5. After reinstalling wheel, secure baffle loosely with
thumb nuts, but do not tighten.
Fig. 12
side view wheel section
dispenser
front
baffle
1/8" (3.2 mm)
spacer
6. Place a 1/8" (3.2 mm) spacer against wheel and
allow baffle to drop until it touches spacer (Fig. 12).
7. Tighten thumb nuts and remove spacer.
Drive bar removal
1. Remove dispense wheel from dispenser
(seeabove).
2. Pull drive bar out of its channel in bottom of wheel.
Wheel motor assembly removal
1. Disconnect power.
2. Remove top cover and dispense wheel.
3. Slide ice machine out of dispenser as described
on page 16, ice machine removal. Ice machine
does not need to be removed completely if there is
sufficient clearance to access the dispenser motor
through the right louvered panel.
4. Disconnect wires on motor.
5. Remove four bolts (7/16" socket) holding motor
assembly to bottom of dispenser.
6. Remove motor assembly.
Ice transport tube replacement
CAUTION
• Tubing must be supplied by Follett Corporation
1. Disconnect power. Remove top and partially slide
ice machine out of dispenser as described on page
16.
2. Disconnect end of tube from ice machine.