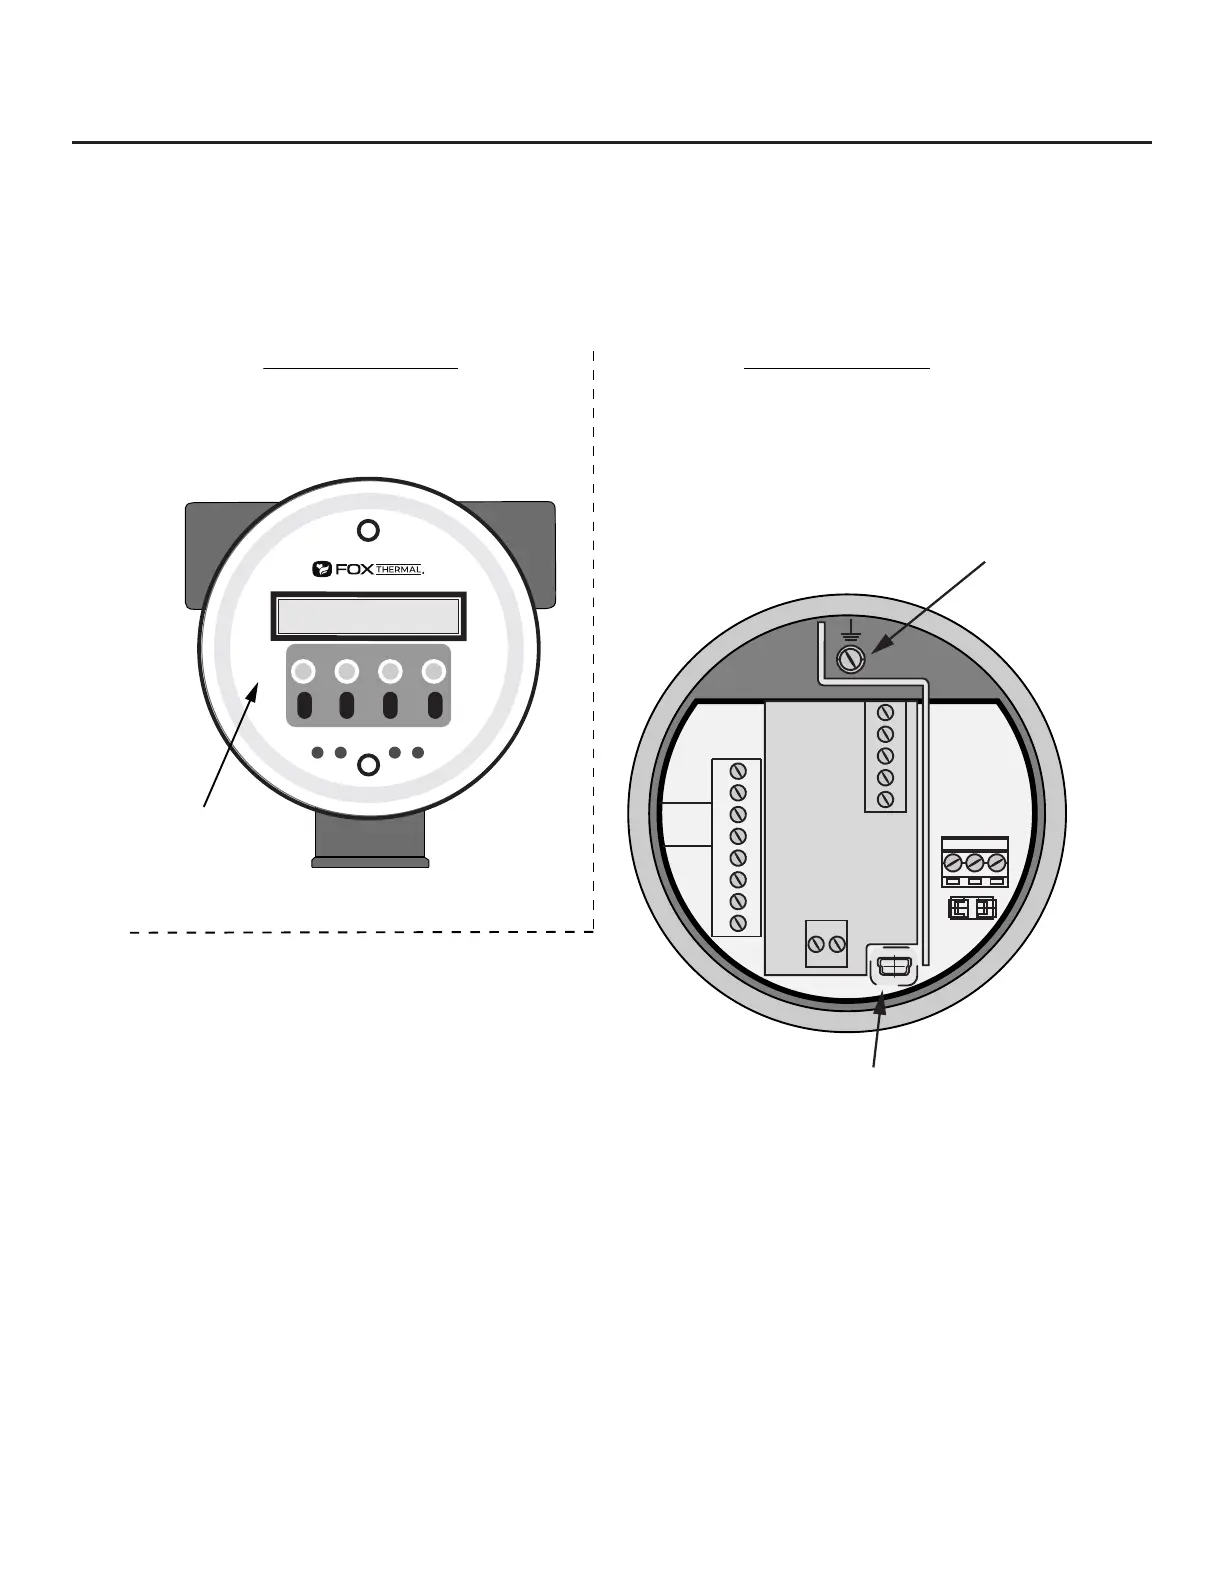
Front Enclosure Cap Rear Enclosure Cap
USB port
Earth Ground
Wiring Access
Unscrew the rear enclosure cap to access wiring
terminals for power, 4-20mA and pulse outputs,
switch input, USB port, remote sensor, and serial
communication options.
No Wiring Access
Unscrew front enclosure cap to access the
mechanical buttons or change the orientation of
the display and configuration panel.
Display front
panel
F1 F2
F3 F4
4-20
FLOW
TS4
24V
OUT
4-20
#2
Red 1
Red2
Yel 3
Wh 4
Wh 5
PULSE
/ALM
TS2
TS1
F1
J2
1
24V, 0.75A
2 3
IN
+1
-2 +1
-2
+3
-4
+5
-6
+7
-8
TS3
REMOTE
SENSOR
Wiring Instructions
To wire the FT3 connect the power and signal wires to the terminal blocks according to the label and
instructions on the following pages.
Fig. 3.1: FT3 Wiring Access
Wire the FT3 by opening the rear enclosure cover, bringing customer supplied wires in through
the conduit openings and connecting to the terminal blocks. The FT3 has two conduit openings to
maintain separation between AC input power and output signal wiring (see Fig. 3.4 on Page 37 for
more information). To eliminate the possibility of noise interference, use a separate conduit for AC
power and cut all wires short for a minimum service loop.
Wiring | 33
Model FT3
Wiring