VYPER
™
VARIABLE SPEED DRIVE
INSTALLATION - OPERATION - MAINTENANCE
100-210 IOM (JUL 09)
Page 3
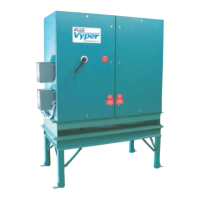
Figure 1 – Vyper
™
Data Plate ....................................................... 5
Figure 2A - Vyper
™
Elementary Wiring Diagram......................... 10
Figure 2B - Vyper
™
Elementary Wiring Diagram......................... 11
Figure 3 - VSD Input Current Without Harmonic Filter ............... 13
Figure 4 - VSD Input Current With Harmonic Filter .................... 13
Figure 5A - Harmonic Filter Elementary Wiring Diagram ........... 14
Figure 5B - Harmonic Filter Elementary Wiring Diagram ........... 15
Figure 6 - Vyper
™
Package Mounted on Frick RWF II 134 ......... 17
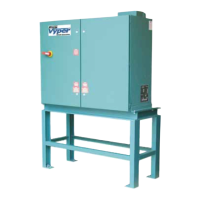
Figure 7 - Vyper
™
Cabinet and Stand ......................................... 18
Figure 8 - Minimum Flow Rates - GLYCOL ................................ 20
Figure 9 - Minimum Flow Rates - WATER .................................. 21
Figure 10 - Pressure Drop vs. Flow Rate.................................... 21
Figure 11 - Vyper
™
P&I Diagram - Noneconomized ................... 22
Figure 12 - Vyper
™
P&I Diagram - Economized ......................... 22
Figure 13 - Ground Circuit .......................................................... 26
Figure 14 - Vyper
™
Cabinet Power and Control Entry Locations 26
Figure 15 - Vyper
™
Input Power Terminal Connection Lugs ....... 27
Figure 16 - Insulation Stripped from Power Leads ..................... 27
Figure 17 - Fastening Power Leads ............................................ 27
Figure 18 - Ground Connection .................................................. 27
Figure 19 - Vyper
™
Output Power Terminal Connection Lugs .... 28
Figure 20 - Vyper
™
Starter, Motor, Blower, and Quantum Wiring 29
Figure 21 - Quantum
™
LX Communications Terminal Block ....... 29
Figure 22 - Analog Board Wiring ................................................ 30
Figure 23 - Temperature Control Valve Wiring ............................ 30
Figure 24 - Thermistor Motor Protection Wiring .......................... 31
Figure 25 - RTD Motor Protection Wiring ................................... 31
Figure 26 - Coolant Circulation System ...................................... 34
Figure 27 - Removing the Cooling System Pipe Plug ................ 34
Figure 28 - Hose connected to the Heat Exchanger Drain ........ 34
Figure 29 - Draining Coolant ..................................................... 34
Figure 30 - Refilling the Cooling System .................................... 35
Figure 31 - VSD Logic Board Connection J2 .............................. 35
Figure 32 - Topping Off the Coolant Supply ................................ 35
Figure 33 - Installing the Cooling System Pipe Plug .................. 35
Figure 34 - VSD Logic Board Connection J2 .............................. 35
Figure 35 - Quantum
™
LX Operating Status Screen.................... 37
Figure 36 - Quantum
™
LX Session Screen .................................. 38
lisT of figures
Figure 37 - Quantum
™
LX Operating Status Screen.................... 38
Figure 38 - Quantum
™
LX Compressor Configuration Screen..... 39
Figure 39 - Communications Screen .......................................... 40
Figure 40 - PID Setup Screen (Page 2) ...................................... 41
Figure 41 - Operating Values Menu ............................................ 42
Figure 42 - Pull-down for Vyper Screen ...................................... 42
Figure 43 - Vyper™ Screen ........................................................ 43
Figure 44 - Harmonic Filter Screen ............................................ 44
Figure 45 - Low Motor Amps ...................................................... 45
Figure 46 - Motor Screen ............................................................ 45
Figure 47 - High Motor Amps ..................................................... 46
Figure 48 - Ex.1 Motor Amps Safety Calculation Table .............. 46
Figure 49 - Ex. 1 Motor Amp Setpoint Calculations (Table A)..... 46
Figure 50 - Ex. 2 Motor Amps Safety Calculation Table .............. 46
Figure 51 - Ex.2 Motor Amp Setpoint Calculations (Table B) ..... 46
Figure 52 - Ex. 3 Motor Amps Safety Calculation Table .............. 47
Figure 53 - Ex. 3 Motor Amp Setpoint Calculations (Table A)..... 47
Figure 54 - Ex. 4 Motor Amps Safety Calculation Table .............. 47
Figure 55 - Ex. 4 Motor Amp Setpoint Calculations (Table A)..... 47
Figure 56 - Motor Screen VFD Setpoints .................................... 47
Figure 57 - Motor Screen Capacity Control Setpoints ................ 48
Figure 58 - Example 1 VFD and Capacity Control Setpoints ...... 49
Figure 59 - 5:1 Turndown Suggested Control Strategy ............... 50
Figure 60 - Example 2 VFD and Capacity Control Setpoints ...... 50
Figure 61 - Compressor Safeties Screen ................................... 51
Figure 62 - 2:1 Turndown Suggested Control Strategy ............... 52
Figure 63 - Example 2 VFD and Capacity Control Setpoints ...... 52
Figure 64 - Capacity Control Setpoint Screen ............................ 53
Figure 65 - Vyper Logic Board .................................................... 53
Figure 66 - Logic Board SW3 ..................................................... 53
Figure 67 - Vyper Logic Board .................................................... 54
Figure 68 - FLA Trim Pot ............................................................. 54
Figure 69 - Job FLA on the Vyper Screen .................................. 54
Figure 70 - Control Logic Board ................................................. 55
Figure 71 - Filter Logic Board ..................................................... 55
Figure 72 - Power Module Screw Tightening Sequence ............. 57
Figure 73 - Logic Board Test Button ........................................... 58
lisT of Tables
Table 1 – Supply Voltage Requirements ..................................... 16
Table 2 – Operating Voltage Limits ............................................. 16
Table 3 – Power Interruption Minimum Voltage Limits ................ 16
Table 4 – Unit Current Limits ...................................................... 16
Table 5 – Circuit Breaker Ratings and Lug Sizes ....................... 16
Table 6 – Ambient Temperature Operating Limits. ...................... 19
Table 7 – Vyper
™
Cabinet Component Temperature Thresholds 19
Table 8 – Entering Coolant Temperature Limits. ......................... 20
Table 9 – Digital Control Signal Wire Recommendations ........... 24
Table 10 – Recommended Transformer Sizes ............................ 24
Table 11 – Vyper
™
Output Power Lead Torque Specifications .... 28
Table 12 – Comm1 Setpoints ..................................................... 40
Table 13 – PID Channel #5 Setpoints ......................................... 41
Table 14 – Binary Parameter Indicator Status ............................ 43
Table 15 – Applied Motor FLA Calculation ................................. 45
Table 16 – High Motor Amps Safety Calculation Table ............... 45
Table 17 – High Motor Amp Setpoint Calculations (Table A) ...... 46
Table 18 – High Motor Amp Setpoint Calculations (Table B) ...... 46
Table 19 – Limit Calculations ...................................................... 54
Table 20 – Fault Code List .......................................................... 59