13 SEP 12
/ Battery Charging Systems / Welding Technology / Solar Electronics
-
--
- 53
53 53
53 -
--
-
Processes
Functional Tests
Step 5:
Step 5:Step 5:
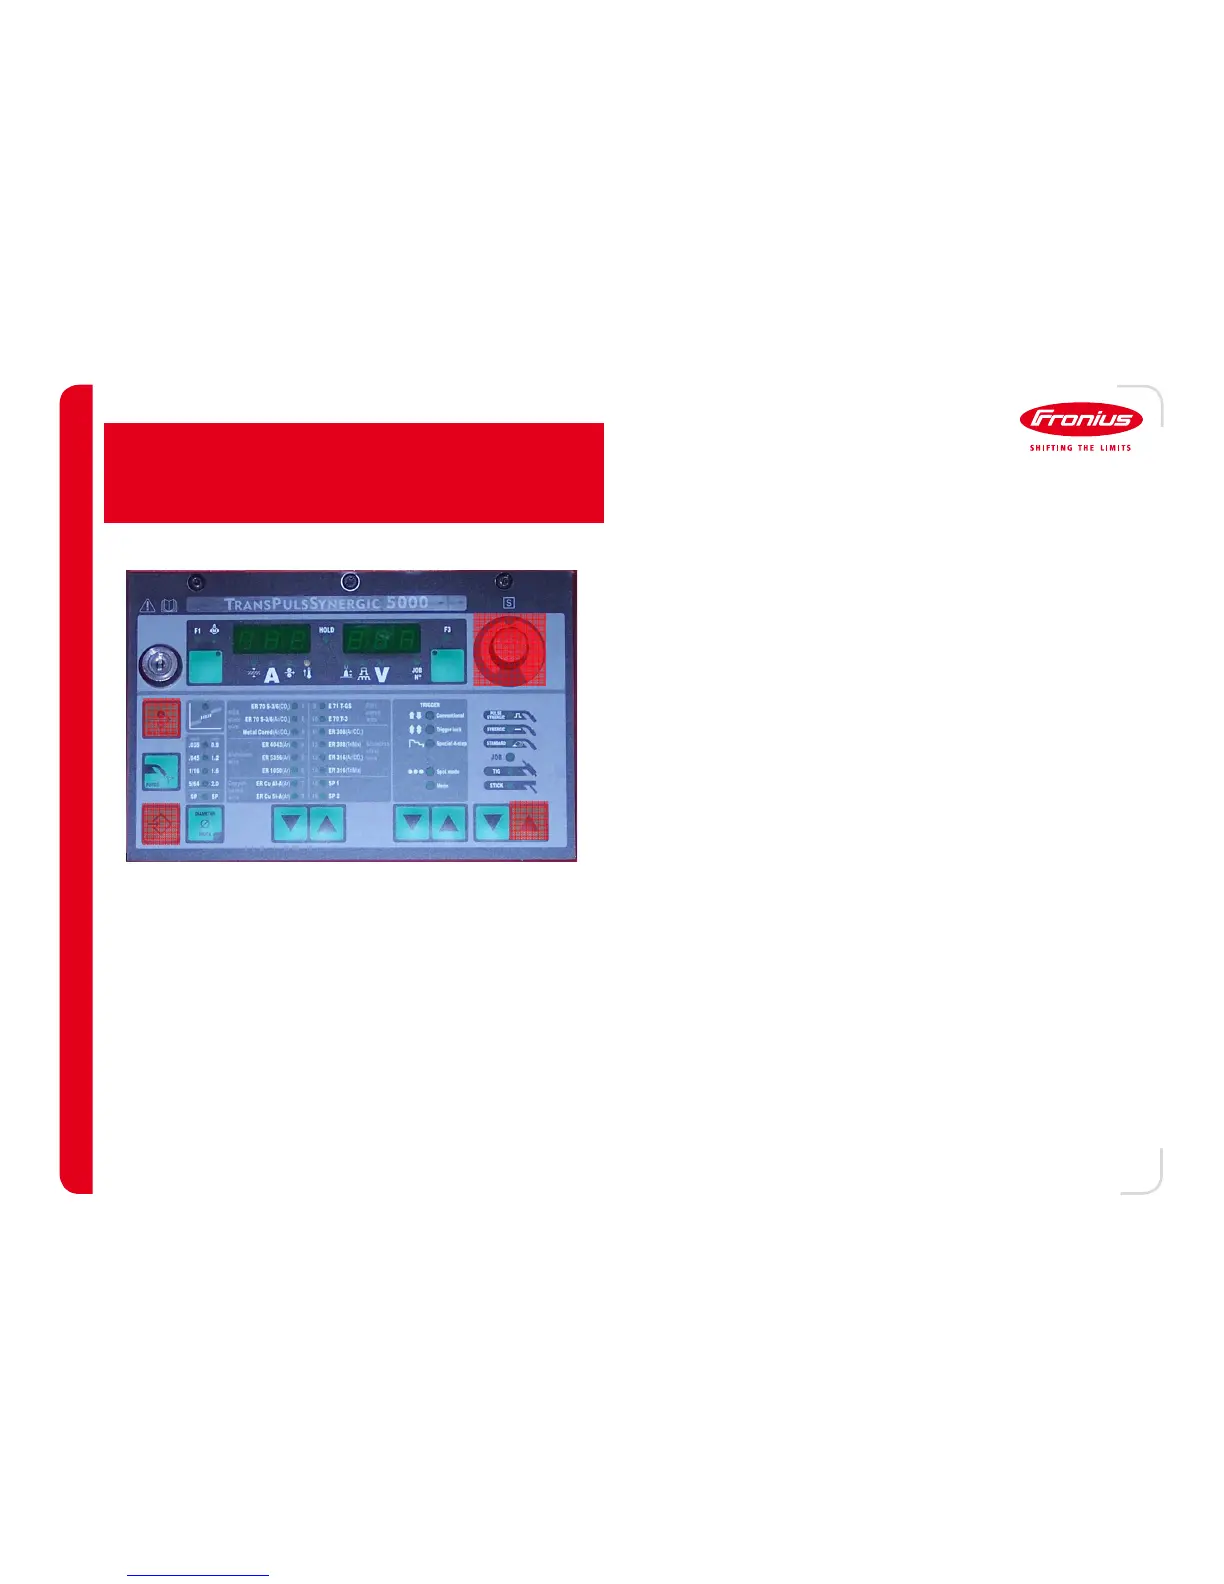
Step 5: Use the red selection knob (C⁄ to select from one
of three options
ON
ON ON
ON
Turns the cooler on as soon as the welder
powers up.
OFF
OFF OFF
OFF
Turns the cooler off and disables flow-
monitoring
Auto
Auto Auto
Auto
Turns the cooler on during welding and for 2
minutes after welding stops.
Step 6:
Step 6:Step 6:
Step 6: Use the process select up arrow (B⁄ to cycle
through parameters until C-T appears in the
display.
Step 7:
Step 7:Step 7:
Step 7: Use red selection knob (C⁄ to select the amount of
time before flow sensor shuts the welding process
down. If unsure, set to ten.
Step 8:
Step 8:Step 8:
Step 8: Press the Store button (A⁄ twice to return to main
display.
Cooler Verification
Cooler VerificationCooler Verification
Cooler Verification
Step 1:
Step 1:Step 1:
Step 1: On the front panel, press the Store button (A⁄ and
the Process Select up arrow (B⁄ at the same time.
Once the display changes, release both buttons.
Step 2:
Step 2:Step 2:
Step 2: Use the Process Select up arrow (B⁄ to cycle
through the parameters until 2
nd
appears on the
display.
Step 3:
Step 3:Step 3:
Step 3: On the front panel, press the Store button (A⁄ and
the Process Select up arrow (B⁄ at the same time.
Once the display changes, release both buttons.
Step 4:
Step 4:Step 4:
Step 4: Use the process select up arrow (B⁄ to cycle
through the parameters until C-C appears in the
display.
A
AA
A
B
D
DD
D
C
CC
C
Note: the flow switch will only shut the system down after
the first weld has been done. When initially turned on, the
flow sensor is ignored.