Setup
165
Tools
5
Create Job Flow Sheet Keyword
You can register job flow search keywords. The registered keywords are displayed
under [Search by Keyword] and allows you to use for job flow sheet search. The
keywords are also available from a list under [Select Keyword] that is displayed when
you create a new job flow sheet. Up to 12 characters are allowed for a job flow search
keyword.
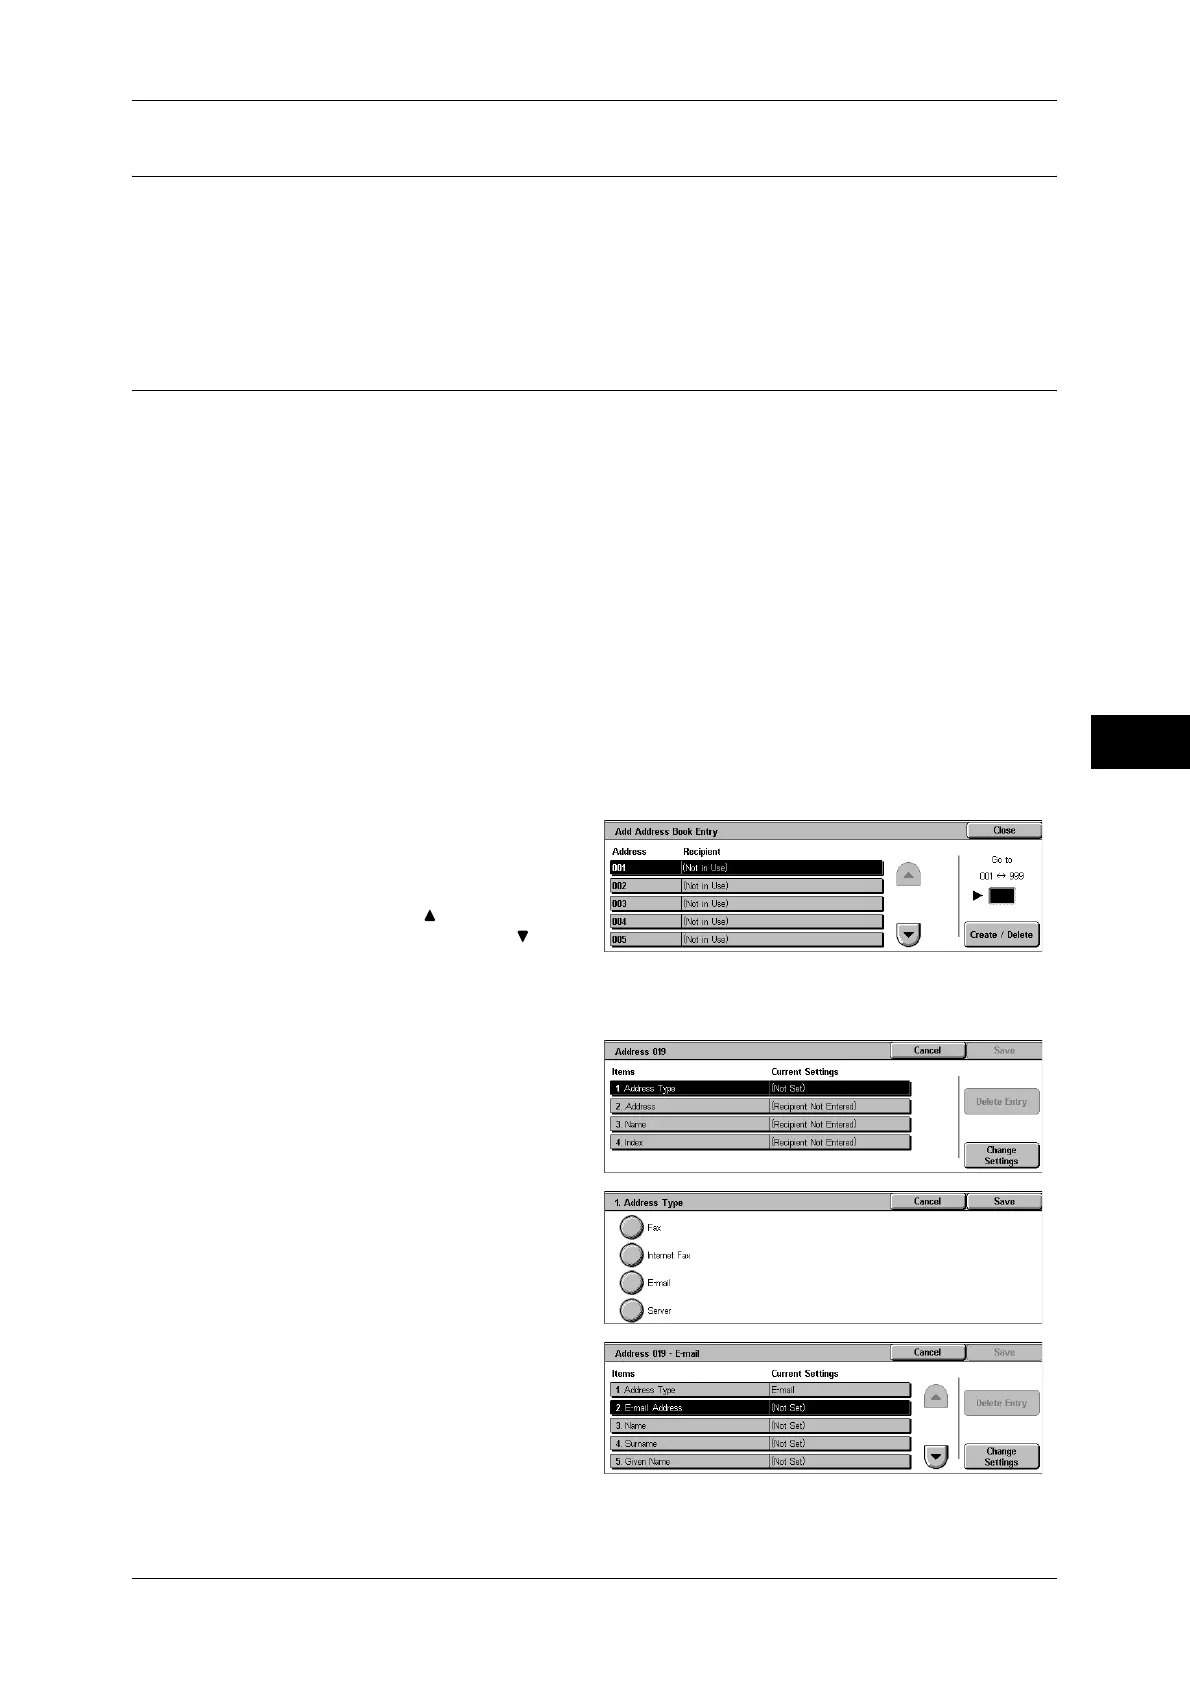
Add Address Book Entry
You can store frequently used addresses in Address Book. Select an address type from
fax, Internet Fax, e-mail, and server (FTP/SMB).
When an address is registered, you can search for it with [Address Book] on the [Fax],
[Internet Fax], and [E-mail] screens.
You can store a total of 500 addresses for fax, Internet Fax, e-mail, and server (FTP/
SMB).
Note • If the Address Book Extension Kit (optional) is installed, you can register up to 999 locations.
• Abbreviated address numbers (001 to 070) are supported by the one touch buttons. The one
touch buttons are available for fax and Internet Fax.
• To specify an e-mail or server (FTP/SMB) address (for insertion in the address book), it is
not possible to use an address number specified with the numeric keypad, one-touch
dialing, or a group dial number.
1
Select [Add Address Book Entry].
Note • To display the [Add Address Book Entry] screen, press the <Log In/Out> button and enter
the user ID, and then select [Tools] > [Setup] > [Add Address Book Entry].
2
Press the abbreviated number you
want to register, and select
[Create/Delete].
Note • Select [ ] to return the
previous screen or [ ] to
move the next screen.
• By entering a three-digit number with the numeric keypad, you can specify the abbreviated
number directly.
3
Select [Address Type], and select
[Change Settings].
4
Select the address type, and select
[Save].
5
Select the item to be set, and
select [Change Settings].
6
When the settings are completed,
select [Save].
 Loading...