66 Service Supplement TX100 S2
Replacement routines
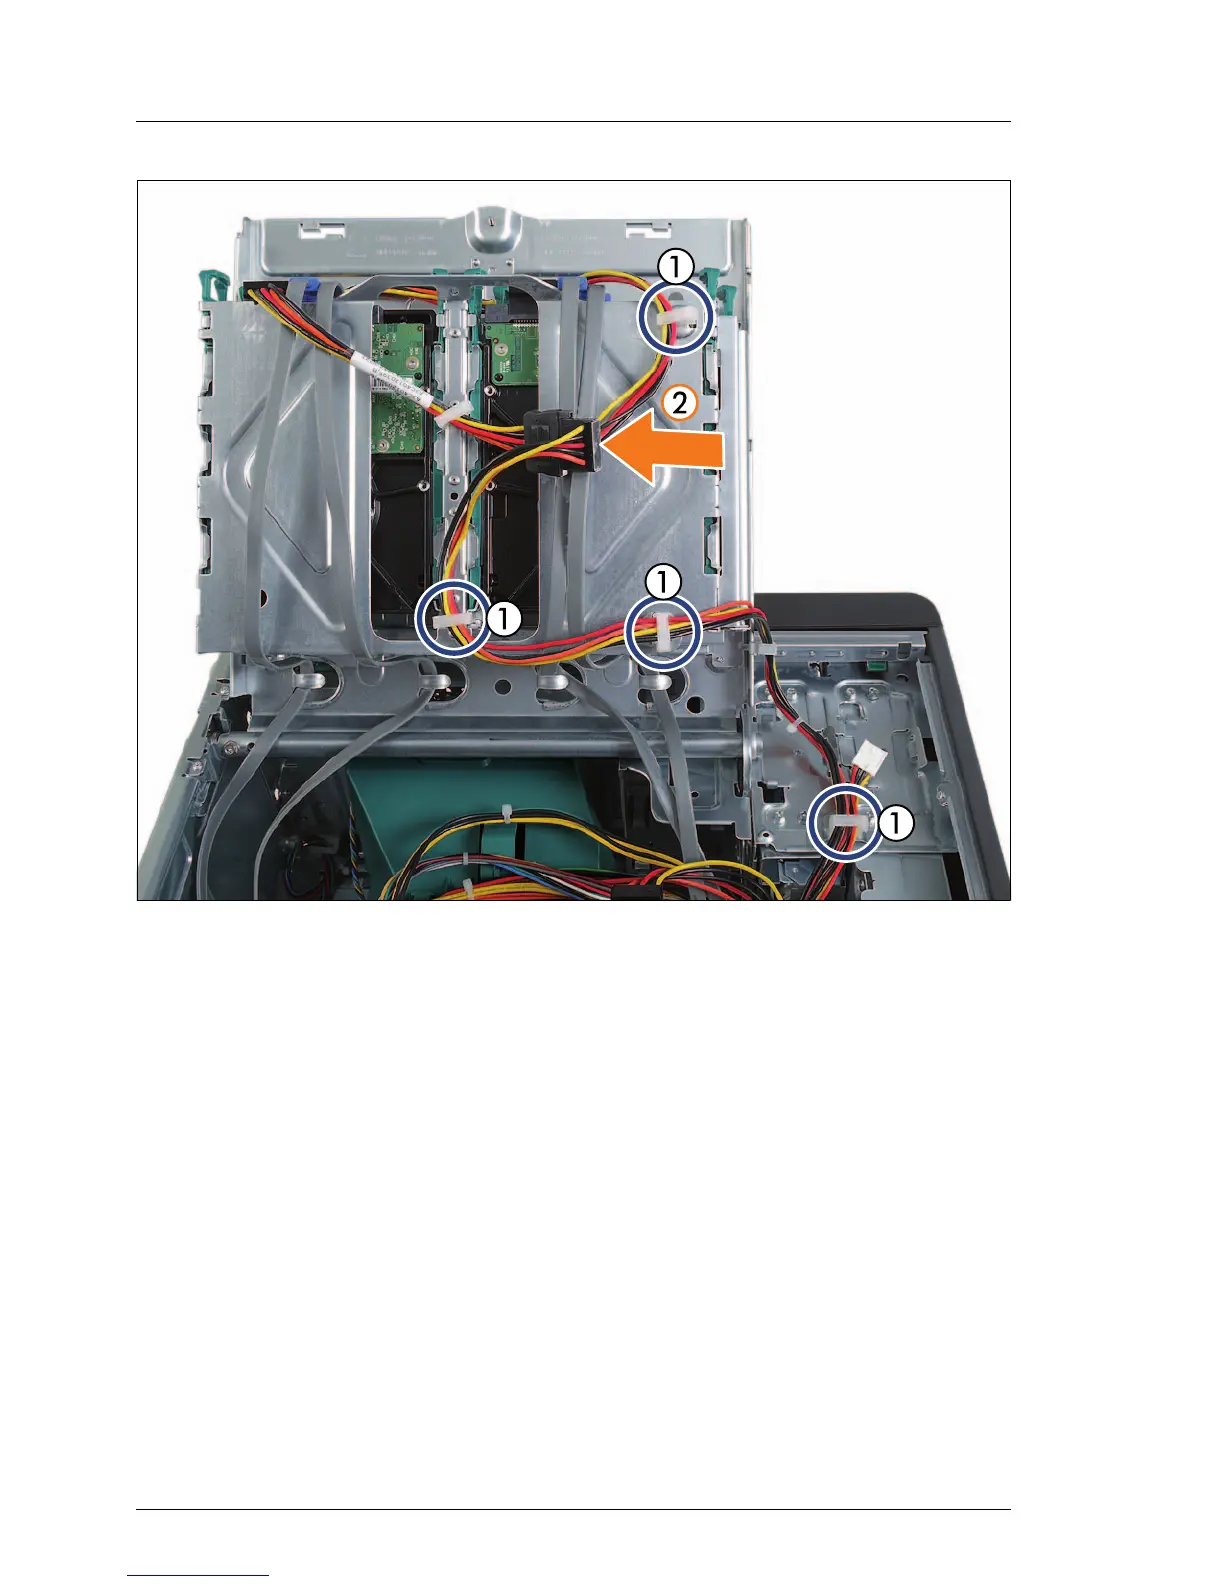
Figure 47: Reconnecting power cables
Ê Route the power cables through four cable clamps on the accessible drive
bay and the HDD cage (see circles) (1). Snap close the cable clamps.
Ê Reconnect SATA power connector P6 to SATA power adapter cable T26139-
Y3942-V221 (for 4-HDD configurations only, see orange arrow) (2).
Ê Reconnect the SATA power connector to HDD 1.
Ê Reconnect all power cables to the system board (see the cabling plans in the
appendix of the PRIMERGY TX100 S2 Options Guide).
Ê Hook the power cable harness into the bracket on the air duct as shown in
section "Installing the air duct" on page 37.
Ê Close the HDD cage as described in section 4.1.2.2 on page 27.
Ê Close the side cover as described in section 4.1.1.2 on page 24 and
reconnect the AC power cord.
 Loading...