9.1 Equipment set-up
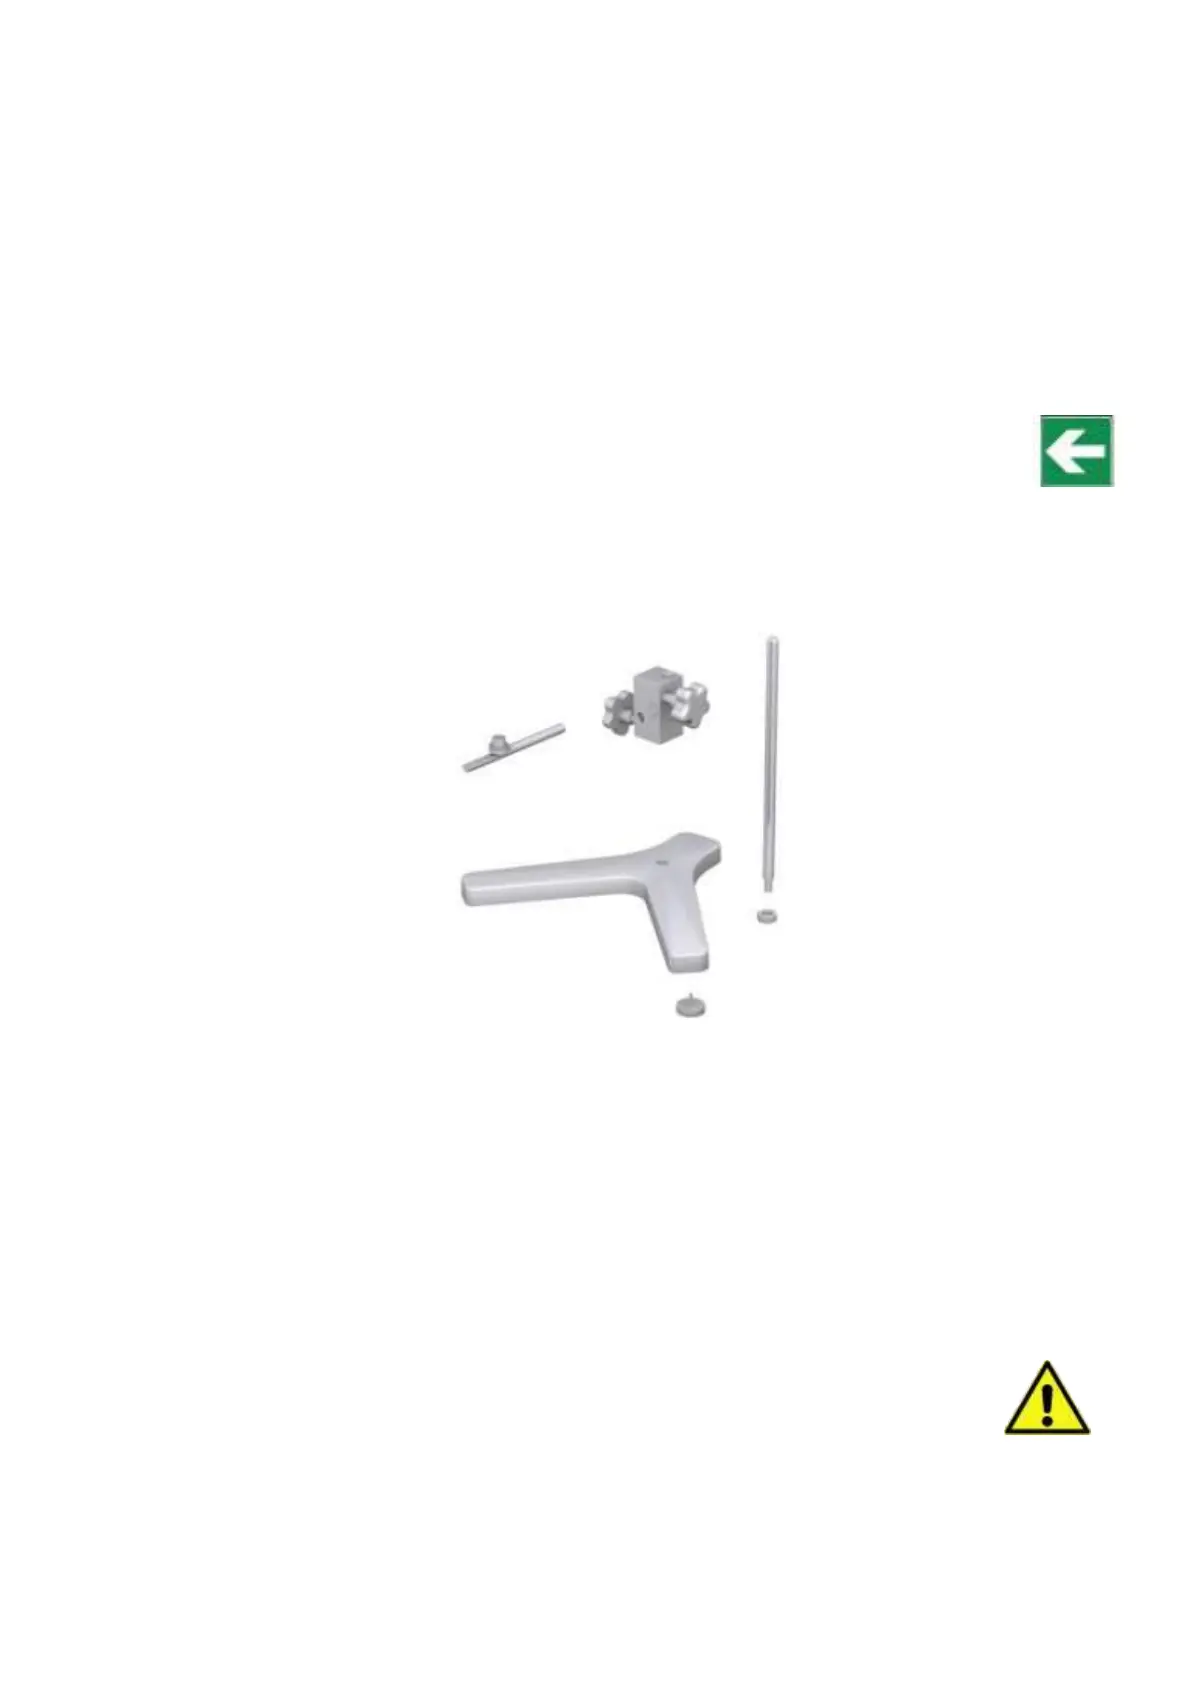
Remove all of the parts from the carry-case or the standard package. Note the Figure below (fig 5).
Place correctly the three height adjustable knobs (B) on the Y-shaped base (A).
Mount the fastening rod (C) with the holding screw (D) at the base (A).
Attach the nut (F) to the fastening rod. The viscometer should be connected to the nut (F) by means of
its rod (E).
Note:
The following process should be done carefully in order to not harm to the shaft of the
viscometer. Immediately remove the shaft’s plastic protector before beginning to use the
viscometer.
Insert the horizontal rod of the viscometer (E) into the nut (F).
Fig. 5 Set-up for the viscometer base
The viscometer should be placed on a stable laboratory table or on a stable surface free of
vibrations (i.e. caused by other machines or equipment). Do not put the viscometer in direct
contact with sunlight or in the middle of any air flow (the temperature of the sample can be easily
influenced by the surrounding conditions). The viscometer has been designed to work indoor!
Turn the height adjustment knobs until the height of the viscometer (located in rod E) is correctly
adjusted.
Plug the power cable into its correct slot located on the back of the equipment (Fig. 3 position 4)
and plug it into the power source.
WARNING:
Verify that the voltage and the frequency coincide with the specifications of the power supply
(look at the identification). Before turning on the machine, let it sit for some time so that it
acclimates to the surrounding temperature in order to avoid a short-circuit caused by
condensation. The fluctuations of the power source should not surpass
10% of the nominal
voltage.
 Loading...