Operators and Technicians Manual
2011 – 2014 FutureLogic, Incorporated. All Rights Reserved. MNL Page 18 04/10/2014
MNL-000067 REV.X03
Set the Printer Communication
Note:
Perform this procedure with the unit powered on.
1. Press the Lid Release Lever to open the Lid.
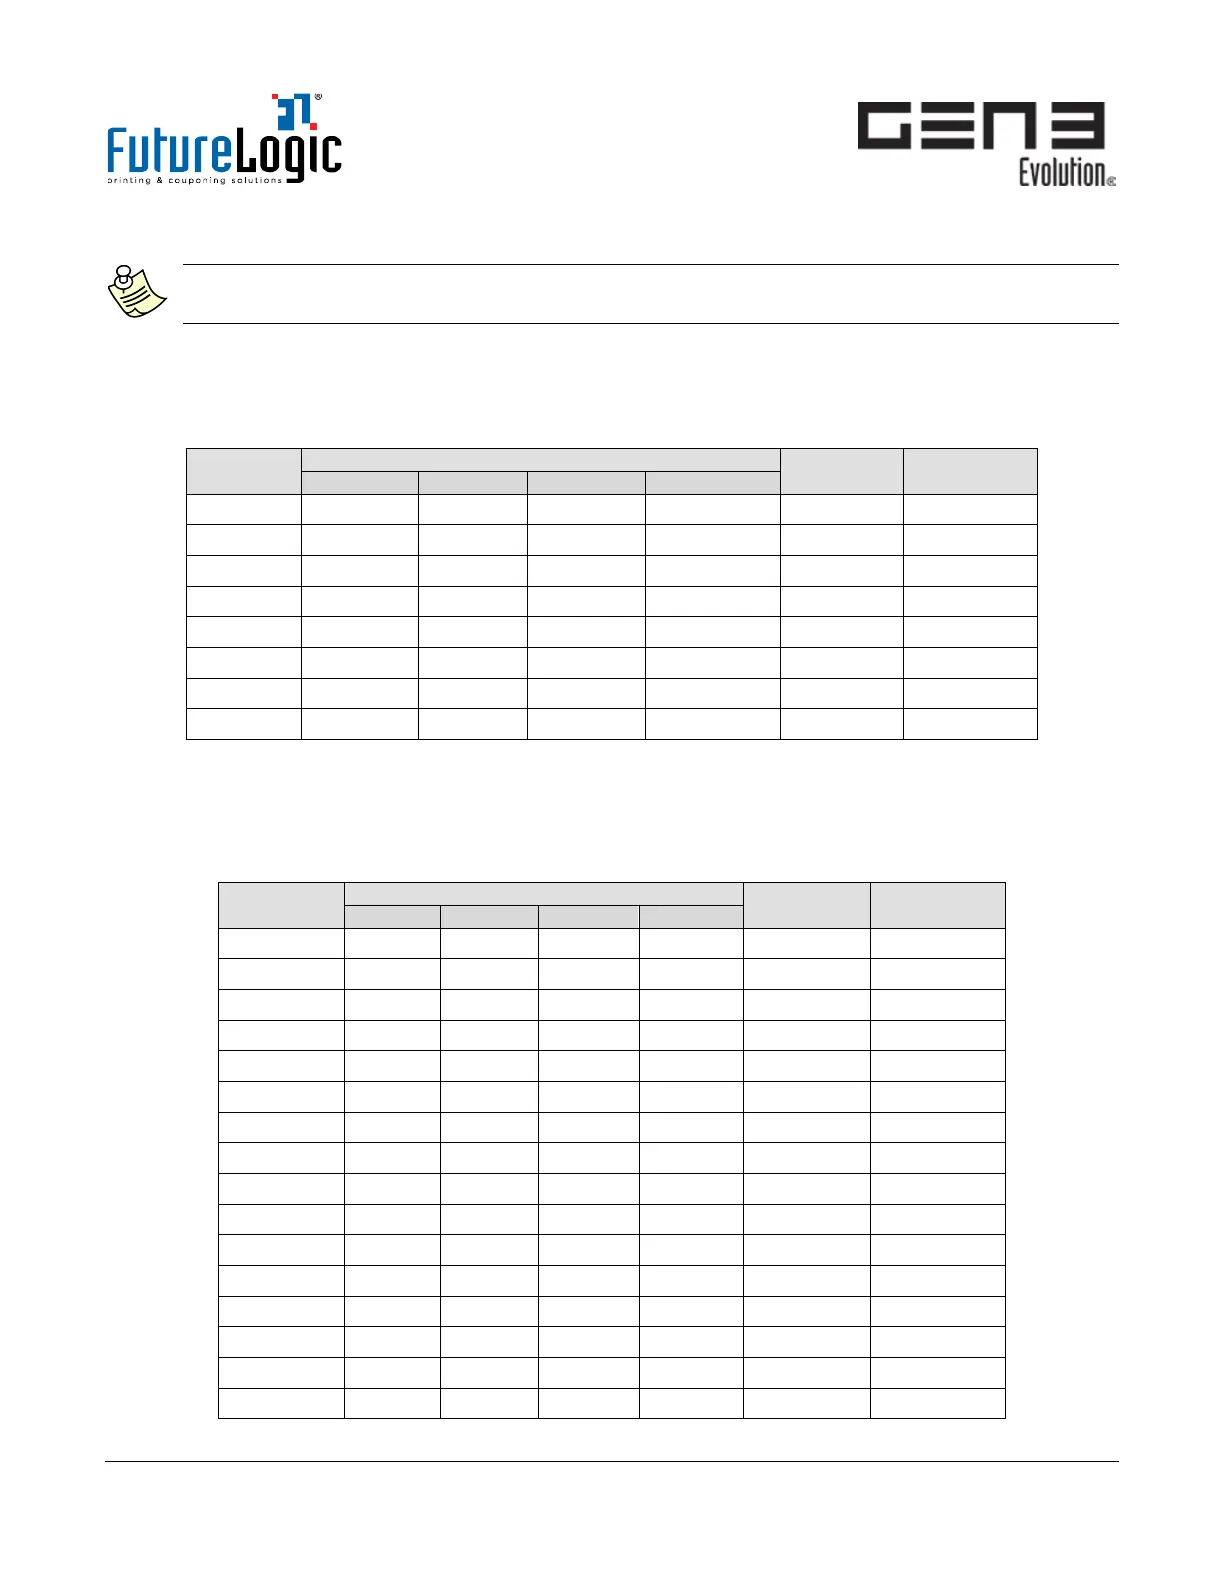
2. Slide and release the COMM Switch to Position 1. The Red LED flashes. The selection is now Port 1.
3. (Optional) To step to Port 2, slide the COMM Switch again to Position 1.
4. Slide or hold the COMM Switch to step through the port selection options.
Position 1
0 OFF OFF OFF *Flashing* Port 1 Main
1 ON OFF OFF *Flashing* Port 2 Secondary
2 OFF
ON
OFF
*Flashing*
Port 0 Debug
3 ON ON OFF *Flashing* Not Used Not Used
4 OFF OFF ON *Flashing* Not Used Not Used
5 ON OFF ON *Flashing* Not Used Not Used
6 OFF ON ON *Flashing* Not Used Not Used
7
ON ON ON *Flashing*
Not Used Not Used
Table Note:
1
The red LED indicating the settings selection mode blinks at a rate of 200 ms.
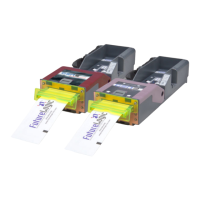
5. Slide the Comm Switch to Position 2.
The Red LED stops flashing; all LEDs are off. The selection is now 9600 Baud, Xon Handshaking.
6. To select other baud rate and handshaking parameters, slide or hold the COMM Switch in Position 2 to
step and cycle through the table below.
Baud Rate Handshake
1 OFF OFF OFF OFF 9600 XON (SW)
2
ON
OFF OFF OFF 9600 RTS (HW)
3 OFF ON OFF OFF 38400 XON (SW)
4 ON ON OFF OFF 38400 RTS (HW)
5 OFF OFF ON OFF 115200 XON (SW)
6 ON OFF ON OFF 115200 RTS (HW)
7 OFF
ON ON
OFF 19200 XON (SW)
8 ON ON ON OFF 19200 RTS (HW)
9 OFF OFF OFF ON 57600 XON (SW)
10 ON OFF OFF ON 57600 RTS (HW)
11 OFF ON OFF ON 230400 XON (SW)
12
ON ON
OFF
ON
230400 RTS (HW)
13 OFF OFF ON ON 460800 XON (SW)
14 ON OFF ON ON 460800 RTS (HW)
15 OFF ON ON ON 921600 XON (SW)
16 ON ON ON ON 921600 RTS (HW)