CHAPTER4: Upgrading Your Computer
56
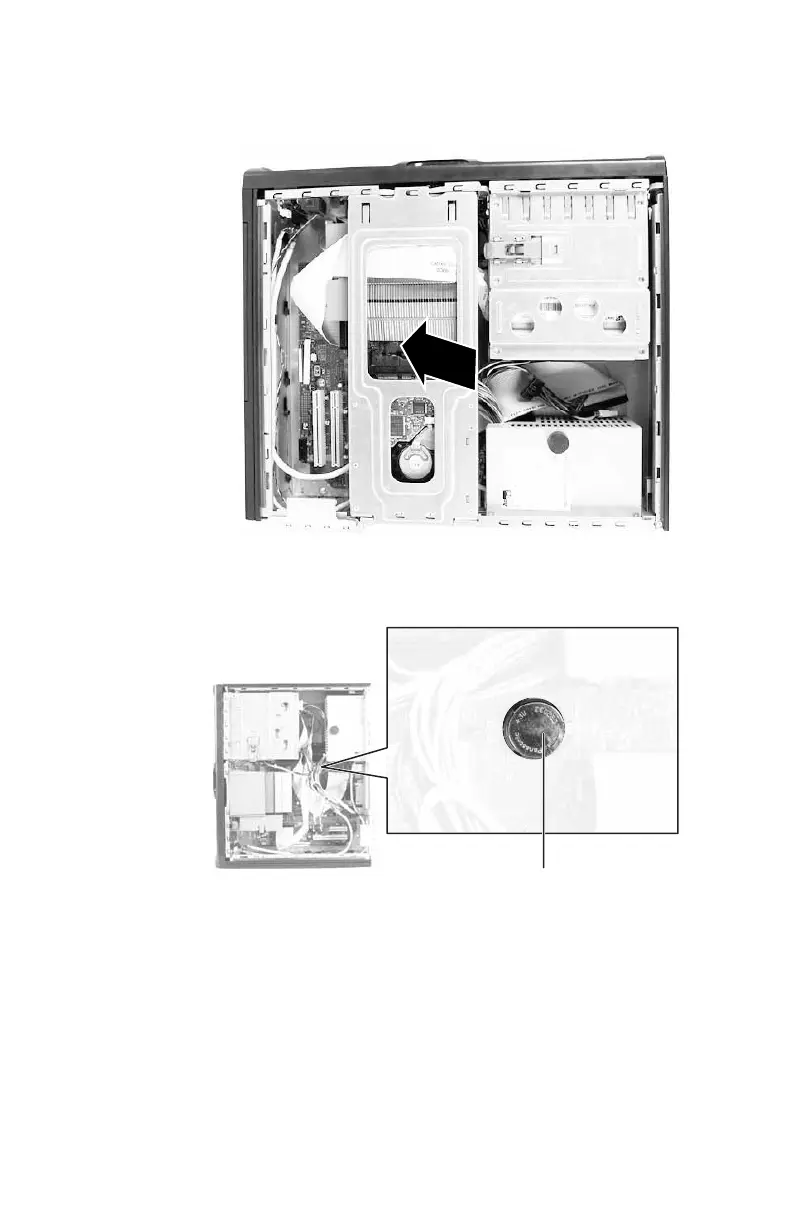
6 Remove the hard drive bracket and set it aside (as far as
the hard drive cables will allow).
7 Locate the old battery on the system board and note its
orientation. You will need to install the new battery the
same way.
8 Push the battery release tab. The battery pops out of the
socket.
9 Make sure that the positive (+) side of the new battery
is facing up, then press the battery into the socket until
it snaps into place.
10 Replace the hard drive bracket, being careful not to pinch
or kink the hard drive cables.
11 Replace the side panel by following the instructions in
“Opening and closing the case” on page 37.
Battery release tab
8512732.book Page 56 Thursday, September 27, 2007 11:33 AM
 Loading...


