CHAPTER4: Upgrading Your Computer
50
8 Remove the four screws securing the fan to the fan
shroud, then remove the old fan.
9 Secure the new fan to the fan shroud with the four
screws you removed in the previous step.
10 Connect the new fan cable to the system board, then
insert the new fan assembly into place.
11 Replace the 5.25-inch component bay into the chassis.
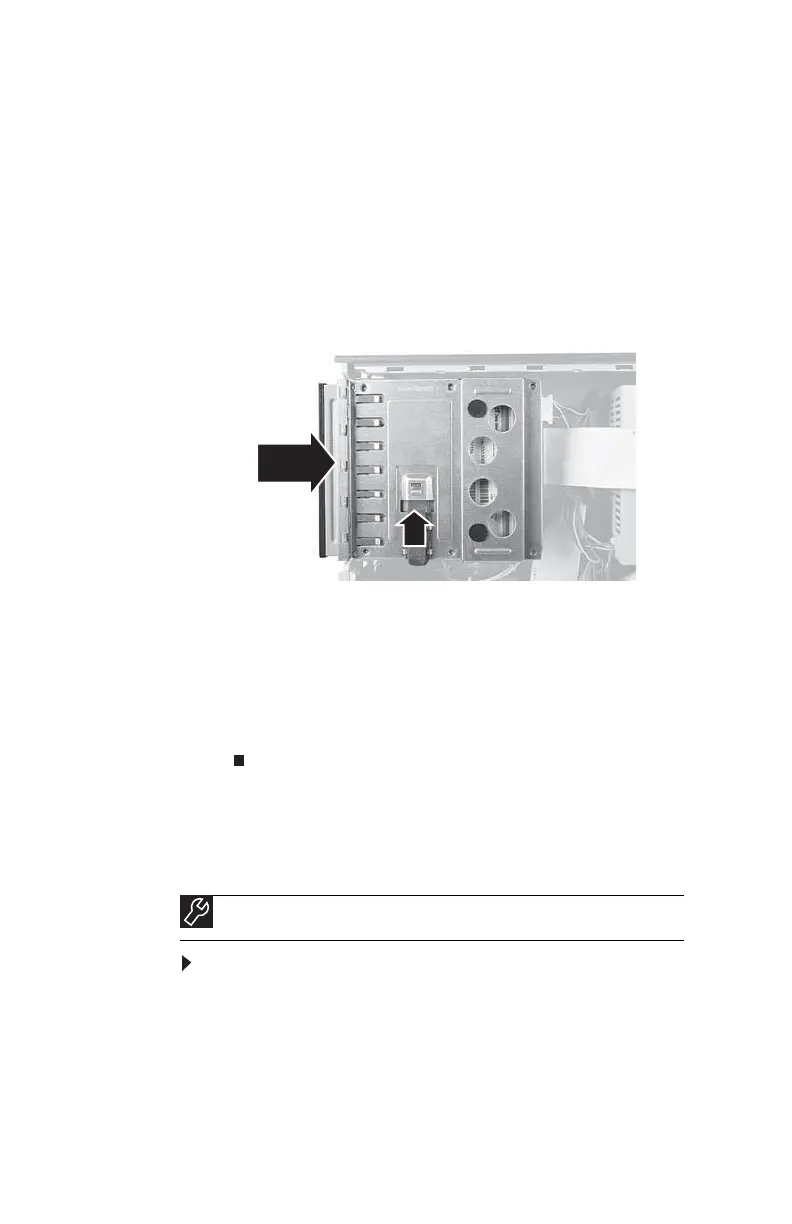
12 Slide the component back into the 5.25-inch bay, then
push up on the release latch to move it to the Lock
position.
13 Reconnect the cables using the notes you took
previously.
14 Replace the front bezel, then replace the hard drive
bracket, being careful not to pinch or kink the hard drive
cables.
15 Replace the side panel.
Replacing the front I/O board
To replace the front I/O panel:
1 Remove the side panel by following the instructions in
“Opening and closing the case” on page 37.
2 Remove the bezel by following the instructions in
“Removing and installing the front bezel” on page38.
Tools
Phillips screwdriver
8512732.book Page 50 Thursday, September 27, 2007 11:33 AM